A Barbell Knee Stability Exercise for Runners

Patellar Femoral Pain Syndrome (PFPS) is the physical therapy term for runner’s knee, a common condition experienced by runners.  It accounts for roughly 25% of all reported cases of knee pain.  PFPS is a term used to describe pain in many areas of the knee including:  pain near the insertion point of the patellar tendon, just below the patella or knee cap; pain just above the knee cap where the quadriceps muscle is blending in and forming the quadriceps/patellar tendon; and/or pain underneath the patella.

Although there are many types of knee pain, many of the potential causative factors for PFPS are similar to other conditions such as IT Band Syndrome (ITBS) and Patellar Tendinitis.  Treatments for knee pain can vary wildly from person to person.  It can be quite painful and significantly affect a person’s ability to run or move properly.  In the case of PFPS, the cause of the pain is often associated with a patellar or knee cap that is tracking in the femoral groove improperly.

Common Causes and Risk Factors for Knee Pain and specifically, Patellar Femoral Pain Syndrome (PFPS) include:

  • Poor quadriceps strength (particularly the inner/medial quadriceps).
  • Poor hip abductor and/or hip external rotator strength.
  • Improper foot biomechanics during the single leg stance phase of the gait cycle or the mid foot strike during running.

One of the primary treatments for nearly all types of knee pain (including PFPS, Patellar Tendinitis, ITBS, and meniscus injury) is to improve your quadriceps and hip strength.  Quadriceps strength is an important component to your long term management and recovery.  As part of the quadriceps strengthening protocol, I have found it useful to skew toward the inner quad, known as the vastus medialis oblique (VMO).  Although you cannot specifically isolate the VMO, I still recommend implementing exercises that are likely to activate the muscle more when performed correctly.

The other critical factor is weak hip abduction and hip external (lateral) rotation muscles, which significantly contribute to PFPS.  The purpose of the lateral and external rotators of the hip is to prevent internal rotation (rolling in) of the hip and knee.  They also provide the stability for the pelvis and lower leg when in single leg stance.  The hip muscles are critical in controlling knee stability and ultimately, patellar (knee cap) tracking.  Adequate strength of the rotators and abductors of the hip is critical.

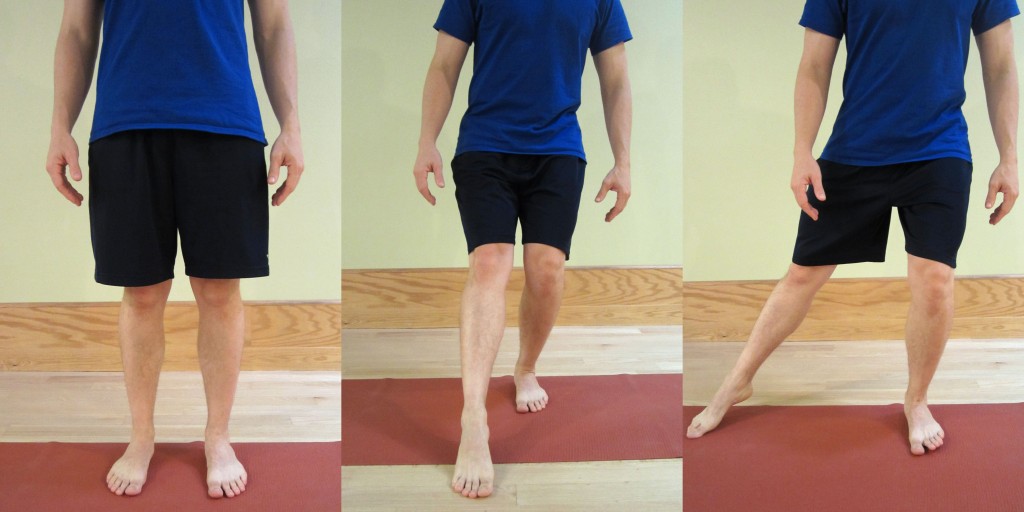
In this video, I demonstrate how to perform an advanced exercise known as the clock or star drill.  It’s an excellent exercise to work on knee stability and balance while specifically focusing on quadriceps and hip strength.  Although I demonstrate the exercise with a barbell in the video, I recommend that you initially be perform it without weight (as demonstrated below).  As you progress, then you could add weight.

ClockExercise

Have you performed the clock or star drill before?  If so, what was your experience like?  Please leave your comments below.

For more information on how to self-treat differing types of knee pain, please refer to the following:

Looking for that exercise or book I mentioned in a post?  Forgot the name of a product or supplement that you’re interested in?  It’s all listed in the Resource Guide.  Check it out today!

If you have a question that you would like featured in an upcoming blog post, please comment below or submit your question to contact@thePhysicalTherapyAdvisor.com.  Be sure to join our growing community on Facebook by liking The Physical Therapy Advisor!

Q & A: Spinous Process Fracture

Q.  My son was recently injured in a weight room accident that resulted in a C7 spinous process fracture. The neurosurgeon says not to worry about it and that he can return to sport in six weeks.  He is a very talented athlete, and he’s trying to get a college football scholarship.  I’m concerned for his safety and scholarship prospects.  Do you have any advice? -Jennifer

A.  I am so sorry to hear about your son’s injury, Jennifer. Weight lifting is such a critical component to any training program as well as for those who are trying to maintain muscle mass and general health. Sadly, accidents happen and can be very serious. However, weight training will be an ongoing critical training component if your son is to compete in football at a collegiate level.

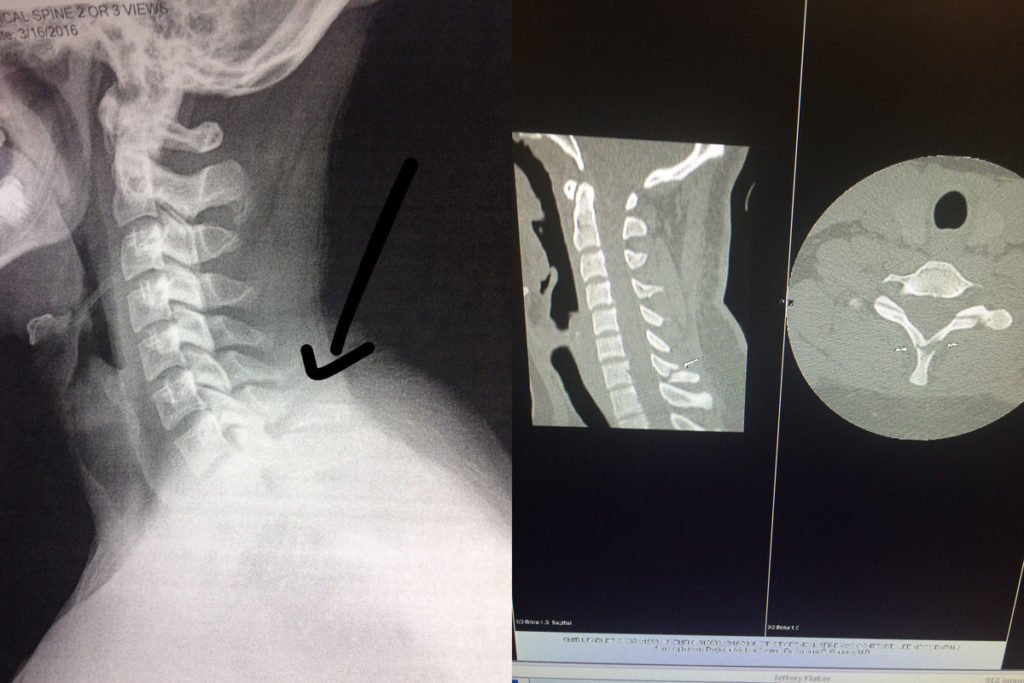
Thank you for letting me share his imaging pictures. Viewing the imaging allows for a better discussion, but please note that I have not evaluated your son.  The following advice is only for the purpose of general discussion.
Spine_Collage

(Left: X-ray of C7 fracture. Right: CT Scan of C7 fracture.)

As you can notice on the imaging provided, only the spinous process was injured. Although close to the lamina of the vertebra (which has a primary role of protecting the spinal cord), it was not injured.  This was confirmed by the physician’s physical exam, X-rays, and CT Scan. I’m glad that the injury was taken seriously with appropriate medical follow up.  One should never take unwarranted risks when evaluating spinal injuries.

This particular fracture is also known as a Clay Shoveler’s Fracture. This occurs when the end of the spinous process is either broken off by a physical impact (as in the case of Jennifer’s son when the barbell hit his neck) OR as a result of the muscle pulling so hard that it breaks the bone and literally tears off part of the spinous process.  The role of the spinous process, particularly in the cervical region, is to help limit cervical hyper extension.  More importantly, the spinous processes are there as an attachment point for muscles and ligaments.

C7 is the largest cervical vertebrae in the neck. The C7 vertebra is right in the middle of transition from the cervical spine to the thoracic spine and is home to many fascial attachments and muscular attachments from the neck and shoulder girdle.  Many of the deeper neck extensors and rotators such as the splenius capitus and splenius cervicis as well as the trapezius, rhomboids and serratus posterior muscles have C7 attachment points.

Typical Symptoms

In most cases, there is pain immediately after the injury which is often described as a burning or “knife-like” stabbing pain.  Other symptoms include muscle tightness and sharp pain that increases with repeated activity and movement of the neck or shoulder girdle. The pain is often described as feeling similar to a severe muscle strain in the upper back.  The area of fracture as well as the nearby spinous processes is typically very tender as are the nearby muscles.

If only the spinous process is injured, you should not see any neurologic symptoms. You will likely see loss of cervical motion and possibly shoulder motion as those motions will cause muscles to pull directly on the site of injury which limits one’s desire to move.  Symptoms are typically worse with the head down or when the arms are active in front of the body (such as driving or working at the computer).

Treatment Considerations

Bone healing is a complex process and will differ significantly among individuals. Factors affecting bone healing include:  the type of fracture and the patient’s age; underlying medical conditions; and nutritional status.  For a person with good health status, the bone will take on average six to eight weeks to heal to a significant degree.  In general, children’s bones heal faster than those of adults.

However, with a spinous process fracture that is separated to this degree, the bone will most likely never heal. The bone will not re-attach itself back to vertebrae.  When this occurs, it’s known as a non-union.  Scar tissue and fascia will surround the injury site and in most cases, form a solid fibrous pseudo-union between the two pieces of bone.  In most cases, there will be no deleterious effects from the injury and healing process.  Like bone healing, this process typically takes six to eight weeks for most individuals.

Acutely there is likely to be pain, but long-term pain typically subsides. However, as with all injuries, there is the risk of chronic pain or long-term irritation to the area associated with the muscle and tendon that insert/attach onto the spinous process involved in the injury.

Pain Management

Initially, I don’t recommend treating with NSAIDS (non-steroidal anti-inflammatory medication) as there is research that indicates that the healing response could be delayed. Instead and whenever possible, I would recommend other alternatives for pain management like applying heat or ice. Typically no more than 20 minutes per hour would be recommended, and don’t apply heat or ice directly to the skin (use a towel as a barrier).

Pain medication, such as acetaminophen, is always an option if recommended by your physician. You may also want to consider utilizing topical agents, which can help to decrease pain and muscle spasms. The method of action varies greatly according to the product used.  You may find that one product works better than another.  Some of my favorite products in my medicine cabinet include:  Biofreeze Pain Relieving Gel; Arnica Rub (Arnica Montana, an herbal rub); and topical magnesium.

Another option is oral magnesium. You can take Mag Glycinate in pill form or by eating foods higher in magnesium such as spinach, artichokes, and dates. Taking additional magnesium (particularly at night) can help to reduce muscle cramps and spasming.  It is also very helpful in reducing overall muscle soreness and aiding in a better night’s rest.  Most people are deficient in the amount of magnesium they consume on a regular basis.  I recommend beginning with a dose of 200 mg (before bedtime) and increasing the dose as needed.  I would caution you that taking too much magnesium can lead to diarrhea.  Mag Glycinate in its oral form is the most highly absorbable.  Although not as absorbable, Thorne Research Magnesium Citrate and magnesium oxide can also be beneficial.

Soft tissue massage of the adjacent muscles as well as electrical stimulation can both be used to reduce pain.  If pain persists, please discuss the options with your physician.

Activity Modification and Exercise Considerations

Activity involving the head, neck, and shoulders should be limited initially. In some cases, the physician may ask that a cervical collar be worn for several weeks.  Opinions on this vary greatly and will be dependent on the exact location of the fracture.

The basic idea is to avoid heavy use of the muscles that would specifically pull on the injury site. This would include muscles that flex, extend, rotate or side bend the head as well any arm movements that move the shoulder.  This would obviously include any type of heavy lifting or placing anything on top of the injury site like a barbell.

Although this seems very limiting, you can still move the neck and shoulders. Gently perform range of motion (ROM) of the neck and shoulders to maintain full mobility. This will also help to limit pain and muscle spasms of the surrounding tissues.  The idea is to limit extreme movement, limit the movement under load, and limit the speed of movement.

I would specifically limit most activity for at least six to eight weeks to insure an adequate amount of scarring has occurred. In addition to the above noted limitations, I also wouldn’t perform any activities that would be jarring to the body (such as jogging).  If you want to maintain your cardiovascular endurance, you could peddle on a stationary bike while keeping your upper body mostly relaxed.

At around the four to six week mark, I would slowly start working on the cervical extensor and shoulder girdle muscle exercises (as demonstrated below).  You will want to engage the muscles symmetrically as to not cause asymmetrical pulling over the injury site.  These exercises will help to engage the muscles (the cervical extensors and scapular muscles, including the rhomboids and trapezius muscle) specifically used to stabilize the injury site.

ITYExerciseCollage

Begin by performing these I’s, T’s, and Y’s exercises on a Thera-Band Exercise Ball. Start slowly without resistance.  Keep your chin tucked and head aligned with the body.  Move your arms slowly up and down in each position of I, T, and Y.  Start with 10 repetitions for 3 second holds, and then progress the number of repetitions as long as there is no pain.

Once you can easily and pain free perform 20 repetitions with 3 second holds, add a 1-2 pound weight in each hand and start the progression initially at 10 repetitions.  Be sure to always let pain guide the progression.  The exercise should remain pain free.

After the six to eight week mark, initiate a slow, but steady return to exercise. Start with lower extremity exercises such as the leg press, body weight lunges, squats or step ups.  During this time, progress with targeted exercises designed to strengthen the muscles of the mid trapezius, rhomboids, and neck extensors.

Let pain guide your progression. If you perform an activity that causes pain near the injury site, then that activity should continue to be avoided in the short-term.  Continue to perform exercises bilaterally to be sure that the force/pull over the injury site is symmetrical.  For example, when you start on rowing, then it should be a two-handed row and not a one-handed version.

Progression of exercise of the associated muscles should be slow and again, pain should be carefully monitored. Any pain provoking movements early in the rehabilitation phase should be avoided.  When returning back to weight training, start with a weight approximately 50% of your prior max.  Work within that weight for a week or two, and then slowly progress back to the prior weight used (depending on your symptoms).

You may also return to light jogging. If there is no increase in your pain level, then slowly progress back into full running and sprinting.

Exercises to avoid for at least twelve weeks include: barbell squats; overhead press; power cleans; squat cleans; and snatches.  Avoid anything that would put direct pressure over the injury site or exercises that include a speed and power component under load (such as the power clean).

Rehabilitation Recap

Due to the amount of information presented, I want to re-iterate the important parts of the rehabilitation process. Be sure that you have your physician’s clearance prior to resuming activity.

0-4 weeks: This is the time for pain management and activity modification. You want the area to scar down.  Exercise and activity should be limited although you should maintain full range of motion (ROM) of the neck and shoulder girdle if possible.

4-6 weeks: Initiate a cervical stabilization program and scapulothoracic exercises starting without any resistance.  Perform the I’s, T’s, and Y’s exercises on an exercise ball (as demonstrated above).  Progress with these exercises and continue with cardiovascular exercise such as riding a stationary bike.  You may also start bench pressing, but begin light and monitor your pain level.

6-8 weeks: Progress with shoulder and upper back exercises. Be sure to use two-handed movements.  Depending on your pain level and strength, lower body exercises can be initiated.  Begin with body weight exercises, and then progress to resistive exercises.  Continue to limit direct pressure over the injury site or asymmetric forces.  Lower body exercises, such as the leg press and dead lift, may be started.  Exercise should be mostly pain free.  If you experience pain during an exercise or movement, discontinue for now and then retry it in a week or two.

8-12 weeks: During this phase, slowly start tapering up on all activity.  During this time, you can progress your jogging to eventually sprinting as well as road bicycling.  You can progress back into lower extremity exercises as tolerated as long as there isn’t any significant associated pain at the injury site.  Focus on neck and upper extremities exercises with two-hands/arms bilateral exercises.  Focus on exercises that develop strength in the muscles surrounding the injury site without causing increased pain or asymmetrical force.  The preference is for two-arm movements for now.  This is also the time to start working on thoracic mobility to insure the entire vertebral chain can move freely.  Be sure to have full shoulder and cervical mobility.  Continue to avoid any specific pressure on the injury site.  If you haven’t already, you could start the following:  dead lifting; front squat; and lunges with load.

12+ weeks: Return to full activity. However, let pain and common sense continue to be your primary guide.  At this stage, you can return to light squatting.  I recommend a low-bar position as this typically lines up just below the spine of the scapula and should be below the C7 injury site.  Start single arm movements, such as a one-armed row, as well as power movements, such as the clean and snatch.  You can also initiate overhead lifting.  The key is to progress slowly and see how your body responds.  Begin with 50% of the load used prior to your injury.

If you don’t already own a copy, I would highly recommend that you purchase Starting Strength: Basic Barbell Training by Mark Rippetoe. This text should be regarded as the authority on strength training and should be used as a guide for beginners to advanced weight training enthusiasts.

Once a full return to weight training activities has been accomplished, a full return to sport should also be possible. Any sports that involve high impact, such as football or mixed martial arts, should have your physician’s approval in order to insure that the fracture is stable.  In most cases, the level of pain present will be a great indication of how stable the injury site is.

If you are unsure about how to properly progress in your training and rehabilitation, I recommend that you work with a highly qualified trainer or sports medicine professional to insure that you are performing your particular exercise and sport in a manner that will keep you safe and the fracture stable. The American Physical Therapy Association (APTA) offers a wonderful resource to help find a physical therapist in your area.  In most states, you can seek physical therapy advice without a medical doctor’s referral (although it’s a good idea to hear your physician’s opinion as well).

Good luck to your son and you, Jennifer! I hope you find this information helpful.  Thankfully, this type of injury usually results in a full return to function without many long-term deleterious effects.  The key is to allow adequate healing time, and then slowly and strategically progress back into full activity.

Have you ever suffered from a spinal fracture or avulsion fracture? Have you experienced an accident while weight training?  Please share your story below.

If you have a question that you would like featured in an upcoming blog post, please email contact@thephysicaltherapyadvisor.com. For additional health and lifestyle information, join our growing community on Facebook by liking The Physical Therapy Advisor!

Disclaimer:  The Physical Therapy Advisor blog is for general informational purposes only and does not constitute the practice of medicine or other professional health care services, including the giving of medical advice. No health care provider/patient relationship is formed.  The use of information on this blog or materials linked from this blog is at your own risk.  The content of this blog is not intended to be a substitute for professional medical advice, diagnosis, or treatment.  Do not disregard, or delay in obtaining, medical advice for any medical condition you may have.  Please seek the assistance of your health care professionals for any such conditions.
How to Self-Treat Patellar Tendon Pain with a Mobility Band

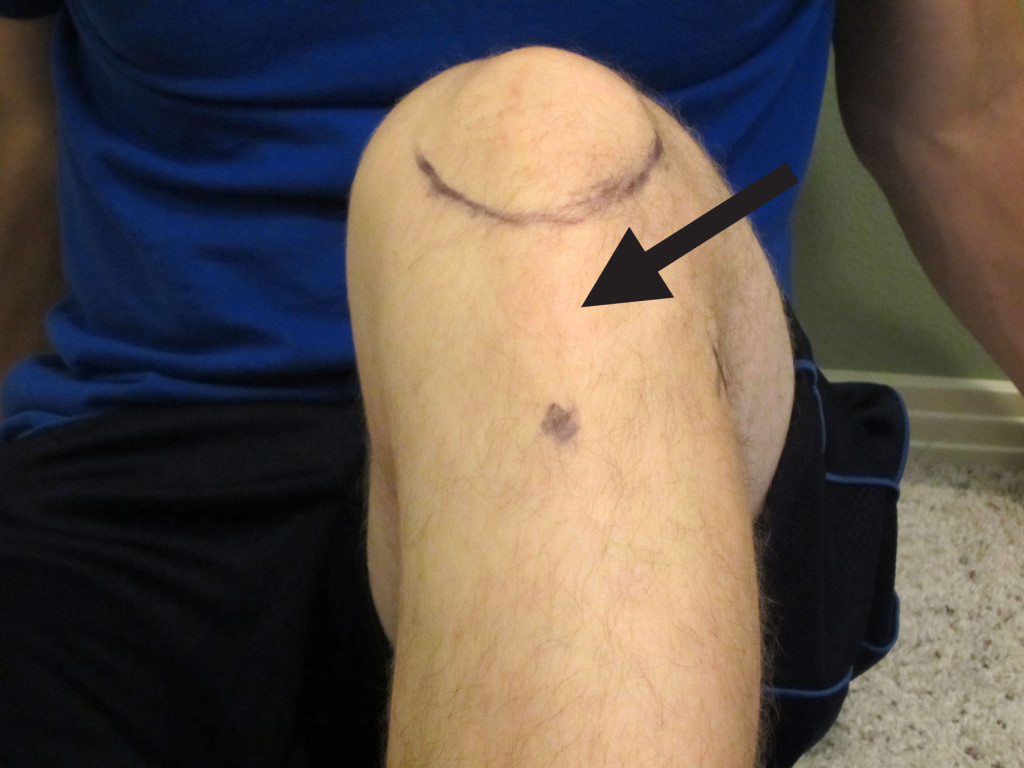
Patellar tendon pain (often called patellar tendinitis or patellar tendinosis) occurs when the tendon connecting your knee cap (patella) to your shinbone becomes inflamed and irritated. Patellar tendinitis is often called “jumper’s knee” because it occurs so frequently in sports like basketball and volleyball.  It also affects runners due to poor lower extremity biomechanics during running.

Patellar Tendinitis symptoms include:

  • Pain directly over the patellar tendon.
  • The tendon is usually tender and swollen.
  • Knee motion can cause “crepitus” (when you hear and feel a crunching or grinding sensation). This may or may not be painful. It’s usually felt under the tendon or the lowest part of the knee cap.
  • Pain with jumping.
  • Pain with kneeling.
  • Pain when walking downstairs.

PatellarTendonPain

The initial course of treatment should include RICE, which stands for Rest, Ice, Compression, and Elevation.

  • Rest. In this case, rest would indicate tapering down from your regular exercise activity and discontinuing running (for the short term).
  • Ice. Apply ice to the painful area. The rule for icing is to apply ice no more than twenty minutes per hour. Do not place the ice directly against the skin, especially if you are using a gel pack style. A bag of frozen peas can be ideal. Individuals with poor circulation or impaired sensation should take particular care when icing.
  • Compression helps to prevent and decrease swelling. Swelling can cause increased pain and slow the healing response, so limit it as much as possible.
  • Elevation. Depending on your pain level and the amount of swelling present, this step may be more or less beneficial.

In this video, I demonstrate how to utilize a mobility/compression band as a self-treatment method for patellar tendinitis. Mobility/compression bands, such as the Rogue Fitness VooDoo X Bands or EDGE Mobility Bands, are a novel way to self-mobilize tissue either of the quadriceps or the patellar tendon. The use of a mobility band not only helps to mobilize the tissue, but it affects blood flow to the area and speeds up healing.  A mobility band also helps to reset some of the receptor cells in the muscle tissue which cause excessive muscle tightness.

As demonstrated in the video, start by applying the mobility band just below the tibial tuberosity, and then over the patellar tendon to the base of the patella. Next, perform the seated knee extension and then the squats.  Typically, the mobility band will only be in place for one to two minutes.  If you experience numbness or tingling, please discontinue the treatment.  (If you suffer from any form of blood clotting disorder or are on blood thinning medications, I would advise against utilizing mobility bands for any type of deep compression.)

In addition to utilizing the mobility band, I often find that it’s critical to improve general tissue mobility. I recommend stretching and mobilizing the tissues of the lower legs.  Myofascial release of the quadriceps muscle is an important component in order to relieve the pain while reducing the pressure and tension through the patellar femoral tendon and joint.  This is typically a very effective and important step as most will find pain relief from improving quadriceps mobility.  I tend to utilize the foam roller for the larger part of the quadriceps.

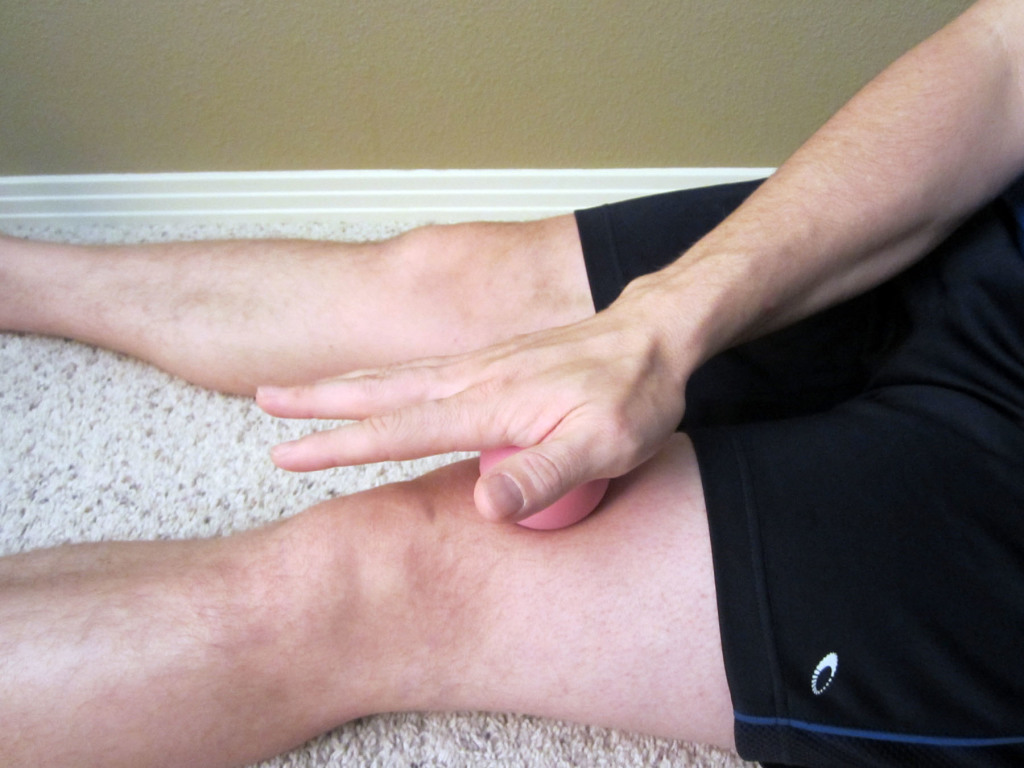
LacrosseBallForQuad

I also use a tennis or lacrosse ball to aggressively work the tissue above the patella. You can use your hand to press the ball in and work it around the tissue.  To use the weight of your leg for a more aggressive mobilization, place the ball on the ground and mobilize the tissue with your leg on top of the ball.

For additional helpful tips and tricks on treating knee pain, please refer to my guest post for the Marathon Training Academy, How to Self-Treat Runner’s Knee.  Much of the advice and training recommendations are also relevant to treating patellar tendinitis.

Have you tried using a mobility band before to treat patellar tendinitis? If so, what was your experience like?  Please leave your comments below.

Looking for that exercise or book I mentioned in a post?  Forgot the name of a product or supplement that you’re interested in?  It’s all listed in the Resource Guide.  Check it out today!

If you have a question that you would like featured in an upcoming blog post, please comment below or submit your question to contact@thePhysicalTherapyAdvisor.com.  Be sure to join our growing community on Facebook by liking The Physical Therapy Advisor!

Masters Runners: Body Changes and Injury Prevention Strategies

MTA_MastersRunners

http://marathontrainingacademy.com/masters-runners

Marathon Training Academy

April 18, 2016

In this guest post for Marathon Training Academy, you will learn how running and a healthy lifestyle can help to slow down age related declines. As a masters runner, discover how implementing these injury prevention strategies can help you to enjoy running for a lifetime.

SeniorRunnerThe question most often asked in regard to the older runner: Is it safe? The answer is yes!  Running can actually help to decrease some of the physiological declines that occur with age.  Who is considered to be an older or masters runner?  Typically, masters runners are over the age of 40.  Shocked?  Me, too!

While it’s true that getting older is not for the faint of heart, it’s also true that if you do nothing, the following age related declines in physical functioning will occur regardless. Implementing exercise while adjusting your diet can help to slow down age related declines so that you can age gracefully.  And, yes, running can be part of that process!  Continue Reading

3 Simple Exercises to Help You Age Well

We are all capable of navigating a successful aging process if we are intentional with our behaviors.  Although successful aging has a different meaning for each of us and outcomes will vary, commonalities exist in most scenarios.  In order to age successfully, you will need to fully embrace what it will take to accomplish the goal of living safely, independently, and comfortably within your community.

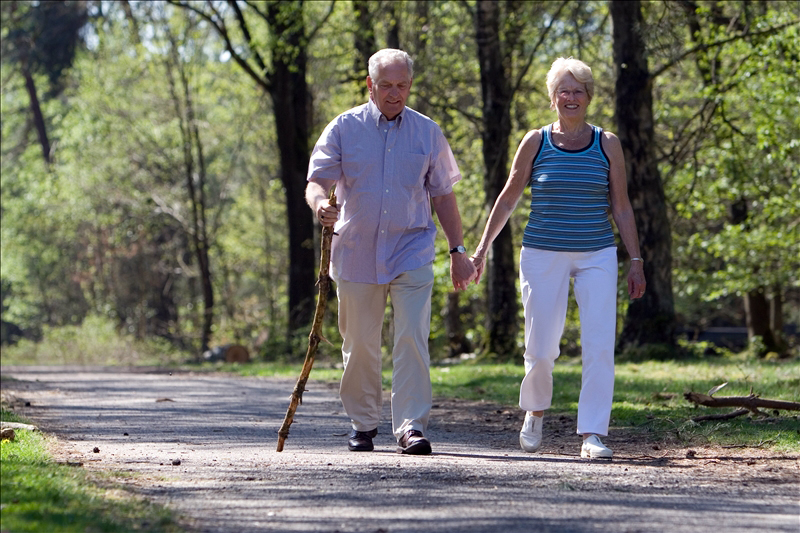
Elderly couple walking through the park hand in hand

Mobility is vital to independence.  Independent mobility is different for everyone.  It may be through ambulation or use of an assistive device such as a cane, walker or wheelchair.  You need to maintain the ability to be independently mobile regardless of utilizing a mobility or assistive device.  Aspects of maintaining mobility include adequate balance, strength, and endurance.

The following 3 simple, yet vital exercises will help you to maintain your functional mobility and independence:

Walking

Walking is a wonderful method of exercise.  Out of all the possible movements humans can perform for mobility, we are best at walking!  Since most of us started at a very early age, we are familiar with walking.  It has different purposes and offers many benefits.  We walk to get somewhere, to have fun, to relax, and to exercise.  Compared to other activities, walking is easy on your body and can fit into your busy schedule.  Walking daily can reduce stress, improve circulation and hormone regulation, maintain strength and bone density, reduce pain as well as benefit your overall well-being.  It just makes you feel good!  Walk daily!

Squatting

Squatting in some form or capacity is a normal part of daily life.  The muscles needed to perform a squatting motion or a sit to stand motion are critical for all functional mobility related movements, including walking; getting up from a chair or a toilet; or picking up someone or something.  This motion helps to maintain lower extremity strength and range of motion as well as maintaining bone density and proper hormone regulation.  It can also help improve balance and even aid in digestion.  A simple method to practice this exercise is to move from sitting to standing.  As you improve, find a lower surface to practice from.  Eventually, the goal would be to move into a full squat (as long you don’t have any medical barriers that would prevent that particular motion).

Standing on One Foot

Balance is an important part of mobility.  It is usually overlooked and taken for granted until mobility is significantly affected.  Like all exercise, balance exercise should be fun and convenient.  Balance, just like muscle strength, is a use it or lose it proposition.  A simple, yet effective method to maintain and/or improve balance is stand near your kitchen counter and practice standing on one leg.  You should be able to stand for at least 30 seconds.  To increase the difficulty, practice balancing with your eyes closed.

These three exercises are critical for maintaining mobility and function as we age.  Walking and squatting are some of the first abilities we develop as children, and they need to be the last ones we lose as we age.  Your ability to perform these exercises is fundamental to how you are able to function throughout your life.

Which of these three simple, yet vital exercises can you implement in order to maintain your functional mobility and independence?  Please leave your comments below.

Looking for relevant senior related resources in your community?  The Seniors Blue Book is full of relevant resources for seniors as well as helpful articles on successful aging and elder care.

If you have a question that you would like featured in an upcoming blog post, please comment below or submit your question to contact@thePhysicalTherapyAdvisor.com.  Be sure to join our growing community on Facebook by liking The Physical Therapy Advisor!

(This article first appeared in the Seniors Blue Book, April through September 2016, pages 116 and 117.)

How to Self-Treat IT Band Syndrome with a Mobility Band

Pain in the lateral (outside) leg or knee is commonly associated with a condition known as Iliotibial Band Syndrome (ITBS). (Iliotibial Band Syndrome is also known as IT Band Syndrome, ITB Syndrome, or IT Band Friction Syndrome.) Pain can range from the lateral side of the leg up toward the hip area to just below the lateral side of the knee joint (where the head of the fibula bone begins).

The IT Band is a very thick fibrous band of tissue that spans from the hip’s origin point at a muscle known as the Tensor fasciae latae (TFL). The TFL transitions into the IT band and progresses down the lateral thigh and ends at the head of the fibula.  The IT Band’s primary function is to provide additional lateral support for the knee joint (particularly when standing or landing on one leg).

IT Band Syndrome is often associated with an over use injury. Runners will often develop ITBS after running on uneven terrain or downhill.  Gait or running abnormalities can increase your risk of developing ITBS.  Although it can be very painful, it can be easily self-treated if you handle your pain and symptoms quickly.

A simple and effective method to self-treat ITBS is through the use of a mobility/compression band (such as an EDGE Mobility Band). In this video, I demonstrate how to use a mobility/compression band to mobilize the iliotibial band (also known as the IT Band) as a self-treatment method for ITBS.

Have you tried using a mobility band before to treat ITBS? If so, what was your experience like?  Additional discussion can help others to manage this condition more effectively.  Please leave your comments below.

For more information on how to self-treat ITBS, please refer to the following:

Looking for that exercise or book I mentioned in a post?  Forgot the name of a product or supplement that you’re interested in?  It’s all listed in the Resource Guide. Check it out today!

If you have a question that you would like featured in an upcoming blog post, please comment below or submit your question to contact@thePhysicalTherapyAdvisor.com. Be sure to join our growing community on Facebook by liking The Physical Therapy Advisor!

How to use a Foam Roller

This video on the basics of foam rolling was recorded during a seminar for CrossFitters. The seminar focused on how to use the foam roller in order to help prevent shoulder, upper back, and neck pain.

The foam roller is a wonderful tool which allows you as an independent user to manipulate the body’s soft tissues which has a potential positive effect on the fascial system, the musculotendinous system, and the circulatory system. (Individuals taking blood thinning medications or with blood clotting disorders should consult his/her physician prior to using a foam roller for mobilization.)

Possible reasons to utilize the foam roller include:

  • A method to perform self myofascial release.
  • It can be used as a mobilization tool for soft tissues even near or around boney articulations.
  • It is an excellent tool for home exercise programs.
  • It can be easily adapted for use on multiple areas of the body.
  • An effective tool which one can easily travel with.

How should I use the foam roller?

  • I typically recommend one to three minutes of body weight rolling (if it is tolerated) per extremity, and the same for the thoracic, low back, and buttock area.
  • A good rule of thumb is to roll out an area that is tender and sore (or recently worked) until it no longer feels tight and sore.
  • Again, approximately one to three minutes per area although this may vary based on your size. Increased time will be needed the more developed your muscles are.
  • Use the foam roll on tight or restricted areas prior to performance without risk of deleterious effects (unlike static stretching).
  • Use the foam roll after exercise or competition to speed up recovery times and decrease the risk of muscle soreness or restriction.
  • The foam roller can also be used as an aid to increase the intensity of a stretch during static stretching activities.

Foam rollers come in many different lengths and sizes. Each size has a slightly different purpose and use.  For most individuals, the three foot long by six inch diameter size will be the most versatile.  You can purchase a quality foam roller for a good price online on Amazon.

For photos and detailed descriptions of the exercises which I demonstrated in the video, opt-in to my e-mail list for instant access to My Top 8 Stretches to Eliminate Neck, Upper Back, and Shoulder Pain.

For more information on the use of a foam roller, please refer to Does Foam Rolling Help or Hurt Performance?

What has your experience been like with using the foam roller? Is it worth the effort?  Please share your comments or questions below.

Join our growing community on Facebook by liking The Physical Therapy Advisor!  If you have a question that you would like featured in an upcoming blog post, please e-mail contact@thephysicaltherapyadvisor.com.

How to Maintain Healthy Joint Motion

Healthy aging could be defined as having the physical, mental, social, emotional, and spiritual capacity to live life on your terms. Maintaining adequate health is a combination of physical strength, cardiovascular endurance, joint motion, and balance in order to perform activities of daily living (ADLs).  This includes any or all desired tasks, such as picking up your grandchildren, to playing golf or running.

The ability to move a joint through its full range of motion (ROM) is critical in maintaining the ability to perform many important functional tasks. Imagine trying to lift a box overhead with a shoulder that only has half its motion.  That makes for a very difficult task.  There are many reasons for loss of joint motion:  muscle or tendon tears; generalized muscle weakness; paralysis; and severe arthritis.

Typically, osteoarthritis (OA) will occur in a joint that has previously been injured or one that doesn’t adequately move. Movement allows the proper nutrients to be circulated through the blood and synovial fluid that coats and lubricates the joint.  There are also genetic factors that may predispose a person to developing OA, which is one of 171 different types of arthritis.

How can you best maintain joint mobility throughout the aging process? What is the minimum effective dose to help insure joint mobility as you age well? The key to maintaining mobility is to take each joint of the body through its full range of motion (ROM) at least once per day.

ShoulderPulleyExercise

A crucial component to joint health and mobility is to insure that the joint surfaces remain coated with the body’s natural lubricant known as synovial fluid. Synovial fluid is best circulated in joints through mobility.  To insure that the entire joint surface is coated, a full arc of motion needs to be performed.

By performing a full arc of motion for each joint, you also insure that the associated ligaments, tendons, and musculature can accommodate for this motion and won’t shorten over time due to lack of use. Moving each joint through a full ROM daily is the key to maintaining motion.  In order to insure optimized healthy aging, it’s best to move that joint frequently.

The latest research indicates that sitting for more than two hours at a time can significantly lessen your life span. The real headline should read, “Even if you are a regular exerciser, sitting for more than two hours a day will still lower your life span.”

Frequent movement throughout the entire day is critical for health.  This includes frequent mobility as it is important for joint health as well as critical for cardiovascular health. Ideally, you should choose movements and exercises that are functional and address multiple joints at the same time.

How to Maintain Healthy Joint Motion:

  • The Squat. The squat activates nearly all of the muscles in the lower leg. It also takes the hips and knees into end range flexion as well as the ankles into near end range dorsiflexion. The squat is particularly effective at activating the muscles in the legs referred to as the posterior chain, which includes the hamstrings, the glutes (or buttock muscles), and the hip adductors (or the groin muscles). It also activates muscles in the hips, the calves, the stabilizing muscles in the ankles, the quadriceps, and as well as the core (the abdominals and lumbar extensor muscles). These muscles are critical for all functional mobility related movements, including walking; getting up from a chair or a toilet; or picking up someone or something. For more information on squatting, please refer to 7 Reasons Why the Squat is Fundamental to Life.
  • Tai Chi and Yoga. Tai Chi, yoga, and Qigong all implement slow simple movements into a full body exercise that can help you to maintain your mobility, balance, strength, and general health as you age.
  • Stretching and Self-Mobilization. There are generally 5 Ways to Improve Range of Motion when utilizing different stretching methods or self-mobilization. Using a foam roller is an excellent method to decrease pain and improve mobility throughout the hip and pelvis. For more information on how to use a foam roller, please refer to Foam Rolling for Rehabilitation.
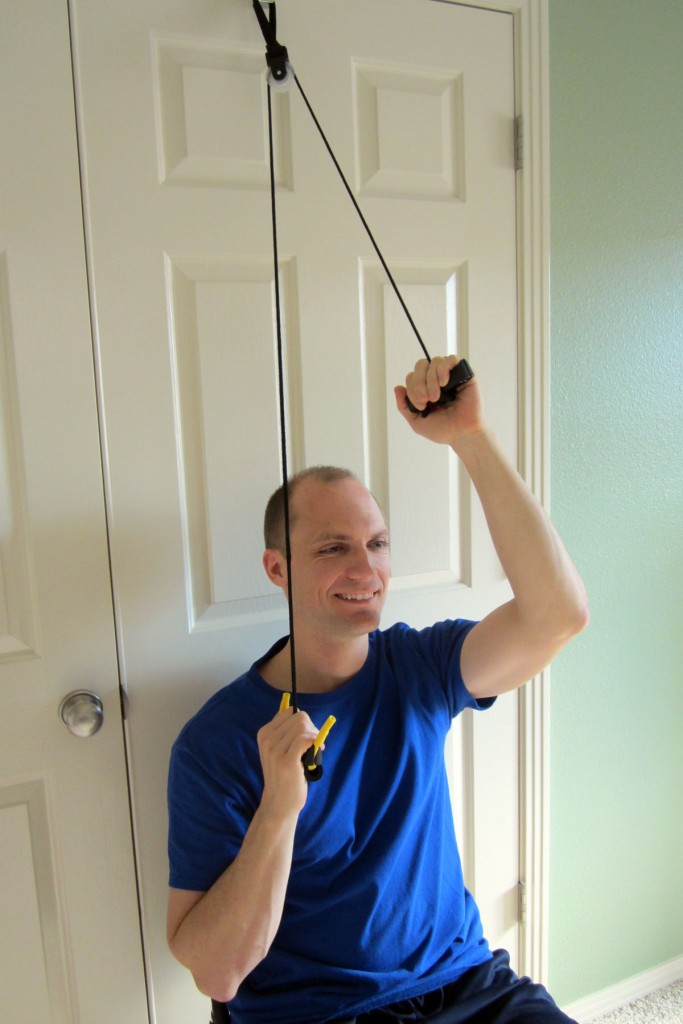
  • Shoulder Pulley. A simple, yet popular, method to maintain shoulder motion is through a shoulder pulley. Shoulder pulleys are an excellent way to use active assistive motion to regain motion in the shoulder post injury or surgery. I also instruct many of my clients to utilize shoulder pulleys for pain management as well as a prevention strategy for arthritis and loss of shoulder motion and function.

Maintaining adequate joint mobility and range of motion is an important component in healthy aging and can be a critical strategy in order to avoid many orthopaedic or arthritic conditions. Be proactive now, so you can save yourself from experiencing pain and debility in the future. It’s never too early or too late to implement strategies to help you age well!

Which strategy do you use to maintain your joint range of motion and mobility? It could be as simple as using the foam roller or a shoulder pulley.  Please leave your comments below.

Looking for that exercise or book I mentioned in a post?  Forgot the name of a product or supplement that you’re interested in?  It’s all listed in the Resource Guide. Check it out today!

If you have a question that you would like featured in an upcoming blog post, please comment below or submit your question to contact@thePhysicalTherapyAdvisor.com. Be sure to join our growing community on Facebook by liking The Physical Therapy Advisor!

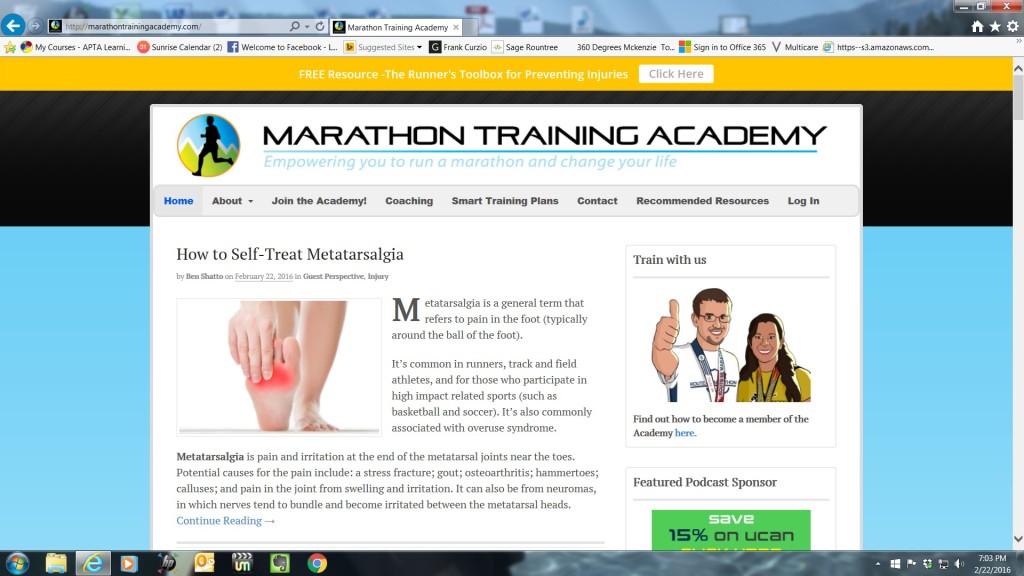
How to Self-Treat Metatarsalgia

MTA_Metatarsalgia

http://marathontrainingacademy.com/how-to-self-treat-metatarsalgia

Marathon Training Academy

February 22, 2016

In this guest post for Marathon Training Academy, you will learn how to identify the potential causative factors for metatarsalgia and how to self-treat this condition so you don’t lose too much time with your training.

Pain in the female footMetatarsalgia is a general term that refers to pain in the foot (typically around the ball of the foot). It’s common in runners, track and field athletes, and for those who participate in high impact related sports (such as basketball and soccer).  It’s also commonly associated with overuse syndrome.

Metatarsalgia is pain and irritation at the end of the metatarsal joints near the toes. Potential causes for the pain include:  a stress fracture; gout; osteoarthritis; hammertoes; calluses; and pain in the joint from swelling and irritation.  It can also be from neuromas, in which nerves tend to bundle and become irritated between the metatarsal heads.

Metatarsalgia typically begins as a mild discomfort which grows steadily and quickly to the point that a person may struggle to walk, stand, or run. The key to treatment and management of this condition is to intervene quickly and to identify the actual cause or causes that led to the pain and irritation.  Learn the potential causative factors for metatarsalgia and how to self-treat this condition so you don’t lose too much time with your training.  Continue Reading

Q & A: Running Injuries, Part 2

MTA_RunningInjuries_Part2

http://marathontrainingacademy.com/running-injuries2

Marathon Training Academy

February 14, 2016

Do you have a nagging stubborn injury? Recovery and injury prevention are critical and should be performed regularly so you don’t miss valuable training time.  In Part 2 of this podcast interview with Marathon Training Academy, I discuss injury prevention and treatment for the most common running injuries.  For detailed written answers and web links for more in-depth prevention and self-treatment strategies, please refer to Q & A Running Injuries Show Notes.

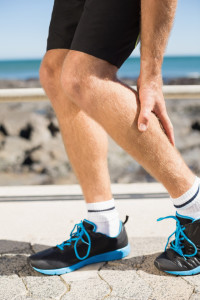
Fit man gripping his injured calf muscle on a sunny dayRunning injuries that crop up during marathon training are a real bummer! Here’s part two of our Q and A with physical therapy doctor Ben Shatto.

In this episode, you will hear about injury recurrence, plantar fasciitis, knee pain, ITBS, and more. My favorite quote from this episode is, “Injury is never normal.” Listen to the podcast

Disclaimer: This blog post and podcast are not meant to replace the advice of your doctor/health care provider, or speak to the condition of one particular person but rather give general advice.