How to Self-Treat IT Band Syndrome

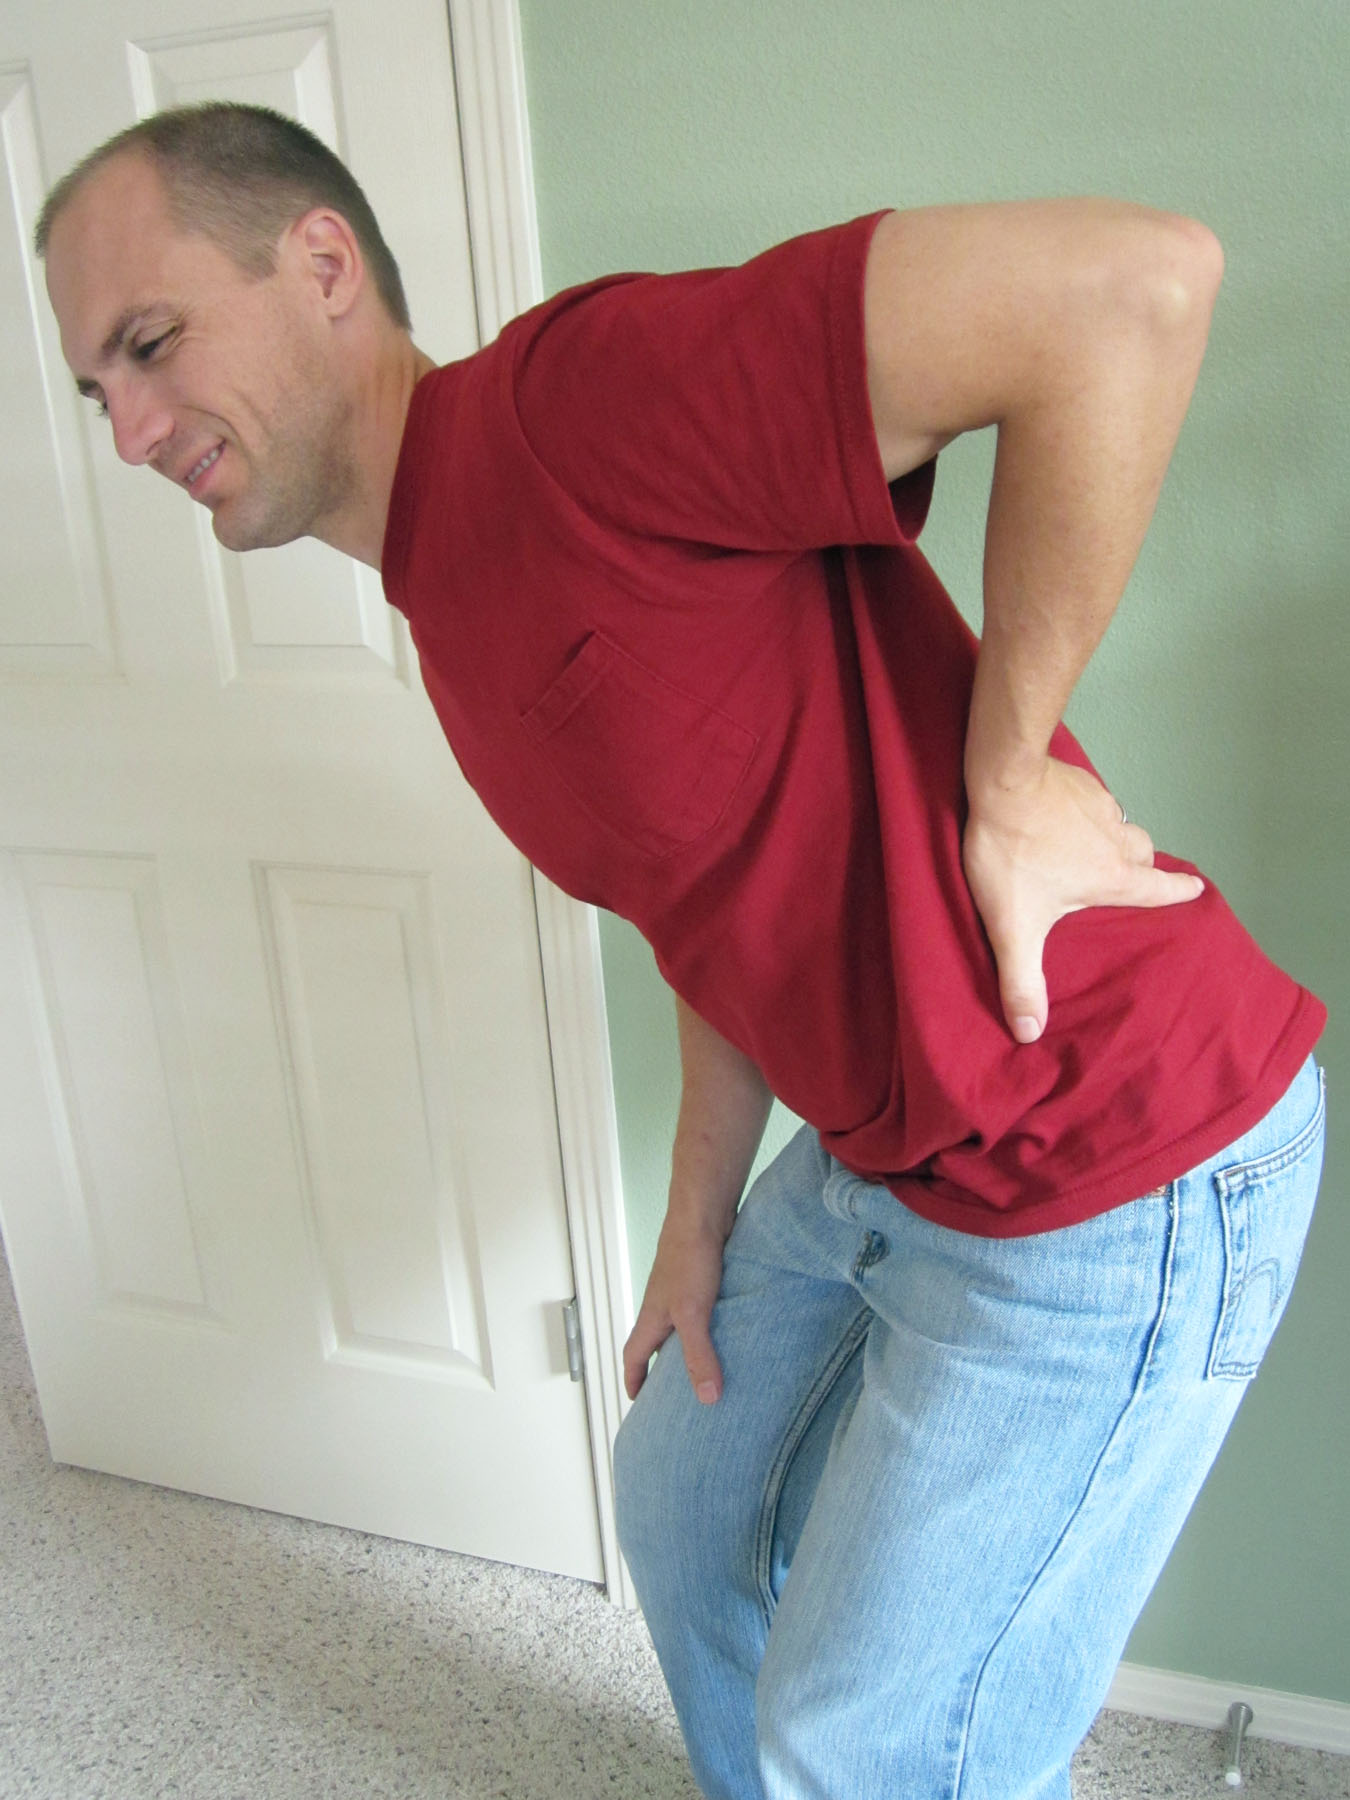
Pain in the lateral (outside) leg or knee is commonly associated with a condition known as Iliotibial Band Syndrome (ITBS).  (Iliotibial Band Syndrome is also known as IT Band Syndrome, ITB Syndrome, or IT Band Friction Syndrome.)  Pain can range from the lateral side of the leg up toward the hip area to just below the lateral side of the knee joint (where the head of the fibula bone begins).  The pain can be very debilitating to the point that running or hiking activities have to be stopped.  Even walking becomes difficult.  I will address the many potential causative factors for IT Band Syndrome and offer advice on how to self-treat this condition.

TherabandRoller

The IT Band is a very thick fibrous band of tissue that spans from the hip’s origin point at a muscle known as the Tensor fasciae latae (TFL).  The TFL transitions into the IT band and progresses down the lateral thigh and ends at the head of the fibula.  The IT Band’s primary function is to provide additional lateral support for the knee joint (particularly when standing or landing on one leg).  IT Band Syndrome is often associated with an over use injury.  It can be very painful, but it can be easily self-treated if you handle your pain and symptoms quickly.

How to Self-Treat IT Band Syndrome: 

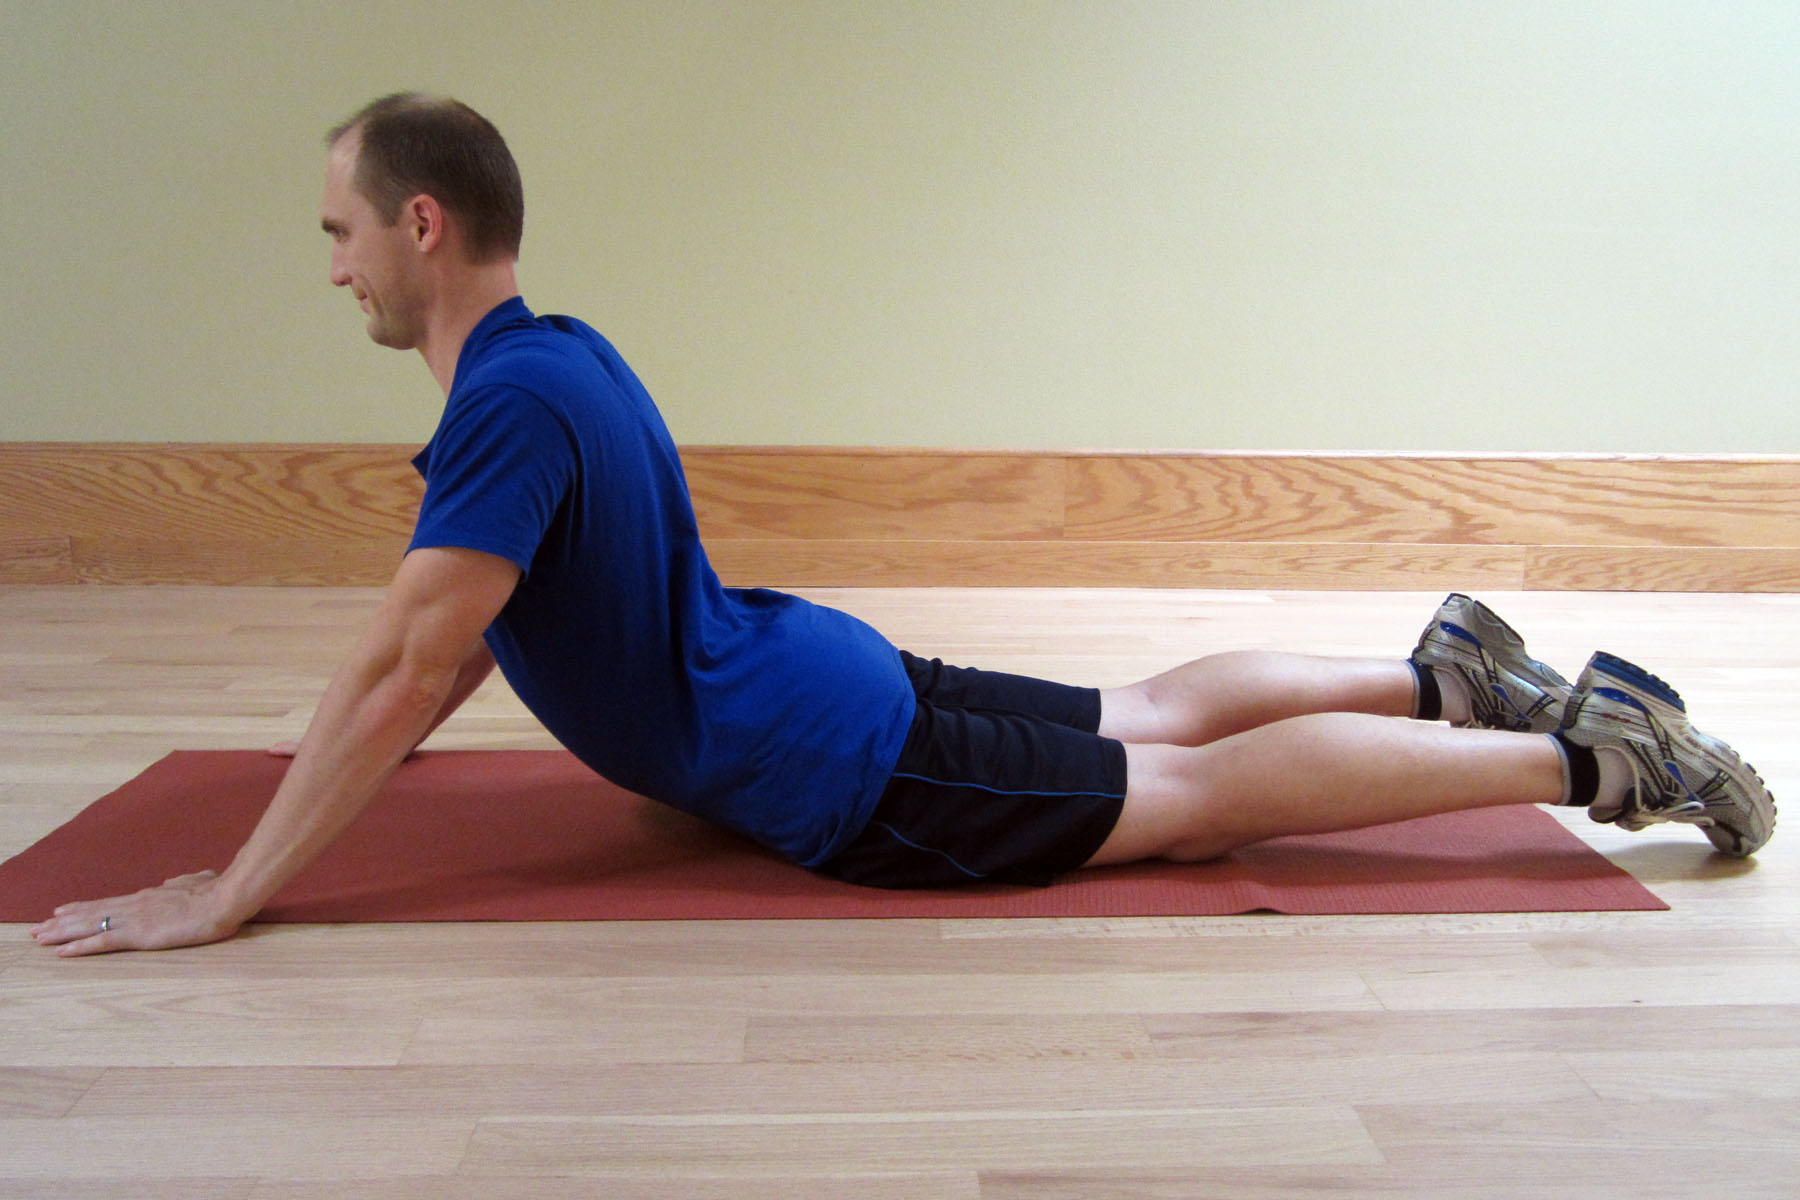
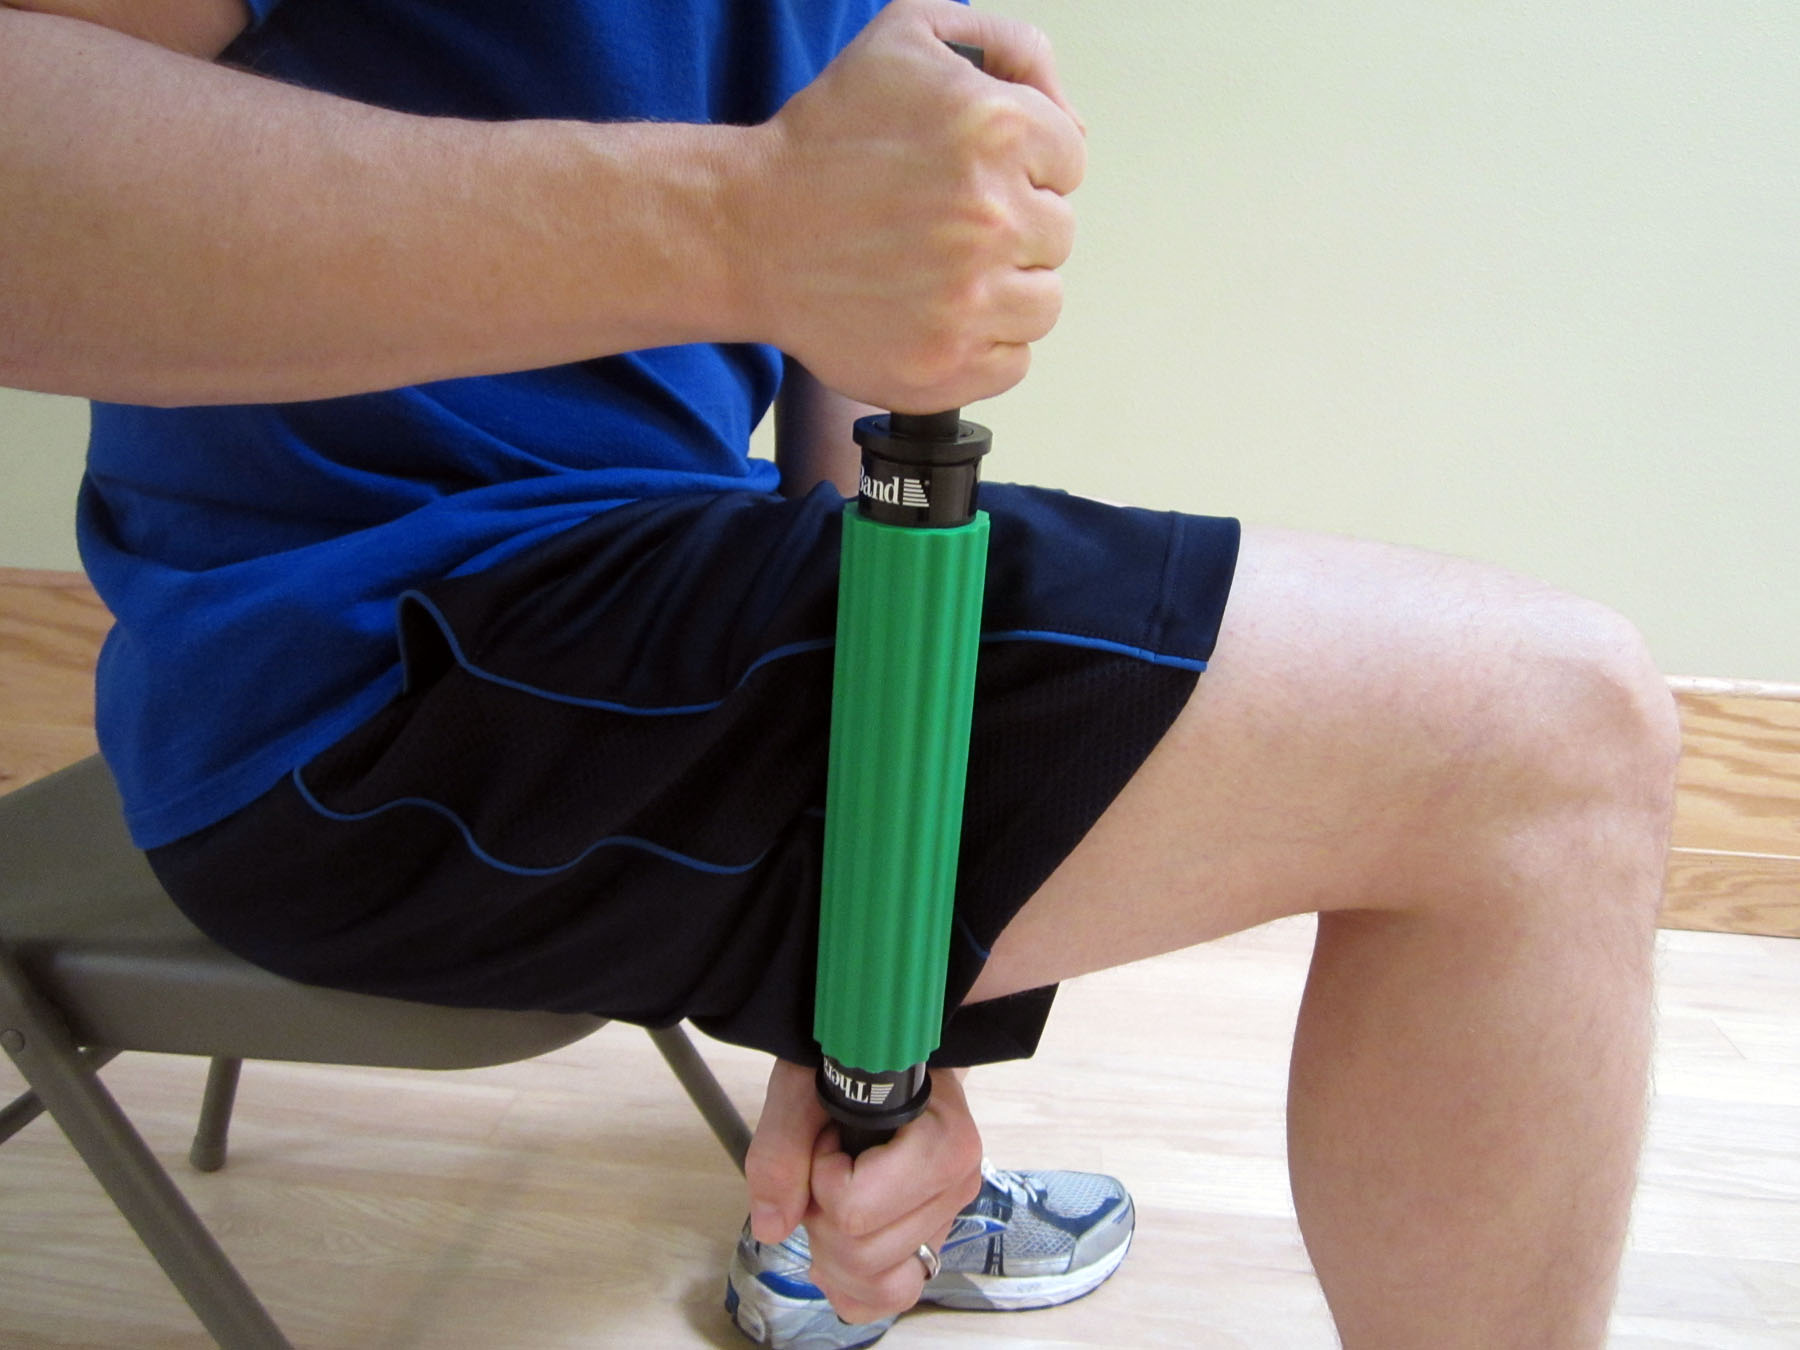
  • Improve your mobility. Mobility issues and myofascial restrictions are highly correlated with ITBS. Tightness in the IT Band or in the deep hip internal or external rotators is a contributing factor to ITBS. The tighter the IT Band, the more likely it will rub on the femoral condyle and develop into pain. Bowlegged describes a medical condition known as a varus deformity, an inward rotation of the tibia resulting in a leg that looks like it is bowed out. It can develop due to chronic friction of the IT Band along the femoral condyle. ITBS may also occur after a total knee replacement (TKA). I recommend using a foam roller to address tightness in the quadriceps or IT Band. To learn how to use a foam roller, please refer to Foam Rolling for Rehabilitation. I also recommend a Thera-Band Standard Roller Massager, which is very firm and allows for a deep amount of pressure. You may also utilize a tennis or lacrosse ball to mobilize the Tensor fasciae latae (TFL) appropriately. The foam roller and roller massager don’t work as well because the greater trochanter of the hip (the boney part of the hip that sticks out) tends to be in the way. Stretching the IT band or the TFL is very difficult, so I tend to utilize other mobilization techniques. However, I recommend a few pelvic and hip stretches. Please refer to IT Band Syndrome Rehabilitation Exercises for my top stretches, foam rolling, and self-mobilization techniques to address IT Band related issues.
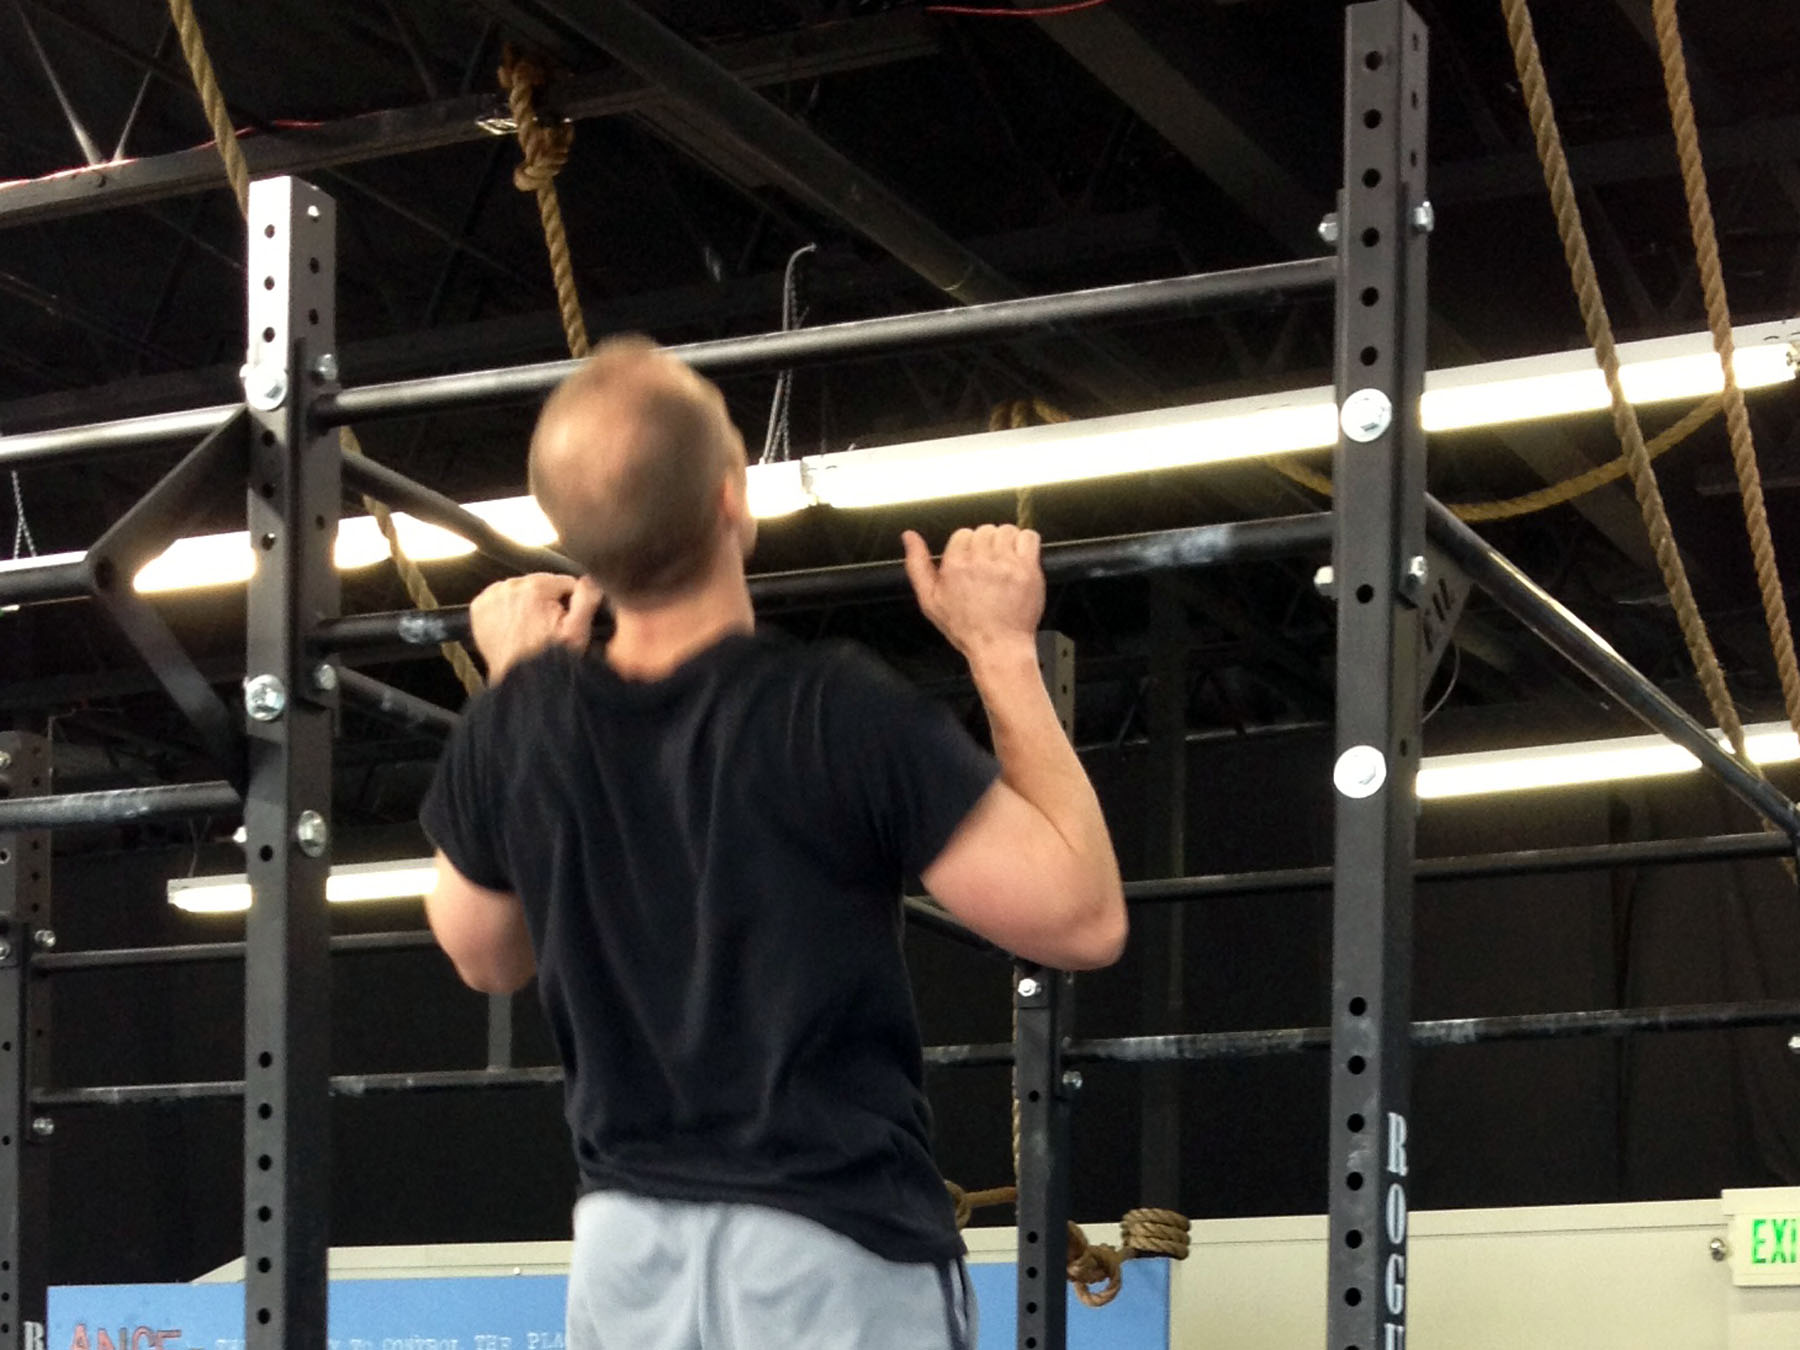
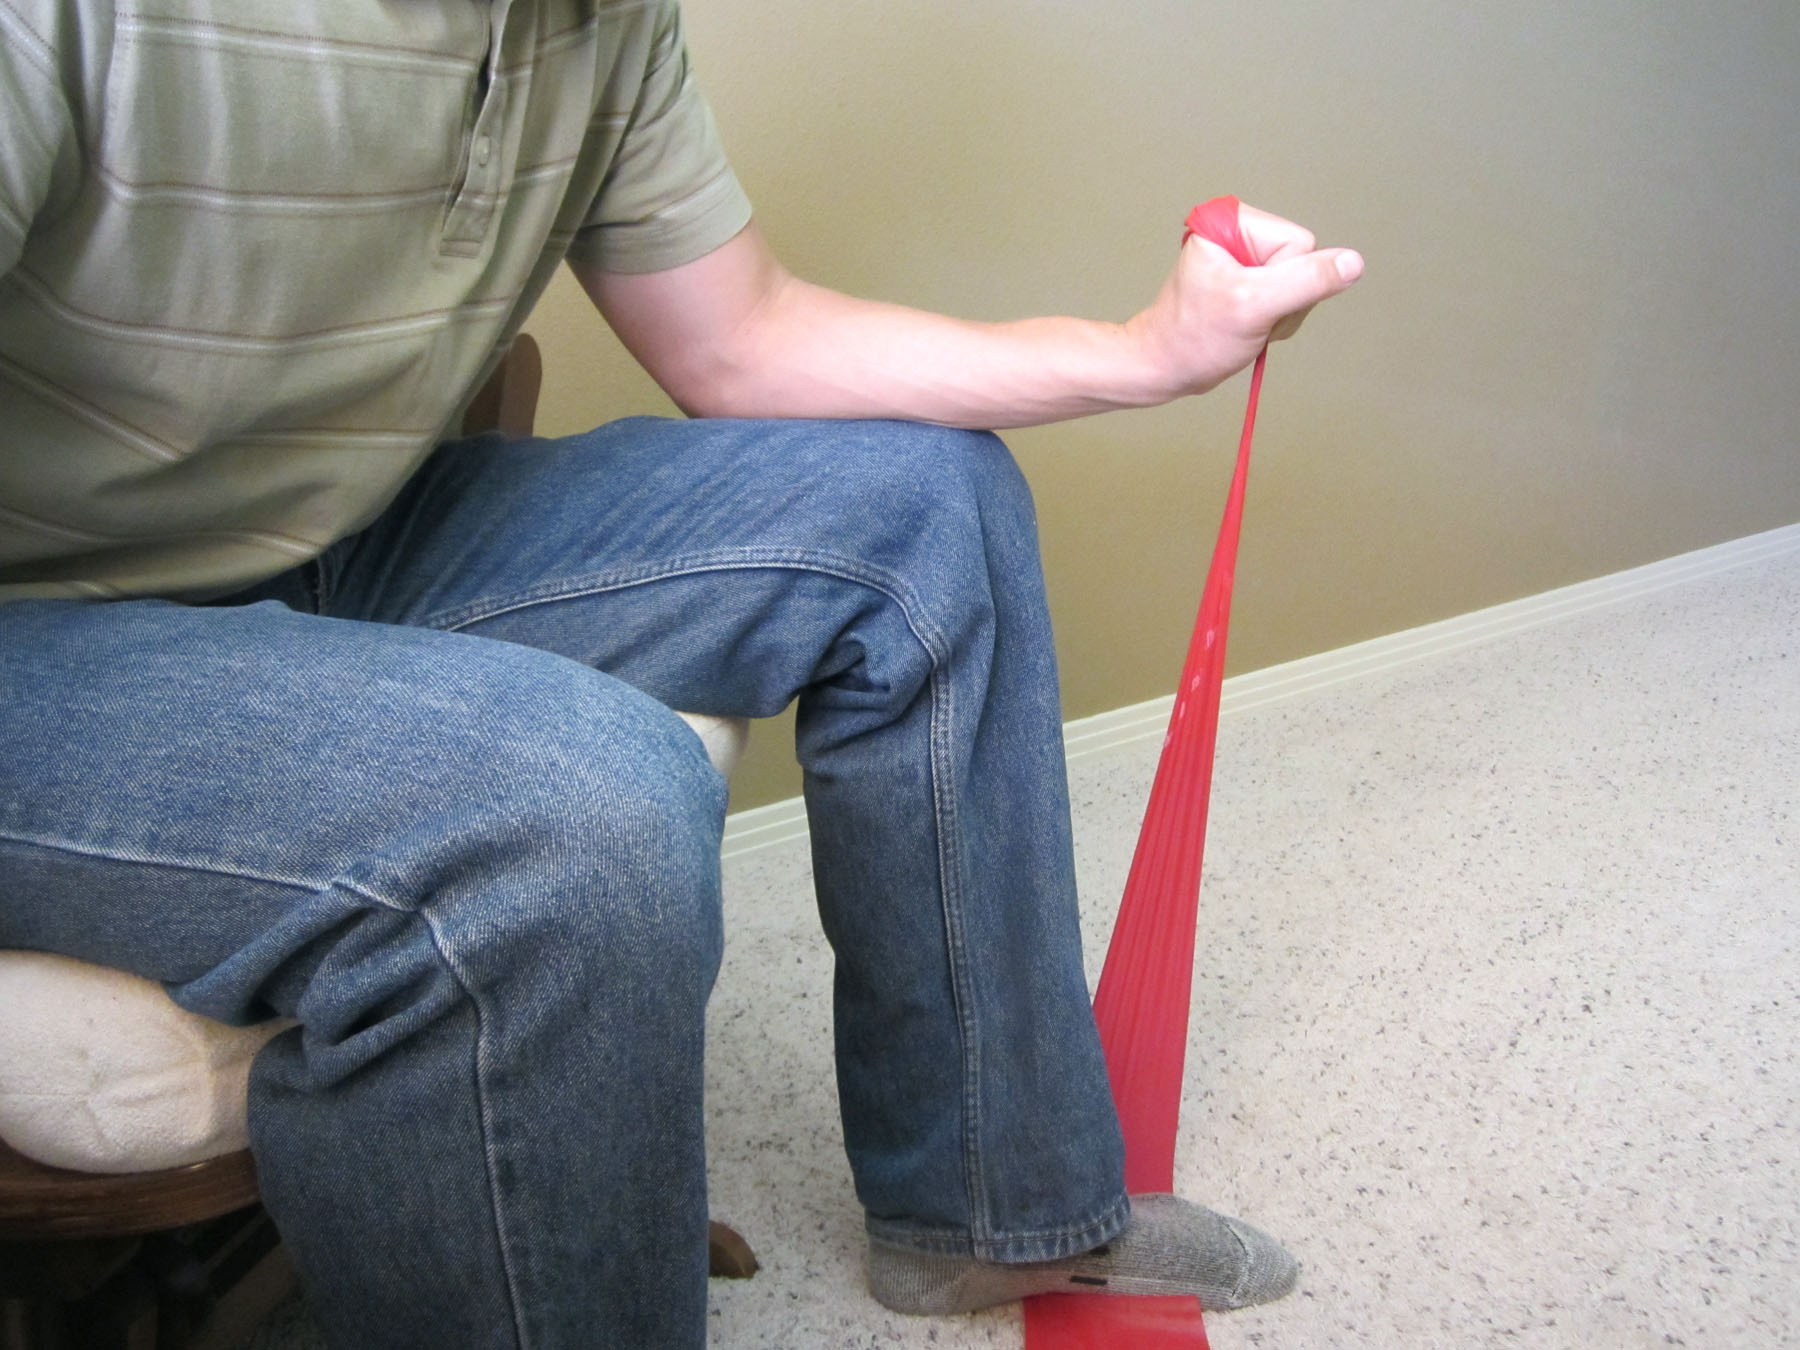
  • Strengthen your hip muscles. Weakness in the hip external rotators and the hip abductors, like the Gluteus medius and the Tensor fasciae latae (TFL), can lead to IT Band Syndrome. Strengthening of these muscle groups can help avoid future ITB issues as well as reduce your risk of developing Patellar Femoral Pain Syndrome (PFPS). Please refer to Hamstring, Hip Flexor, and Piriformis Stretches for LBP for additional hip and lower leg stretching exercises.
  • Over use injury due to downhill running? IT Band Syndrome is often associated with an over use injury. For runners, a common cause of ITBS is running downhill. Few runners actually train appropriately for a race with downhill running. Afterward, they end up with a case of ITBS. I have been guilty of improper training in the past. If you have ever run in the Robie Creek Half Marathon, then you understand the importance of downhill training. To avoid ITBS, adequately train for the downhill portion of the race. Also, vary your running routine and surfaces while training. Although ITBS is often associated with over use, always address other contributing factors as well.
  • Check your shoes. Your shoes may be worn out and may be the cause of the pain. If you wear a shoe that helps to limit overpronation, remember that the inner cushion and structure of the shoe can wear out before its outer appearance. If this occurs, the shoe can no longer adequately control inappropriate foot and heel movements such as overpronation. This could result in IT Band Syndrome or other hip, knee, or ankle related issues. Shoes typically only last 350-500 miles. If you are nearing those miles, then it may be time to change. If you’re unsure if your shoes are performing correctly, visit your local running shoe store. The trained staff can inspect your shoes for wear and tear. They may ask you to walk or run in order to watch your gait to fit you in the appropriate shoe. Another option to help control overpronation is an over-the-counter orthotic such as Superfeet Blue Premium Insoles. The blue tends to fit most feet, but a variety of options are available for customization. In my experience, these insoles can last 1,000 to 1,500 miles easily. If the over-the-counter options aren’t helping you, please see a physical therapist or podiatrist for custom orthotics.
  • Did you progress too quickly into a minimalistic shoe? If you are used to a standard built up shoe, progressing into a minimalistic shoe may be more difficult and take more time. Unless you are a child or teenager, expect a safe transition to take at least three months. Don’t transition during a period of intense sports. I highly recommend waiting until the off season as progressing slowly is always a better choice.
  • Have your gait analyzed while running. Gait or running abnormalities can increase your risk of developing IT Band Syndrome. Over striding tends to occur while running downhill. Scissoring occurs when your leg crosses over the midline with each step. Both over striding and scissoring are easily recognized by a professional. Check with your local running store or a physical therapy clinic for a monthly gait analysis clinic. If you’re unable to obtain a gait analysis, ask your spouse or a friend to video record you (from behind) while you’re running. Then watch the recording to see if you notice either over striding or scissoring.
  • Don’t forget to ice. IT Band Syndrome is typically is due to a specific event. Afterward, there is usually an active inflammatory process occurring. I typically apply ice to the lateral part of the knee, but place it on your most painful location. The rule for icing is to apply ice no more than twenty minutes per hour. Don’t place the ice directly against the skin, especially if you are using a gel pack style. Individuals with poor circulation or impaired sensation should take particular care when icing. A bag of frozen peas can be a cheap alternative or you could use one of my favorite gel pack style cold packs.
  • Start a supplement. ITB Syndrome is typically associated with a specific event and an active inflammatory process typically occurs. I am a supporter of natural supplements and remedies. Many supplements include herbs which are designed to help reduce inflammation. Phenocane Natural Pain Management combines the following: Curcumin, an herb that reduces pain and inflammation; boswellia, a natural COX2 inhibitor that also reduces pain and inflammation; DLPA, an amino acid that helps to increase and uphold serotonin levels in the brain; and nattokinase, an enzyme that assists with blood clotting and reduces pain and inflammation. If you are taking blood thinner medication, please consult with your physician prior to taking Phenocane Natural Pain Management.

If you’re not experiencing relief after a week or two of aggressively managing the symptoms, contact your local physical therapist for an assessment and help in managing IT Band Syndrome.  The American Physical Therapy Association offers a wonderful resource to help find a physical therapist in your area.

Has a specific treatment for IT Band Syndrome helped you? Which treatments haven’t worked for you?   Additional discussion can help others to manage this condition more effectively.  Please leave your comments below.

Looking for that exercise or book I mentioned in a post?  Forgot the name of a product or supplement that you’re interested in?  It’s all listed in the new Resource Guide.  Check it out today!

If you have a question that you would like featured in an upcoming blog post, please comment below or submit your question to contact@thePhysicalTherapyAdvisor.com. Be sure to join our growing community on Facebook by liking The Physical Therapy Advisor!

How to Self-Treat Plantar Fasciitis

Plantar fasciitis is a very painful and potentially very debilitating condition.  It’s one of the most common causes for heel and bottom of the foot pain.  The plantar fascia is essentially a band of connective tissue (a ligament) which runs the length of your foot from your heel to your toes.  It helps to support the arch of your foot by using “windlass mechanism” to make the foot more rigid and aid in the foot’s ability to transfer force and push off when walking or running.   In the case of plantar fasciitis, the fascia on the bottom of the foot becomes swollen and irritated and may cause pain when you stand and/or walk.  It’s typically at its worst in the morning with your first several steps after sleeping.  Plantar fasciitis is also more common the older a person becomes.

Image courtesy of www.runnersgoal.com

Risk factors for developing plantar fasciitis include:

  • Excessive foot pronation. Your feet tend to roll inward as you stand, walk, and/or run.
  • Either excessively high arches or overly flat feet.
  • Spending long periods of time standing or walking.
  • Spending long periods of time on hard surfaces, such as concrete.
  • Obesity
  • Your shoes don’t fit well or the shoe is worn out.
  • You have transitioned too quickly from a more built up running shoe into a minimalistic style.
  • Poor ankle mobility, particularly excessive tightness in the Achilles tendon or calf muscles.
  • Poor foot muscle strength, particularly the foot intrinsic muscles which help to support the arch of the foot.

Plantar fasciitis typically begins as a mild discomfort which grows steadily and quickly to the point that a person may struggle to walk, stand, or run.  Plantar fasciitis may occur after a specific event.  The plantar fascia could be over stretched due to a slip.  It could occur after an overzealous training day in unfamiliar circumstances, such as running barefoot in the sand.

Fortunately, plantar fasciitis doesn’t always require formal medical treatment.  The key is to intervene quickly to identify the actual cause or causes that led to the inflammation and irritation.  The recommended treatment is the same whether or not the plantar fasciitis developed over time or due to a specific event.

How to Self-Treat Plantar Fasciitis:

  • Begin your rehabilitation. Start with these Plantar Fasciitis Rehabilitation Exercises. Complete with instructions and photos, this guide outlines how to safely self-treat your plantar fasciitis. Stretch your calves as tight Achilles tendons and calf muscles can cause excessive strain on the plantar fascia, which increases your risk of pain. Stretch your plantar fascia by performing stretches prior to standing or walking upon morning waking and after any prolonged sitting.
  • Mobilize the tissue. Depending on how aggressive you want to be, a tennis ball, lacrosse ball, or golf ball can be used to mobilize the tissue. I recommend mobilizing once or twice per day for 2-3 minutes. Then perform additional stretching of the plantar fascia and calves.
  • Use ice. My favorite technique for icing this area is to use a frozen water bottle. Roll your foot over the bottle for 3-4 minutes until your foot starts to feel numb and the pain subsides. It’s possible to frost bite your foot, so be mindful of the length of time you’re icing.
  • Strengthen your foot and ankle complex. Weakness in the foot and ankle muscles (as well as the smaller foot intrinsic muscles) can lead to excessive strain on the plantar fasciitis. I recommend initiating a complete ankle/foot strengthening protocol. Please refer to Ankle Resistance Exercises.
  • Improve your balance. Poor balance is often associated with muscle weakness in the foot and ankle as well as the knee and hip musculature. Weakness and balance deficits can lead to poor foot mechanics, which can lead to excessive strain on the plantar fascia. Improving your balance can help reduce the risk of plantar fasciitis and is an important part of the rehabilitation. Please refer to Improving Balance by Using a Water Noodle.
  • Start a supplement. I am a supporter of natural supplements and remedies. Many supplements include herbs which are designed to help reduce inflammation. Phenocane Natural Pain Management combines the following: Curcumin, an herb that reduces pain and inflammation; boswellia, a natural COX2 inhibitor that also reduces pain and inflammation; DLPA, an amino acid that helps to increase and uphold serotonin levels in the brain; and nattokinase, an enzyme that assists with blood clotting and reduces pain and inflammation. If you are taking blood thinner medication, please consult with your physician prior to taking Phenocane Natural Pain Management.
  • Use a plantar fasciitis night splint. Although a little cumbersome and annoying, night splints can be helpful. While lying, the natural tendency is to flex the foot to point your toes (plantarflex). This position causes the plantar fascia to shorten and tighten, which explains the pain you might experience during the first few steps after sleeping or resting. The night splint helps you to heal by maintaining a neutral position which doesn’t allow the fibers to shorten.

While you’re self-treating your plantar fasciitis, you’ll likely need to modify your exercise or running program.  It’s an excellent time to focus on cross training activities.  I recommend following this protocol for two to three weeks.

If you’re not experiencing significant relief upon progressing into your exercise program, please consult a medical professional.  I recommend a physical therapist who specializes in feet or who works with athletes for the treatment of plantar fasciitis.  The American Physical Therapy Association offers a wonderful resource to help find a physical therapist in your area.

Has a specific treatment for plantar fasciitis helped you? Which treatments haven’t worked for you?   Additional discussion can help others to manage this condition more effectively.  Please leave your comments below.

Looking for that exercise or book I mentioned in a post?  Forgot the name of a product or supplement that you’re interested in?  It’s all listed in the new Resource Guide.  Check it out today!

If you have a question that you would like featured in an upcoming blog post, please comment below or submit your question to contact@thePhysicalTherapyAdvisor.com. Be sure to join our growing community on Facebook by liking The Physical Therapy Advisor!

Q & A: 7 Tips to Get Rid of Knee Pain

Q.  Over the last month or so, I have had a pain in the back of my knee. My knee feels really stiff when I sit cross-legged or try to squat.  What should I do? –Sam

A.  Great question, Sam! The symptoms you are describing sound like the pain may be coming from your meniscus.  The meniscus is the cushion found between the two major leg bones, the femur and the tibia.  It is made of a cartilaginous substance.  Many times, the meniscal cartilage can be torn.  It would be similar to getting a hang nail near your cuticle.  A tear occurs when the cartilage rises up and causes pain, a feeling of knee instability, and/or locking up of the knee.  Other times, the cartilage can become frayed like an old rope.  This fraying can cause pain and stiffness, particularly pain behind the knee in an area known as the popliteal space.

The good news is that most meniscal related injuries don’t require surgery. Research suggests that the proper physical therapy program can be superior to surgical intervention with long term outcomes. There are times when surgery will be indicated, but physical therapy is typically indicated as an initial course of action.  (Particularly, when there are no episodes of knee locking occurring.)

Wall Squat

The following 7 tips will help you to rehabilitate your knee.  If symptoms worsen, then additional assessment and follow up is likely needed.  I would anticipate an improvement of your symptoms in a few of weeks or less when initiating this program.  (Depending on the severity, it could take longer for a full recovery.)  If the pain continues, please seek additional assistance from a qualified physical therapist or physician.

1.  Warm up prior to exercise.  I recommend that you increase your normal warm up time by at least 10 minutes in order to increase blood flow to the area. This allows for better mobility and also promotes healing as movement is necessary to bring in the nutrients.  Use a stationary bike or the rower machine initially to get the muscles warm and the knee joint more lubricated.  Then work on moving into a deep squat position multiple times as part of the warm up.  You may need to hang onto a beam or a pole to take some pressure off of your knee as you move in and out of the squat.

Deep Squat Position

2.  If it hurts, don’t do it!  Modify the activity or discontinue it completely.  If your knee is hurting when performing a squat, then initially don’t move as deep into the exercise.  This would also be true for a lunge position or step up.  Modify any exercise as you need to, and don’t compromise technique to complete an exercise.  Poor technique will only increase your risk of injury elsewhere.

3.  Work on strengthening.  The primary goal of a strengthening program is to work on quadriceps and glut medius (hip abduction) strengthening.  Weight lifting is an appropriate choice, but you may have to initially limit your range of motion (ROM).  Most of my clients begin on a non-weight bearing program, then progress to partial weight bearing, and eventually, full weight bearing.  The more severe the symptoms, the longer it will take for an individual to progress to more difficult exercises.

To initiate a physical therapy program, please refer to Meniscus Rehab Exercises.  This exercise guide is designed to address the muscles that I find are weakest in most individuals.  The exercises are listed from easiest to most challenging and are designed to primarily improve quadriceps and hip strengthening.  Start with exercises like a straight leg raise (possibly with an ankle weight) and bridging (either one or both legs).  Wall squats holding for time also works well.  A Thera-Band Exercise Band can be tied around the thighs above your knees to make your hips more engaged.

Weight training exercises (with machine weights or free weights) should be geared toward general leg strengthening and may include: squats; leg press; hip abduction machine; step ups; dead lifts; and straight leg dead lifts. If further instruction is needed, search YouTube to watch the proper technique for a specific exercise.

The speed at which exercise is performed while in group exercise classes is typically too fast for an individual who is properly and safely exercising his/her knee during a rehab and recovery phase.  You can still participate in group exercise classes or CrossFit WODs (Work out of the Day), but your specific knee program should be separate from any group structured activity.  You need time to insure proper technique.

4.  Cool down. After performing your exercises, take extra time to cool down and stretch. Use either a stationary bike (at a causal/slower pace) or the rower machine.  Both are reduced weight bearing exercises that promote movement and circulation to the knee as well as increasing range of motion (ROM).

5.  Improve your Range of Motion (ROM).  The goal of the rehabilitation program is to regain full pain free ROM.  This can be accomplished many ways.  Perform heel slides by lying on your back and sliding your heel toward your buttocks.  Consider using a pole to assist in performing deeps squats.  Hang onto a pole or a door frame, and bring your heel toward your buttocks as you perform a quadriceps stretch.  These exercises can be performed within a mild to moderate amount of discomfort in order to regain full pain free ROM.  If you experience muscle tightness and soreness, I recommend using a foam roller to assist with any myofascial symptoms.  To learn how to use a foam roller, please refer to Foam Rolling for Rehabilitation.

6.  Drink more water.  Cartilage tends to have a poor blood supply.  The more water you drink, the more hydrated your body becomes.  This can help the body to deliver much needed hydration and nutrients to the meniscus.

7.  Add a joint supplement. CapraFlex is my preferred supplement for meniscal related injuries. I have recommended this supplement for years as my clients have had successful outcomes with use.  I have taken it to help prevent injury as I entered a particularly intense period of training as I prepared for a marathon.  It has also assisted in recovery from my many injuries.  Essentially, it combines an organic glucosamine and chondroitin supplement with other natural herbs which are designed to reduce inflammation.  CapraFlex can be taken long term or intermittently to help heal from an injury.  I recommend that you try it for 30 days to see if it improves your knee pain.  (If you are taking blood thinners, please consult with your physician prior to use as the herbs could interact with some medications.)

Thank you, Sam, for your question. I hope these 7 tips will help you to rehabilitate your knee and recover quickly!  If the pain continues, please seek additional assistance from a qualified physical therapist or physician.

Which treatments for knee pain are the most effective for you? Please share any recommendations that you may have by leaving your comments below.

If you have a question that you would like featured in an upcoming blog post, please comment below or submit your question to contact@thePhysicalTherapyAdvisor.com. Be sure to join our growing community on Facebook by liking The Physical Therapy Advisor!

Disclaimer:  The Physical Therapy Advisor blog is for general informational purposes only and does not constitute the practice of medicine or other professional health care services, including the giving of medical advice. No health care provider/patient relationship is formed.  The use of information on this blog or materials linked from this blog is at your own risk.  The content of this blog is not intended to be a substitute for professional medical advice, diagnosis, or treatment.  Do not disregard, or delay in obtaining, medical advice for any medical condition you may have.  Please seek the assistance of your health care professionals for any such conditions.

Q & A: Vertigo – Causes & Treatment

Q.  Hi, Ben! Yesterday I had another experience with vertigo.  I visited a doctor last year, and we are using a nasal spray to help make my Eustachian tubes more pliable to help pressurize when I go skiing.  I thought it was to help alleviate my vertigo issue as well.  This seems to happen a couple times a year, and it’s very debilitating.  The last two times, I’ve done the Epley maneuver, and I’ve been able to go about my day within six hours versus the normal all day in bed affair.  I’m not sure if it’s the factor that is helping.  I’m wondering if there is something else I can do to prevent this occurrence. –Amy

A.  Thanks, Amy, for your question! Vertigo is often a term used to describe many different sensations including the feeling of being dizzy, nauseous, swimmy, or lightheaded. Vertigo is a false sensation that your surroundings are moving or spinning. It can be horribly debilitating and can last from seconds to minutes to days. Although there are many potential causes of vertigo, three of the most common forms include:

  • Benign paroxysmal positional vertigo (BPPV) – BPPV can occur for many reasons. The condition is characterized by its sudden onset. This occurs when the tiny crystals that are present in your inner ear get loose and float around in the fluid in your inner ear without becoming reabsorbed correctly. In my clinical experience, I have seen this occur many times after a fall or bump on the head or from tossing and turning while sleeping. Most cases are idiopathic–meaning from an unknown cause.
  • Vestibular neuronitis – Vestibular neuronitis may be described as acute, sustained dysfunction of the peripheral vestibular system with nausea, vomiting, and vertigo. This disorder is characterized by a sudden severe attack of vertigo, caused by inflammation of the nerve to the semicircular canals (part of the vestibular system, which helps control balance).  Although it’s not entirely clear, vestibular neuronitis is likely caused by a virus. Hearing is usually not affected.
  • Meniere’s disease – Meniere’s disease is a disorder of the inner ear that not only causes vertigo, but it’s also associated with intermittent bouts of hearing loss. This chronic condition can include permanent hearing loss; ringing in the ear (tinnitus); and fullness and pressure in the ear. This disease is most commonly diagnosed in people in the 40s to 50s age range.

ManDizzinessHeadPain

When first experiencing symptoms of dizziness, it’s always wise to check with your medical doctor. If you’re suffering from vertigo, I recommend that you at least try the Epley maneuver that Amy mentioned above. It’s very simple to perform and can produce immediate results. Many YouTube videos demonstrate how to correctly perform the Epley maneuver. I recommend the following: Epley Maneuver to Treat BPPV Vertigo and Epley Maneuver: How to Perform.

If the Epley maneuver doesn’t eliminate your symptoms, then additional medical consultation will likely be needed. Your medical professional may administer the Dix-Hallpike, the associated test to be performed prior to the Epley maneuver, to determine if BPPV is present and potentially treatable.

Amy, it sounds like the Epley maneuver has been somewhat beneficial in reducing the time it takes you to feel functional again. If you’re experiencing vertigo on a regular basis, you may consider other potential causes or aggravating factors which may lead to your episodes.  If you don’t have a definitive diagnosis for the cause of the vertigo or dizziness symptoms, consider the following:

  • Cervical (Neck) Dysfunction or Derangements – Skeletal muscle spasms or cervical vertebral dysfunctions associated with the upper neck, particularly along the C2/C3 (upper cervical) region, can cause dizziness symptoms.
  • Dehydration – Dehydration can result from excessive alcohol, caffeine use, poor fluid intake, and other medications, including diuretic use.
  • Electrolyte Imbalances – Any type of electrolyte imbalance that affects the normal sodium, potassium, and calcium levels of the body can cause dizziness related symptoms.
  • Hypoglycemia – Low blood sugar is usually associated with diabetes, but anyone can experience the symptoms (which include dizziness and lightheadedness) as well as gait ataxia, slurred speech, or declining cognitive function.
  • Medication Side Effects – Dizziness is a potential side effect of many commonly used over-the-counter and prescription medications. Even if you have been taking a particular medication for a long time, you can still develop a side effect. Please consult with your medical physician and/or pharmacist if you suspect a medication issue.
  • Migraine Headaches – This type of headache can also be associated with vertigo and dizziness.
  • Orthostatic Hypotension – This condition occurs when your blood pressure doesn’t regulate fast enough upon standing or sitting up, and it’s associated with dizziness. Please see your medical physician for treatment.
  • Other Medical Conditions – Stroke, known as a cerebral vascular accident (CVA); Transient Ischemic Attack (TIA); Multiple Sclerosis; and Cerebellar Hemorrhages (brain tumors) can all cause associated vertigo or dizziness symptoms. You should be screened as necessary by your physician.
  • Recent Trauma – Any trauma that affects the head or neck area could lead to vertigo. If you experience symptoms after an associated trauma, please seek competent medical advice.
  • Sinus Infections – Sinus infections can cause excessive pressure to build up in the ear canal. This includes symptoms of the common cold and allergies as well. Any fluid buildup in the ear canals (whether or not associated with an infection or Eustachian tube related issues) can lead to dizziness symptoms.
  • Tooth Infections – Tooth or gum infections can affect the sinus canals in both the head and face area and can lead to dizziness symptoms.
  • Vertebro-basilar Insufficiency – When the vertebral artery (a critical artery to supply blood to the brain) isn’t supplying adequate amounts of blood, dizziness or a lightheaded feeling can occur. This insufficiency can be due to atherosclerosis, plaque buildup in the arteries which causes hardening and narrowing. This should be diagnosed and addressed by your physician.

Although this list of potential causes or aggravating factors isn’t conclusive, it demonstrates how complex it can be to treat dizziness and vertigo. The good news is that most of the time, the symptoms resolve rather quickly. In cases of BPPV (when the proper treatment technique is performed), the resolution of symptoms can be almost immediate. If your symptoms persist and can’t be definitely attributed to a particular diagnosis, then I strongly suggest that you seek a specialist who treats dizziness and vestibular related issues.

Thanks, Amy, for the question, and I hope you find relief from your vertigo episodes. It’s best to continually challenge your vestibular system by remaining active, and in particular, moving your head more.  For more information on dizziness and vertigo, please refer to How Do I Improve Balance? (Part I), and also consider trying the Vestibular Ocular Reflex (VOR) exercise described in How Do I Improve Balance? (Part II).

Do you know which factors might trigger your vertigo? Have you discovered a way to successfully treat your vertigo?  Additional discussion can help others to manage his/her vertigo.  Please leave your comments below.

If you have a question that you would like featured in an upcoming blog post, please comment below or submit your question to contact@thePhysicalTherapyAdvisor.com. Be sure to join our growing community on Facebook by liking The Physical Therapy Advisor!

How to Safely Self-Treat Low Back Pain

Did you know that an estimated $50 billion dollars is spent annually on back pain related issues?   Low back pain (LBP) is one of the most prevalent medical conditions treated in the United States and throughout the western world.  It affects nearly 80% of the U.S. population at one time or another.  It’s one of the top reasons for physician visits and one of the most common reasons for missed work days.  The previous post, 12 Sure Fire Ways to Injure Your Back, addressed potential risk factors for low back pain. This follow-up post includes how to safely self-treat your low back pain and helpful methods for a speedy recovery. (Not to mention, possibly saving you time and money by avoiding a physician visit for minor pain!)

To safely self-treat your low back pain, first take a moment to assess your symptoms and pain level. What led to your pain and/or injury?  Did the pain come on suddenly or slowly?  Evaluate the severity of the injury. If you’re experiencing any of the following, please seek immediate medical attention:

  • Loss of bowel/bladder function.
  • Uncontrollable pain. The pain is so severe you cannot function or move.
  • You are losing muscle function or control. The muscles in the legs will no longer work. (This is different than pain preventing the muscle from working.) This sensation of paralysis occurs when the muscles will not actually function.
  • Significant loss of sensation in the leg or groin area. This is not a tingling sensation, but an actual loss of sensation. For example, you cannot feel the toilet paper when you wipe after using the toilet.
  • Onset of pain without any known mechanism for the injury. (Thoroughly consider your activity. Many times, a slow onset of pain begins several hours after performing an activity.)

Fortunately, most LBP is mechanical–meaning it is from a physical or structural cause and isn’t related to conditions such as cancer or infections. Most LBP will have a directional preference for extension.  A majority of injuries occur when performing a forward biased (flexed movement) like chronic slouching or a spinal flexion biased movement.  For discussion purposes, I will be addressing an extension biased program.

You should be able to alter and change your LBP within a short period of time. First, establish a directional preference by identifying a pattern to the pain.   Does the pain get worse when you bend over or does it improve?  What happens when you repeat this movement?  Determine how your pain responds.  If it spreads away from the spine and down into the leg, beware that you are moving in the wrong direction.  Stop that particular movement, and instead try flexion biased movements.  In my experience, most episodes of LBP tend to respond better to extension biased movements.  If flexion or extension doesn’t help or change the pain in any way, then you may need assistance from a medical provider.

The rule of thumb for movement: If the pain worsens by spreading peripherally down the buttock and into the leg and/or foot, then the condition is worsening. We must stop that activity.  If the pain centralizes and returns back toward the spine (even if the pain worsens slightly), then keep moving as the condition is actually improving.  For a thorough discussion and an excellent treatment resource, please refer to Treat Your Own Back by Robin A. McKenzie.

Although most LBP isn’t considered serious, the pain tends to re-occur. One major reason for this is that the deep stabilizing muscles known as the multifidus muscles reflexively shrink, weaken, and lose function. Without proper rehabilitation, the muscles will not fully recover.  This increases the risk of future episodes because the spine no longer has the ability to stabilize itself normally.

How to Safely Self-Treat Low Back Pain:

  • Perform Press-ups – Once you have injured your back, immediately start press-ups. Perform this exercise with high repetitions and frequently throughout the day as long as the pain does not periperalize down the buttock and into the leg and/or foot. Lie on your stomach and perform 10-20 press-ups. Move slow and easy, but work your way up to full motion multiple times a day.

PressUps

  • Perform Standing Back Extensions – After sitting, stand up and perform standing back extensions. Ideally, perform this exercise at least 10 repetitions each time you stand.

StandingBackExtensions

  • Activate the Multifidus – Start exercises to activate the multifidus muscles as soon as possible. Think spine extensor muscle activation. Again, perform this exercise frequently during the day after the initial injury. The Lumbar Extensor Exercises are designed to progressively activate the multifidus muscles (with the final exercise being the most challenging). Once the pain subsides and muscle function improves, more advanced lumbar extension strengthening and stabilizing exercises should be performed to decrease your risk of re-current low back pain.
  • Don’t Sit – Walking is critical to your recovery! It’s the number one way your spine receives nutrients and disposes of metabolic waste products. Walk frequently, and try to avoid any prolonged sitting.
  • If you Sit, Use Good Posture – Use a McKenzie Lumbar Roll to help insure a good lumbar curve. If you can’t sit comfortably, listen to your body and don’t sit! Be sure to stand up and walk every 20-30 minutes. Make sure you stand with good posture as well.
  • Stretch the Muscles of the Legs and Pelvis – Hamstring, Hip Flexor, and Piriformis Stretches for LBP help to reduce muscle spasms and tightness throughout pelvis area when performed daily. Stretch for at least 30 seconds at a time, 2-3 times each session.
  • Reduce Inflammation and Support the Healing Response – I recommend starting a thirty day course of CapraFlex by Mt. Capra.  CapraFlex is an organic glucosamine and chondroitin supplement which also includes an herbal and spice formulation designed to naturally decrease inflammation and support healing.  I recommend it to anyone recovering from an injury or attempting to prevent injury when performing at a very high level. I personally use it, and in my practice, it has helped clients recover faster and prevent injury. It can interfere with some blood thinning medication, so if you are on this type of medication, please check with your physician.
  • Ice as Needed for Pain – The rule for icing is to apply ice no more than twenty minutes per hour. Do not place the ice directly against the skin, especially if you are using a gel pack style. Individuals with poor circulation or impaired sensation should take particular care when icing.
  • Use Topical Analgesics for Pain – There are many topical agents which can be used for pain. My two favorites to help manage pain and stiffness are Arnica Montana (an herbal rub) and Biofreeze.
  • Be as Active as You Can – Don’t stop moving! It’s important that you remain as active as you can. You should taper certain activities that you know will increase your pain. This typically would be activities involving heavy loading of the spine such as squats with weight, deadlifts, and other activities that may cause forward flexion (particularly under a load). As you are able to, continue to work on cardiovascular conditioning and core muscle activation, particularly the lumbar extension exercises. Remember the concept of peripheralization and centralization. If your pain progresses from the area of the injury into your leg, then you need to stop that activity. If the pain remains constant or is progressing out of the leg, then continue with the activity as you are helping the body to heal.
  • Ask for Help – Yes, even physical therapists have to ask for help sometimes! Many useful manual techniques can help to manage LBP. You just can’t perform them on yourself. If your pain is not improving, I highly suggest seeking a qualified and competent physical therapist who works with clients suffering from LBP. The American Physical Therapy Association offers a wonderful resource to help find a physical therapist in your area. In most states, you can seek physical therapy advice without a medical doctor’s referral (although it may be a good idea to seek your physician’s opinion as well).

Low back pain is a serious and debilitating condition. It will either most certainly affect you or someone close to you.  Be pro-active in maintaining a healthy back by incorporating these helpful methods for a speedy recovery.  Don’t let LBP affect your ability to stay active and keep enjoying your favorite activities!

AVAILABLE NOW ON AMAZON!

In my book, Treating Low Back Pain during Exercise and Athletics, you will learn how to address specific causes of LBP as well as the best practices on how to prevent and self-treat when you experience an episode of LBP. In this step-by-step LBP rehabilitation guide (complete with photos and detailed exercise descriptions), you will discover how to implement prevention and rehabilitation strategies to eliminate pain and get back to training and exercise sooner.

Learn how to prevent, self-treat, and manage LBP so you can get back to your daily life and exercise goals more quickly without additional unnecessary and costly medical bills!

BUY NOW

12 Sure Fire Ways to Injure Your Back

You caught me red-handed! A physical therapist with a lapse in judgment which lead to an injury that I could have avoided had I followed my own advice.  During an early morning workout, I recently tweaked my low back.  I’m guilty of being exhausted, using poor technique, and not taking a rest day.  Sound familiar?

LowBackPain

In the following days (as I was forced to rest although I would rather have been at the gym), I drafted a rather cheeky list of risk factors and how to maintain a healthy back.

12 Sure Fire Ways to Injure Your Back:

  1. Start Smoking – Smoking is a major risk factor for low back pain (LBP). The chemicals in cigarette smoke affect both the lunges’ ability to exchange oxygen and the body’s normal healing response. These chemicals alter the blood supply to the discs and other spinal structures which affects nutrient exchange and increases the risk of pain. Healing time for all medical conditions worsen with smoking.
  2. Be Male – Males have a higher risk of LBP. Females tend to experience more cervical or neck pain. (Obviously, you have very little control over this factor other than the knowledge that you’re at an increased risk if you are a male.)
  3. Choose Parents Who have Experienced LBP – A family history of low back pain increases your risk. In some cases, this may be due to actual structural deformities which may be genetically linked. More commonly, it’s a learned behavior, such as chronic sitting and slouching (poor posture), that can lead to a higher risk of LBP.
  4. Prior Episodes of LBP – Once you have experienced LBP, you are more likely to have re-current episodes. This is partially due to weakness in the deep multifidus muscles that help support the spine and prevent shearing forces. This weakness can be addressed with proper physical therapy intervention.
  5. Have a Baby – Pregnancy increases your risk for LBP due to structural changes as the baby develops and hormones change. The expectant mother releases relaxin, a hormone which loosens the whole body, to prepare for the baby’s delivery. Again, a risk worth taking! Most women can manage the pain by modifying posture and movements while learning techniques for self-management.
  6. Don’t Exercise – A sedentary lifestyle will increase your risk for LBP. The spine is designed to work and move. In order for the spine to remain healthy, it requires exercise and movement.
  7. Sit for more than 2 Hours a Day – Sitting for a long period of time not only affects your general health status in a negative way, but it also increases your risk for LBP. To increase your risk further, be a heavy equipment operator who sits on a vibrating surface! Please refer to The #1 Way to Extend Your Life Span for the reasons why sitting has such a negative effect on your body.
  8. Practice Poor Posture – In western culture, we spend most of our day sitting slouched or standing hunched over. This is an excellent way to increase your risk for LBP. It’s one of the major risk factors for disc herniation and development of spinal stenosis. Please refer to How to Improve Posture & Eliminate Pain for exercises that can help you to develop better posture and strength to eliminate back pain.
  9. Don’t Warm Up Before Exercise – This is a common mistake which can lead to injury. Jump out of your bed in the morning without warming up, and then start your exercise routine. (Please don’t!) Instead, prepare your body for challenging activities in order to avoid injury. A warm up should consist of a cardiovascular component and a dynamic stretching routine of the actual exercises you will be performing to insure you’re ready for the movement. This is also pertinent for weightlifting and running.
  10. Keep Moving even when Exhausted – This is a common problem among CrossFitters (including myself). Just keep pushing yourself even when you can’t see straight. Typically, this results in poor technique which further increases your risk. Combine poor technique with muscles which can no longer perform the proper movement pattern, and you are likely to become injured. High Intensity Training (HIT) is a wonderful form of exercise and has many health benefits as long as you’re able to properly perform the exercise.
  11. Use Poor Technique – Poor technique, along with feeling exhausted, often occurs when performing exercises that are too advanced. Performing unfamiliar lifting techniques or lifting too much weight will likely result in poor technique. Please see your coach, athletic trainer, or physical therapist for the proper technique for your activity of choice.
  12. Keep the Training Volume High – Who needs a rest day? All of us can benefit from taking a break. Training every day without regard to rest is an excellent way to cause over training syndrome and injury.

Low back pain is a serious and debilitating condition. It will either most certainly affect you or someone close to you. Be mindful of your risk factors and be pro-active in maintaining a healthy back!  Don’t let LBP affect your ability to stay active and keep enjoying your favorite activities!

AVAILABLE NOW ON AMAZON!

In my book, Treating Low Back Pain during Exercise and Athletics, you will learn how to address specific causes of LBP as well as the best practices on how to prevent and self-treat when you experience an episode of LBP. In this step-by-step LBP rehabilitation guide (complete with photos and detailed exercise descriptions), you will discover how to implement prevention and rehabilitation strategies to eliminate pain and get back to training and exercise sooner.

Learn how to prevent, self-treat, and manage LBP so you can get back to your daily life and exercise goals more quickly without additional unnecessary and costly medical bills!

BUY NOW

Q & A: Can CrossFit Cause Elbow Pain?

Q.  A lot of CrossFitters, including myself, seem to have tendinitis of the elbow or other achy elbow issues. Do you know why that is?  What exercises are we doing to cause it?  What therapy would you recommend to help the pain?  I appreciate you and love this blog that you are doing!  I always look forward to reading it! -Stephanie

A.  Thanks, Stephanie, for the great question! I have worked with quite a few CrossFitters who have experienced elbow pain.  I have treated people new to the sport and those who participate at a high level.  Elbow pain can be debilitating by limiting your ability to exercise and perform daily tasks.  I will address potential causes and how to alleviate elbow pain associated with exercise. (Note: You don’t have to be a CrossFitter to benefit from this information.)

CrossFit_ElbowExercise_6x4

Possible reasons for developing elbow pain include:

  • Poor grip strength.
  • Muscle imbalances between wrist flexion and extension strength.
  • Improper lifting technique (which is the primary problem for the newer participant).
  • The progression of training is too quick (which again tends to be an issue for the newer participant).
  • Mobility related issues in the wrist, shoulder, or thoracic spine. (Poor mobility can affect both those who are new to the sport as well as CrossFit veterans.)
  • Excessive mobility or hypermobility may also be an issue. It tends to be more common in females than in males and is usually associated with the shoulders or elbows.

Poor technique is a frequent complaint in regard to safely performing CrossFit. Many people believe that there isn’t enough emphasis placed on proper lifting technique or specific CrossFit exercise techniques (particularly with the new participant).  Some complain that the emphasis is on speed, not form, during WODs (Workout of the Day).  This may be true in some Boxes (gyms/clubs), and it’s a valid concern.

Please be honest with yourself when you start a new activity. This is especially important if you’re starting very high intensity activities with very specific movements which require a high degree of skill to perform such as CrossFit.  Beginners to CrossFit should spend the necessary time to learn the proper technique.  With any new activity, there is always a learning curve.  It’s the responsibility of the coach and the client to insure proper form.

The power clean is an example of a common movement in CrossFit and Olympic Weightlifting. This exercise can cause elbow pain when performed incorrectly.  One reason for elbow pain to develop during this movement is that the bar is reversed curled.  It causes excessive strain on the wrist extensor muscles instead of the participant exploding the bar upward, and then dipping underneath. There shouldn’t be a reverse curl movement to this lift. I witness it fairly often as a common mistake.  If you’re experiencing aches and pain in your elbow or elsewhere, please see your coach or athletic trainer to insure that your lifting technique is correct.

Poor wrist, shoulder, or thoracic mobility is also commonly related to elbow pain associated with exercise. If the wrist cannot extend properly, it not only causes wrist pain, but excessive stretching of the forearm muscles and strain on the elbows (possibly leading to pain).

Poor shoulder or thoracic spine mobility can also cause excessive strain on the elbow. Consider exercises like the overhead lift or pull ups.  If the shoulder cannot fully flex or the thoracic cannot fully extend (allowing proper shoulder flexion), then the elbows will absorb more of the load.  The lack of shoulder or thoracic mobility also affects proper alignment of the upper extremity during the movement.  Over time and with multiple repetitions, this overloading can cause pain and injury to the elbow.

Whenever one part of the body doesn’t have adequate mobility, another part will do more to allow for the movement to take place. When an exercise is performed at a high speed, high relative weight, or high repetitions, a lack of mobility can make you more susceptible to pain and injury.

Excessive mobility can have a similar effect. For example, if you’re performing an overhead lift, but your shoulders flex past 180 degrees, then the bar is too far behind your head.  This causes excessive force to be placed on the shoulders and elbows.  Again, this can lead to injury and pain when performed at a high speed, high relative weight, or high repetitions.

Top 7 Recommendations to alleviate Elbow Pain associated with Exercise:

  1. Work on your Grip Strength. Practice bar hangs for time. Carry barbell plates (one in each hand) to challenge the grip strength. Don’t just work on wrist flexion or gripping exercises, but also work on wrist extension to improve grip strength and decrease your risk of lateral elbow pain. Use an exercise band (as shown below) to perform 2-3 sets of 20 repetitions. Extend the wrist up, and then slowly back down toward the floor. Be sure to move very slowly during the eccentric/muscle lengthening position (when your hand returns to the floor). IMG_5215_GripStrengthExercise_RGB
  2. Identify the Offending Movement. If you’re experiencing elbow pain, try to identify which specific movement aggravates the elbow. Once you identify the movement, work with your coach or athletic trainer to insure proper lifting technique.
  3. Work on your Mobility. CrossFit is not just about metabolic conditioning or strength training. You need to develop all aspects of your fitness, and this includes your flexibility. Work on upper body mobility by focusing on shoulder and thoracic mobility as well as lower body and spinal mobility. A free resource for shoulder and thoracic mobility is My Top 8 Stretches to Eliminate Neck, Upper Back, and Shoulder Pain which you can automatically download when you subscribe to my e-mail list. You will receive each week’s blog post sent directly to your e-mail making it even easier and more convenient!
  4. Warm Up. Prior to activity, be sure to perform a cardiovascular warm up to insure that the muscles are ready to stretch and perform high level activities. Perform a dynamic warm up by taking the associated muscle (or muscles) needed for the workout through the anticipated and needed range of motion (ROM) in a quick and brisk manner. A foam roller can also be utilized as part of your warm up. For more instruction, please refer to Foam Rolling for Rehabilitation and Does Foam Rolling Help or Hurt Performance?
  5. Static Stretch and Self-Mobilization Post Work Out. Continue to work on the immobile areas through static stretching and/or self-mobilization. Again, a foam roller can also assist. If you prefer a very comprehensive guide for improving mobility, I recommend Kelly Starrett’s Becoming a Supple Leopard.
  6. Be Proactive. Once you start to feel pain, be aggressive with your management and self-treatment. I like to use either a tennis ball or roll PVC pipe over the forearm area, which can be an effective treatment for lateral epicondylitis (“tennis elbow”). For more ideas on how to self-mobilize, please refer to My Top 3 Household Items for Self Mobilization.
  7. Contact your Physical Therapist. If the pain persists, seek additional help. Don’t let the pain linger. The longer it’s left untreated, the more potential for harm and damage which potentially could lead to a longer recovery. The American Physical Therapy Association (APTA) is an excellent resource for learning more about physical therapy as well as locating a physical therapist in your area.

Elbow pain can be debilitating by limiting your ability to exercise and perform daily tasks. Be proactive in your care and management.  Most importantly, don’t let the pain linger. You can find more tips and strategies on managing pain and injury by simply using the search function (located on the upper right-hand sidebar).

What specifically causes your elbow pain? Which treatments have you found to be the most effective?  Additional discussion can help others to manage his/her pain.  Please leave your comments below.

If you have a question that you would like featured in an upcoming blog post, please comment below or submit your question to contact@thePhysicalTherapyAdvisor.com. Be sure to join our growing community on Facebook by liking The Physical Therapy Advisor!

How to Improve Posture & Eliminate Pain

Imagine how much the average person actually slouches during a day. One may slouch as she sits in a chair for breakfast, then she may hunch over the kitchen sink to wash dishes. She slouches while driving a car, then she slouches while sitting at work or at a school desk. She slouches while texting, watching TV, or using the computer. If she isn’t slouching, she’s bending over to clean or pick up children and/or pets. The list of slouching possibilities is endless!

Our bodies are designed to move both forward and backward. The problem is that we spend most of our times in a slouch, hunched over (flexed) position. Slouching is having a forward head and a rounded shoulders posture. It can also involve a posterior pelvic tilt which causes a reduction in the normal lumbar curve. This position tends to be even worse in people who are taller than average or in teenage girls and women (as many will slouch to modestly hide their chests). Over time, this constant flexed position causes excessive strain on posterior muscles, and it begins to overload the vertebral discs and ligaments which can lead to pain and injury.

PoorSittingPosture

Poor posture causes improper spinal positioning and affects the neck, shoulders, low back, mid back/thoracic, and ultimately, the entire body. This flexed (slouched) posture leads to postural muscle weakness which causes us to slouch more as well as predisposing us to injury. The lumbar spine is the most common area for injury (followed by the neck, mid back, and shoulders). Injuries can include: disc herniation, spinal degeneration, and shoulder impingements.

How to improve posture and eliminate pain? As simple as it sounds, first work on your posture!  Sit and stand up straight.  Initially, it may be difficult because the posterior chain, which includes the hamstrings, glutes, and back extensor muscles, is weak. Correcting your posture may actually cause some pain as the muscles will be utilized in a way that they aren’t used to. Persistence is crucial if you want to eliminate pain and decrease your risk of injury.  The following exercises can help you to develop better posture and strength to eliminate neck, shoulder, and back pain.

  • Increase Your Postural (Extensor) Muscle Strength – Refer to Prone Superman Exercises for instructions and photos of exercises that can be performed while lying on the floor or bed. The purpose of these exercises is to improve your back extensor strength, so it will be easier to maintain good posture. Move slowly and only raise the leg as far as you can without twisting.
  • Perform Foam Roller (Towel Roll) StretchesA foam roller is the best option, but you could substitute one by tightly rolling up a beach towel or by rolling a beach towel over a water noodle. Make sure to keep your knees bent and your head supported. Subscribe to my e-mail list to gain immediate access to My Top 8 Stretches to Eliminate Neck, Upper Back, and Shoulder Pain for step by step exercise instructions and photos.
  • Start Squatting – The squat is a critical exercise to maintain mobility and function as we age. It is also the most beneficial exercise to develop your posterior chain. Please refer to 7 Reasons Why the Squat is Fundamental to Life.

For a comprehensive look at pain management, I recommend Robin McKenzie’s Treat Your Own Back and Treat Your Own Neck. He offers very easy and practical advice on how to treat and manage back or neck pain.

What are some different ways to raise awareness of your posture? How can you incorporate them into your daily tasks?  Feel free to leave your comments below.

If you have additional questions or comments, please comment below or submit your question to contact@thePhysicalTherapyAdvisor.com. Be sure to join our growing community on Facebook by liking The Physical Therapy Advisor!

Treat Your Own Neck (Orthopedic Physical Therapy Products, 2011)

McKenzie is a pioneer in the field of physical therapy. He offers very easy and practical advice on how to treat and manage neck pain.  I recommend this book to anyone who has experienced neck pain or knows someone suffering from neck pain.

Backpacks = Back Pain?

Now that school is in full swing, a common complaint has arisen: the dreaded back pain! (This could be low to mid back pain, thoracic back pain, or cervical/neck pain.) Are backpacks to blame?  Excessive weight or improper wearing of the backpack could cause pain.  Research is still inconclusive, but it indicates that backpacks contribute to all kinds of back, neck, and shoulder pains.  For children, the real question is: Can permanent damage be avoided in the future by taking the correct action now?  My experience has shown me that injury (even in a young age) causes a higher propensity for injury, degeneration, and pain later in life.

StudentWithBackpack

Taking care of your back is an important habit to develop for all ages. Back pain is the number one cause of orthopaedic disability.  These simple tips for carrying backpacks can keep our spines healthy now and as we age.

Tips to Avoid Backpack Related Pain:

  • Use two straps instead of one. Keeping the load equal and symmetrical is important to avoid excessive rotational and compression forces which can cause undue stress and pain.
  • Use a backpack with wheels. If you have to carry heavy books or supplies, opt for a backpack on wheels. This eliminates carrying a load which is too heavy and could cause you grief.
  • Make sure the weight is appropriate for your child or yourself. If you’re a strong and fit person or an older teenager, a twenty pound backpack may not be an issue for you. However, if your child is in elementary school or has orthopaedic related issues, twenty pounds may be too much for your child’s body to reasonably handle.
  • Remember, loads and compression forces add up. Limit the amount of time you are wearing the backpack. Take it off unless you are actually walking or moving. If you’re standing to visit for a while, then take the backpack off.
  • Use larger shoulder straps and a waist strap. Properly fitting straps can help distribute the load more evenly.
  • Only carry what you have to. Many times, we carry more items than we really need to. Carry only what you need, and be efficient in the way you pack your backpack.
  • Go digital. Many books can now be found in a digital format. Consolidate your larger text books into a smaller, lighter digital book reader like a Nook, Kindle, or iPad.

If you are already experiencing low back pain, please review My Top 7 Tips to Prevent Low Back Pain When Traveling for helpful exercises. For a comprehensive look at back pain management, I recommend Robin McKenzie’s Treat Your Own Back.

If you are experiencing mid back or neck pain, sign up to receive my weekly blog posts via e-mail, and I will share with you My Top 8 Stretches to Eliminate Neck, Upper Back, and Shoulder Pain.

What are your tips and tricks to avoid overloading backpacks? Feel free to leave your comments below.

If you have additional questions or comments, please comment below or submit your question to contact@thePhysicalTherapyAdvisor.com. Be sure to join our growing community on Facebook by liking The Physical Therapy Advisor!