Q & A: Exercises Beneficial in Managing Rheumatoid Arthritis

Q.  I have rheumatoid arthritis in my hands, wrists, and elbows.  What type of exercise can I do to keep my upper body strength? Gloria

A.  Thanks for your question, Gloria, as it presents an opportunity to discuss a very devastating disease, Rheumatoid Arthritis (RA).  Your willingness and desire to maintain your upper body strength despite the disease is an encouragement to others who may be suffering as well.

Rheumatoid Arthritis (RA) is one of 171 different types of arthritis.  RA is most commonly diagnosed in women, with nearly three out of four cases involving women.  Over 46 million people in the United States alone suffer from one form of arthritis or another, and this number is climbing rapidly.  The most commonly recognized forms of arthritis are osteoarthritis and RA.  Osteoarthritis is most commonly associated with “wear and tear” syndromes (degeneration of the joint from excessive use or injury).  RA (known as an inflammatory arthritis) is an autoimmune disease in which the immune system works against normal body cells by attacking the joint surfaces and eventually, even the body organs.  As the condition progresses, joint surfaces become severely damaged–leading to deformities and dysfunction.

A person with RA should always be medically managed by a specialist in the disease.  Symptoms are typically quite severe and not only cause pain and deformities, but also excessive fatigue and loss of appetite.  RA can be found in only one joint or area, but it’s usually associated with many areas in combination, typically in a symmetrical pattern.  Eventually, it can affect the entire body including the internal organs.

In addition, it is important that you and your loved ones learn as much about the disease as possible.  There must be a multifactorial approach to managing the disease.  Consider the following:

  • Medical/Physician Management – This may include pharmacological management or surgical intervention, including total joint replacement.
  • Nutritional Management – Eat foods which promote a low inflammatory diet, including a diet high in Omega-3 fatty acids and other natural herbs (like garlic and turmeric) which can naturally lower inflammation.
  • Weight Management – It is important to manage your weight effectively. Excessive body weight can cause additional “wear and tear” (particularly on the lower extremities joints) and can worsen any damage caused by RA. Also, excessive weight can worsen RA symptoms or even cause osteoarthritis. If possible, you don’t want more than one form of arthritis if it can be avoided.
  • Activity Modification – As the disease progresses, it is important to understand how your body is functioning and then learn how to adapt to manage the disease. Unfortunately, certain activities and how you perform them will need to be modified or avoided. Learn to pace yourself and take more frequent rest breaks. Adequate night time sleep is also critical. Depending on the joints affected, learning to limit the use and strain on the joint is important. For example, if your knee is affected, then repeatedly going up and down stairs could cause a strain. You may choose to eliminate or minimize the frequency of that particular activity. Repetitive joint motion and in particular, repetitive joint loading and hyper loading, should be avoided and/or minimized. Learning to use adaptive devices to limit the strain placed on the body during activities will also be helpful.
  • Modalities – This is a broad category, but in general the application of heat, cold, or over-the-counter topical agents, such as Arnica Montana (an herbal rub) or Biofreeze, may help manage pain and stiffness. Gentle massage and TENS (Transcutaneous Electrical Nerve Stimulation, a form of electrical stimulation) may also be beneficial.
  • Splints – Many times, custom or over-the-counter splints (particularly for the upper extremities) can be utilized to provide support and comfort to joints which are in pain and/or suffering from deformity.

Image courtesy of Pond5Now that you have a clear understanding of RA and options available to manage the disease, I will specifically address Gloria’s question regarding exercise for the upper extremity and exercise in general.  Although the research for exercise for individuals with RA is far from complete, it indicates that a regular exercise and range-of-motion (ROM) program is a critical component to proper management of the disease.  (Make sure you are adequately rested before performing any exercise program.)  General guidelines for exercise include:

  • Strength Training – Strength training is encouraged, and the exercise program should be established by a professional who is familiar with managing RA. Excessive shearing forces and rotational forces and/or exercises should be avoided. Joints with severe involvement should be exercised with caution and an emphasis should be placed on ROM versus actual loading of the joint. All exercises should be performed in a slow and controlled environment within the available ROM. Maintaining muscle mass through strength training is critical and should be performed only one to two times per week to minimize any risk of over stressing the joint.
  • Endurance Training – Endurance training is critical for general health and should be included as part of a comprehensive exercise program for individuals with RA. Avoid cardiovascular exercise (running, jogging, skipping, jump roping, etc.) which produces high impact forces. Instead, focus on less impact activities such as bicycling, rowing, or water aerobics.
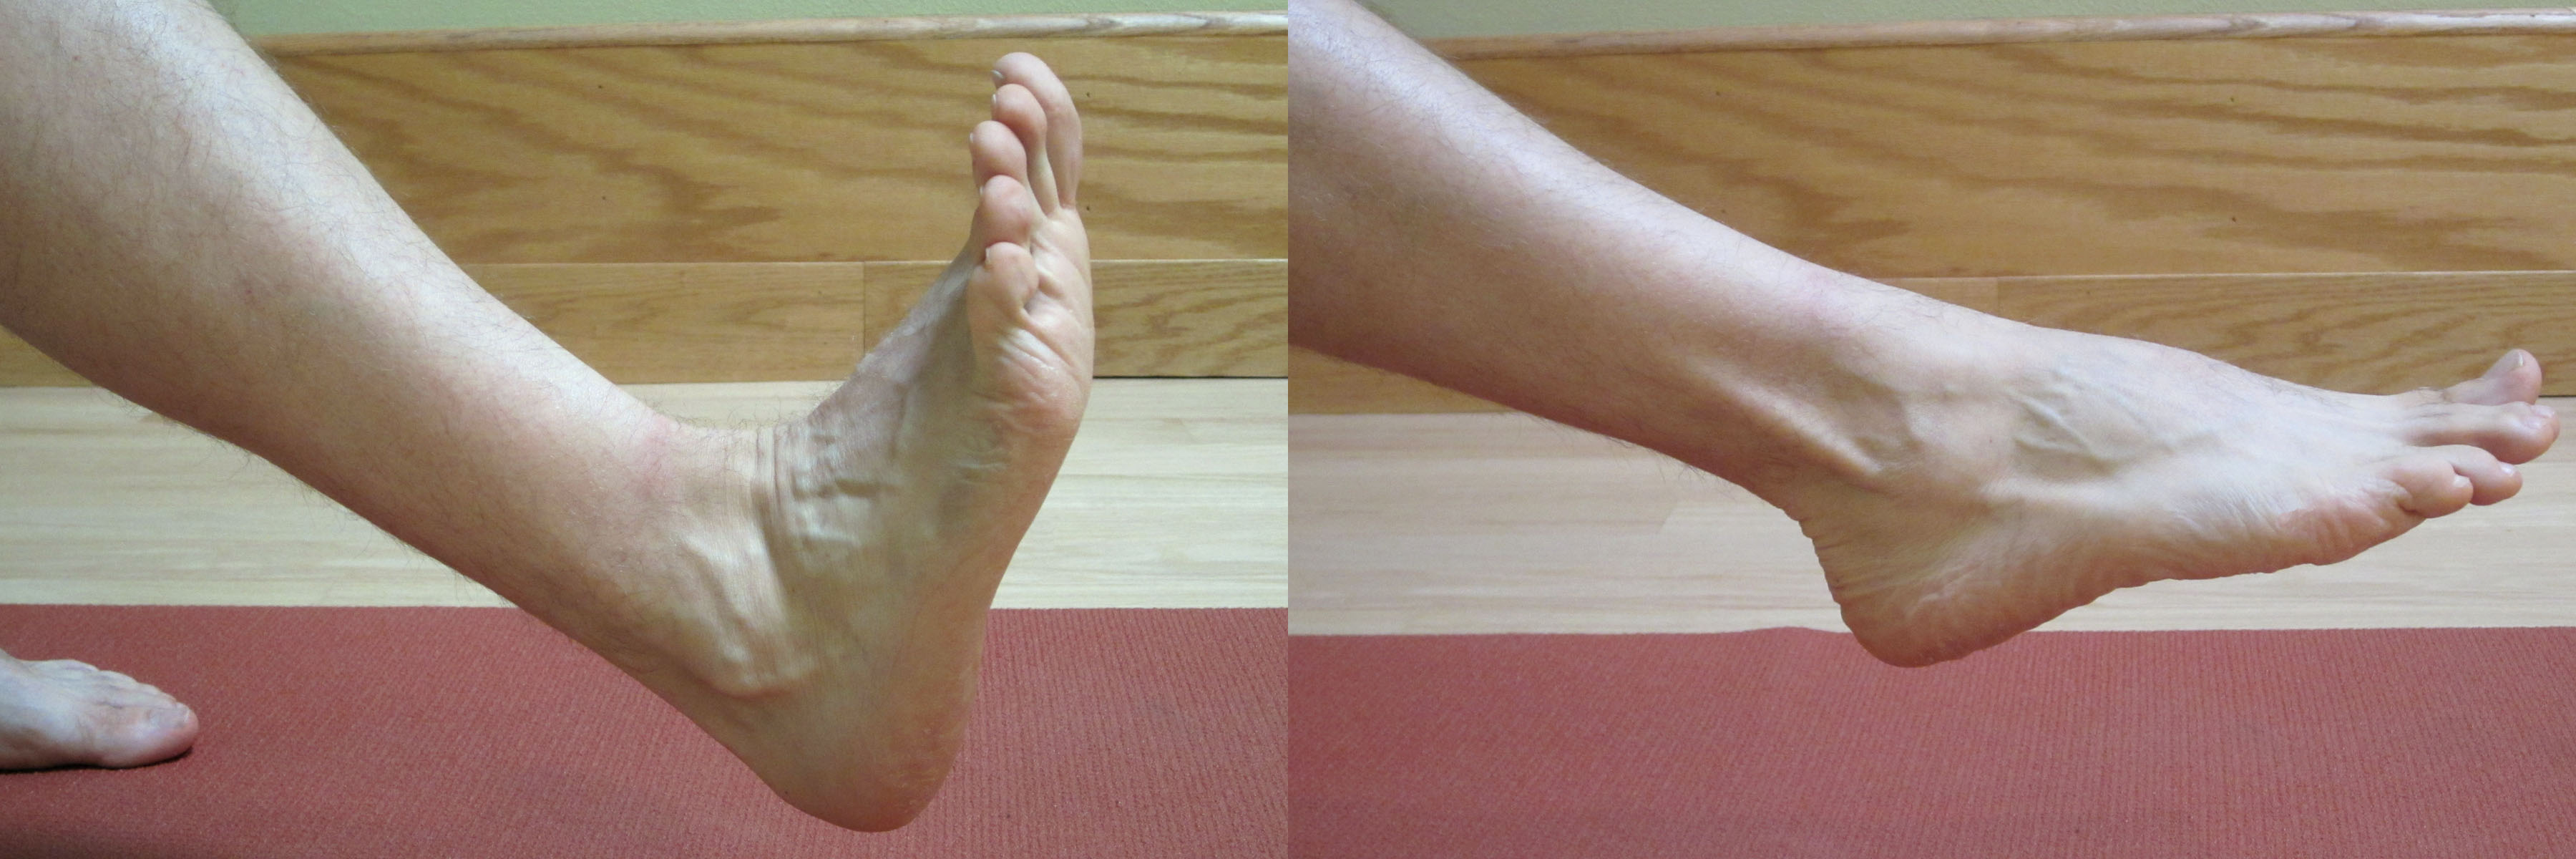
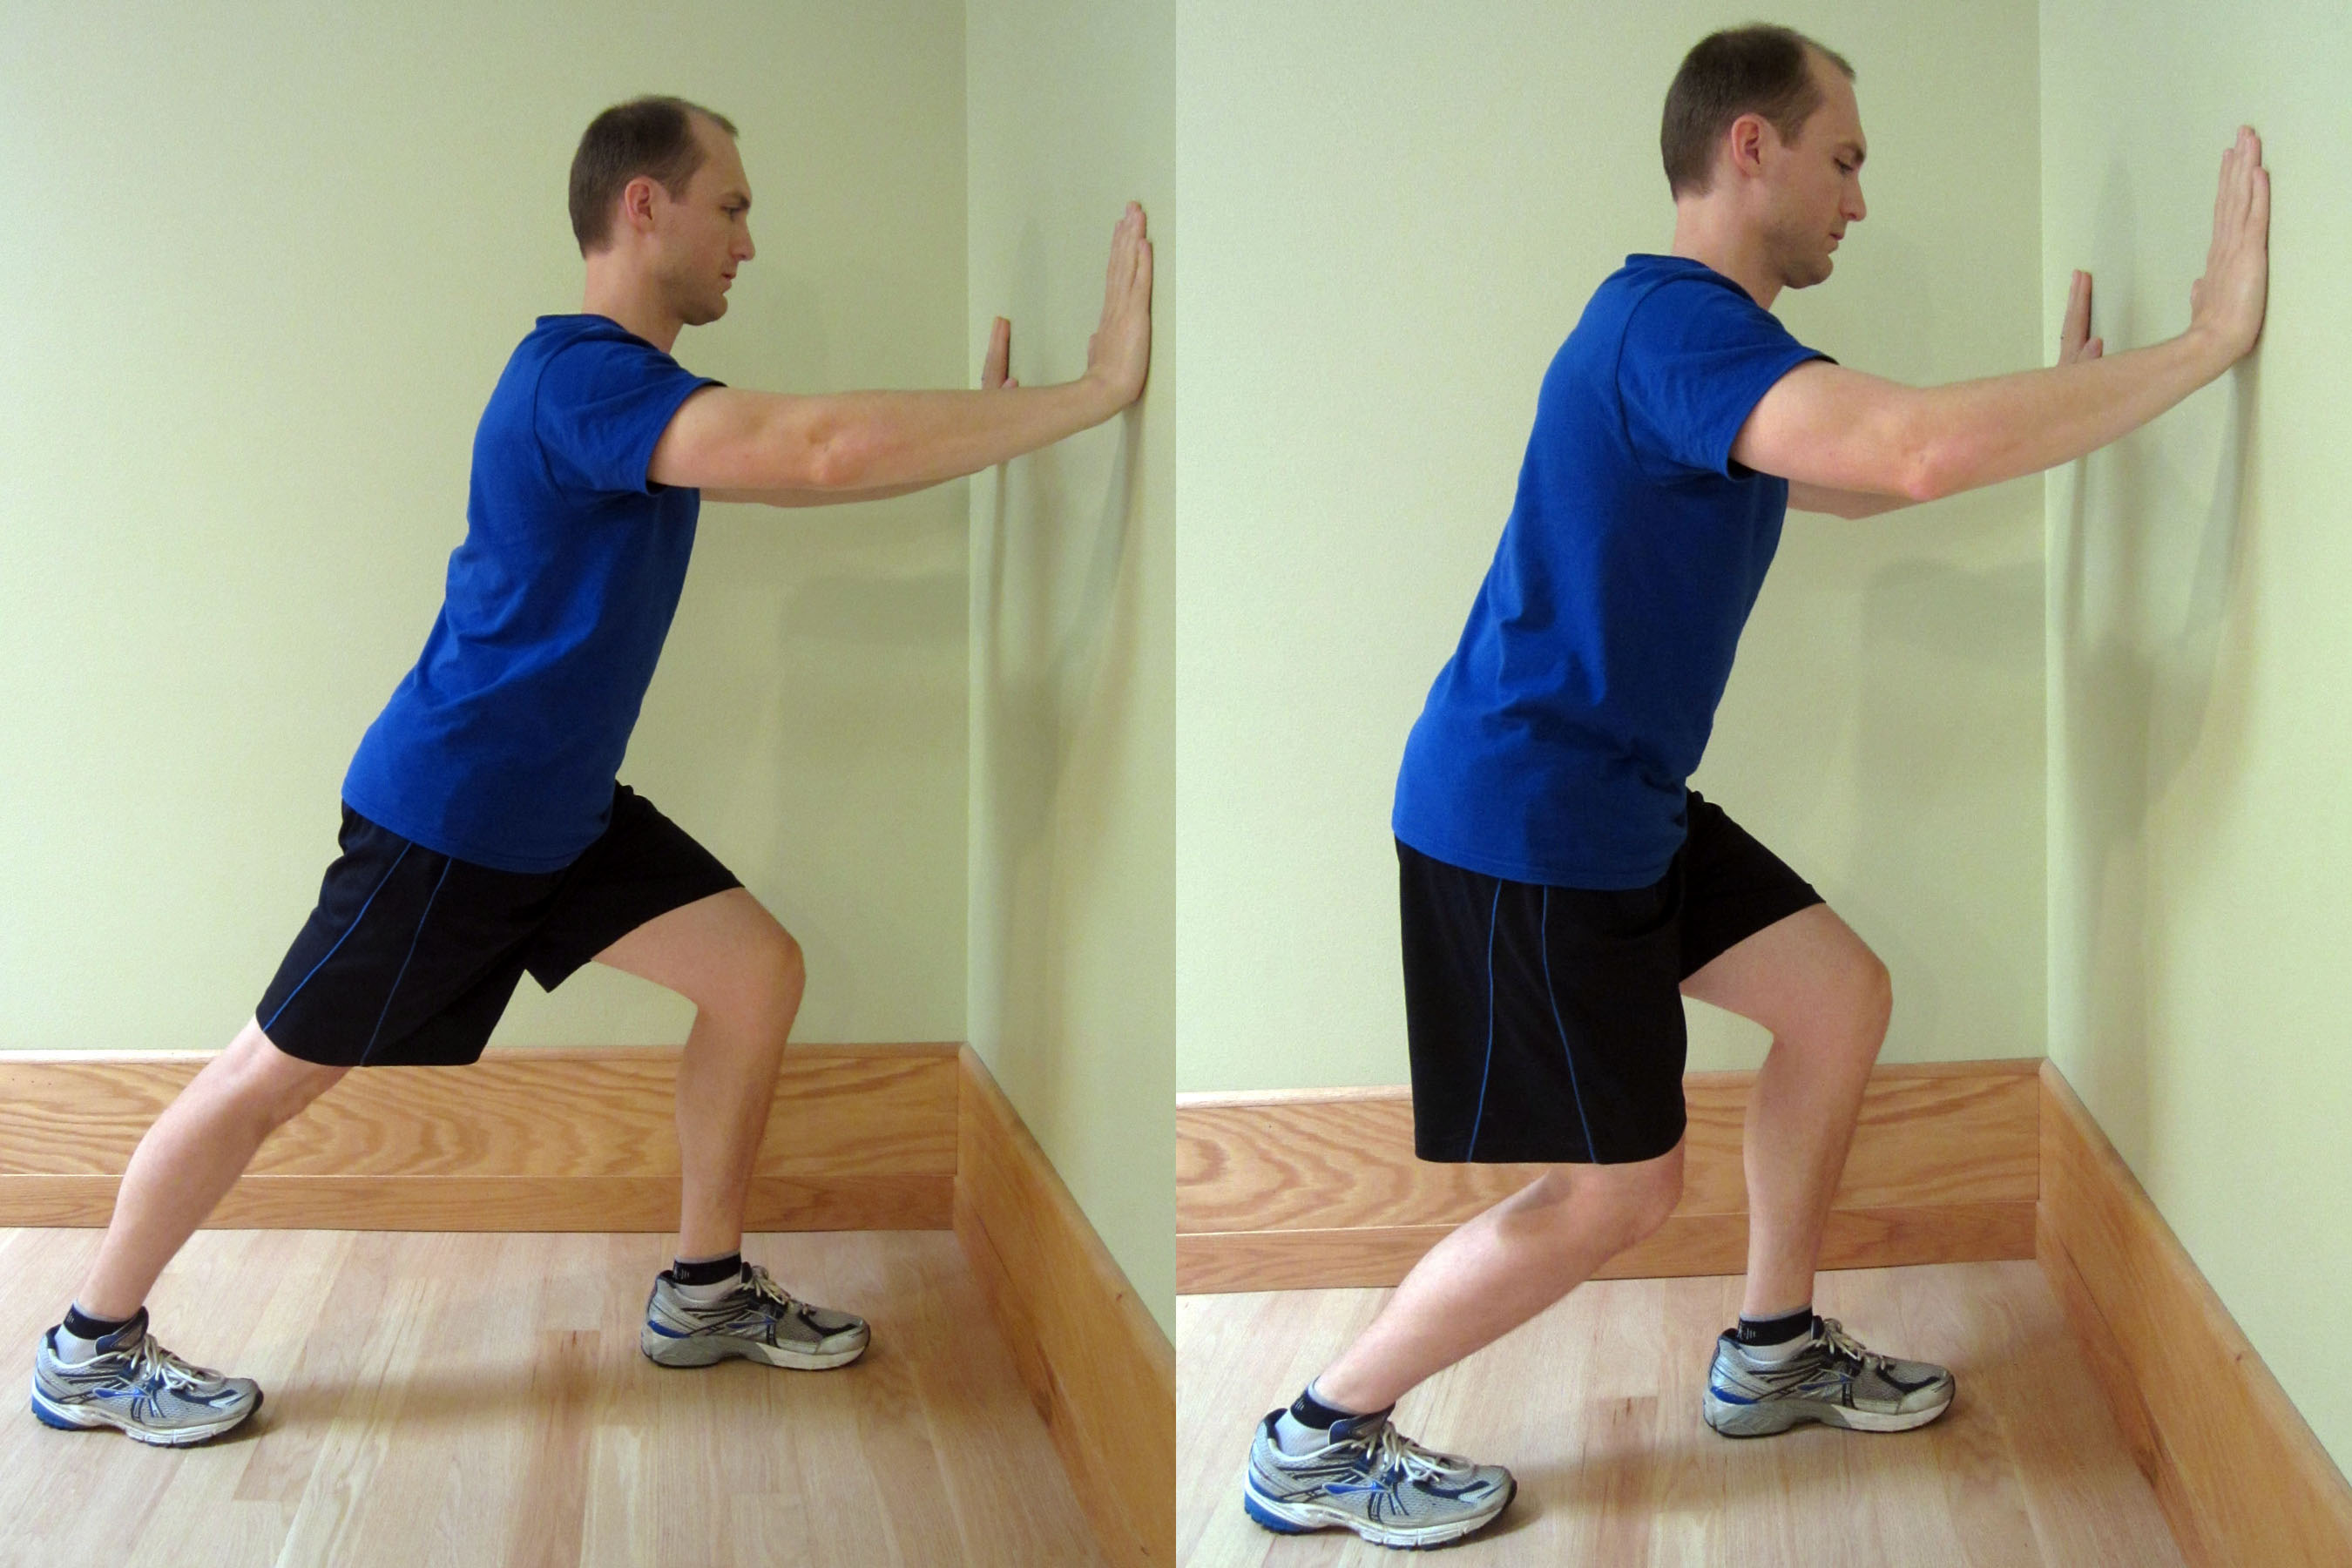
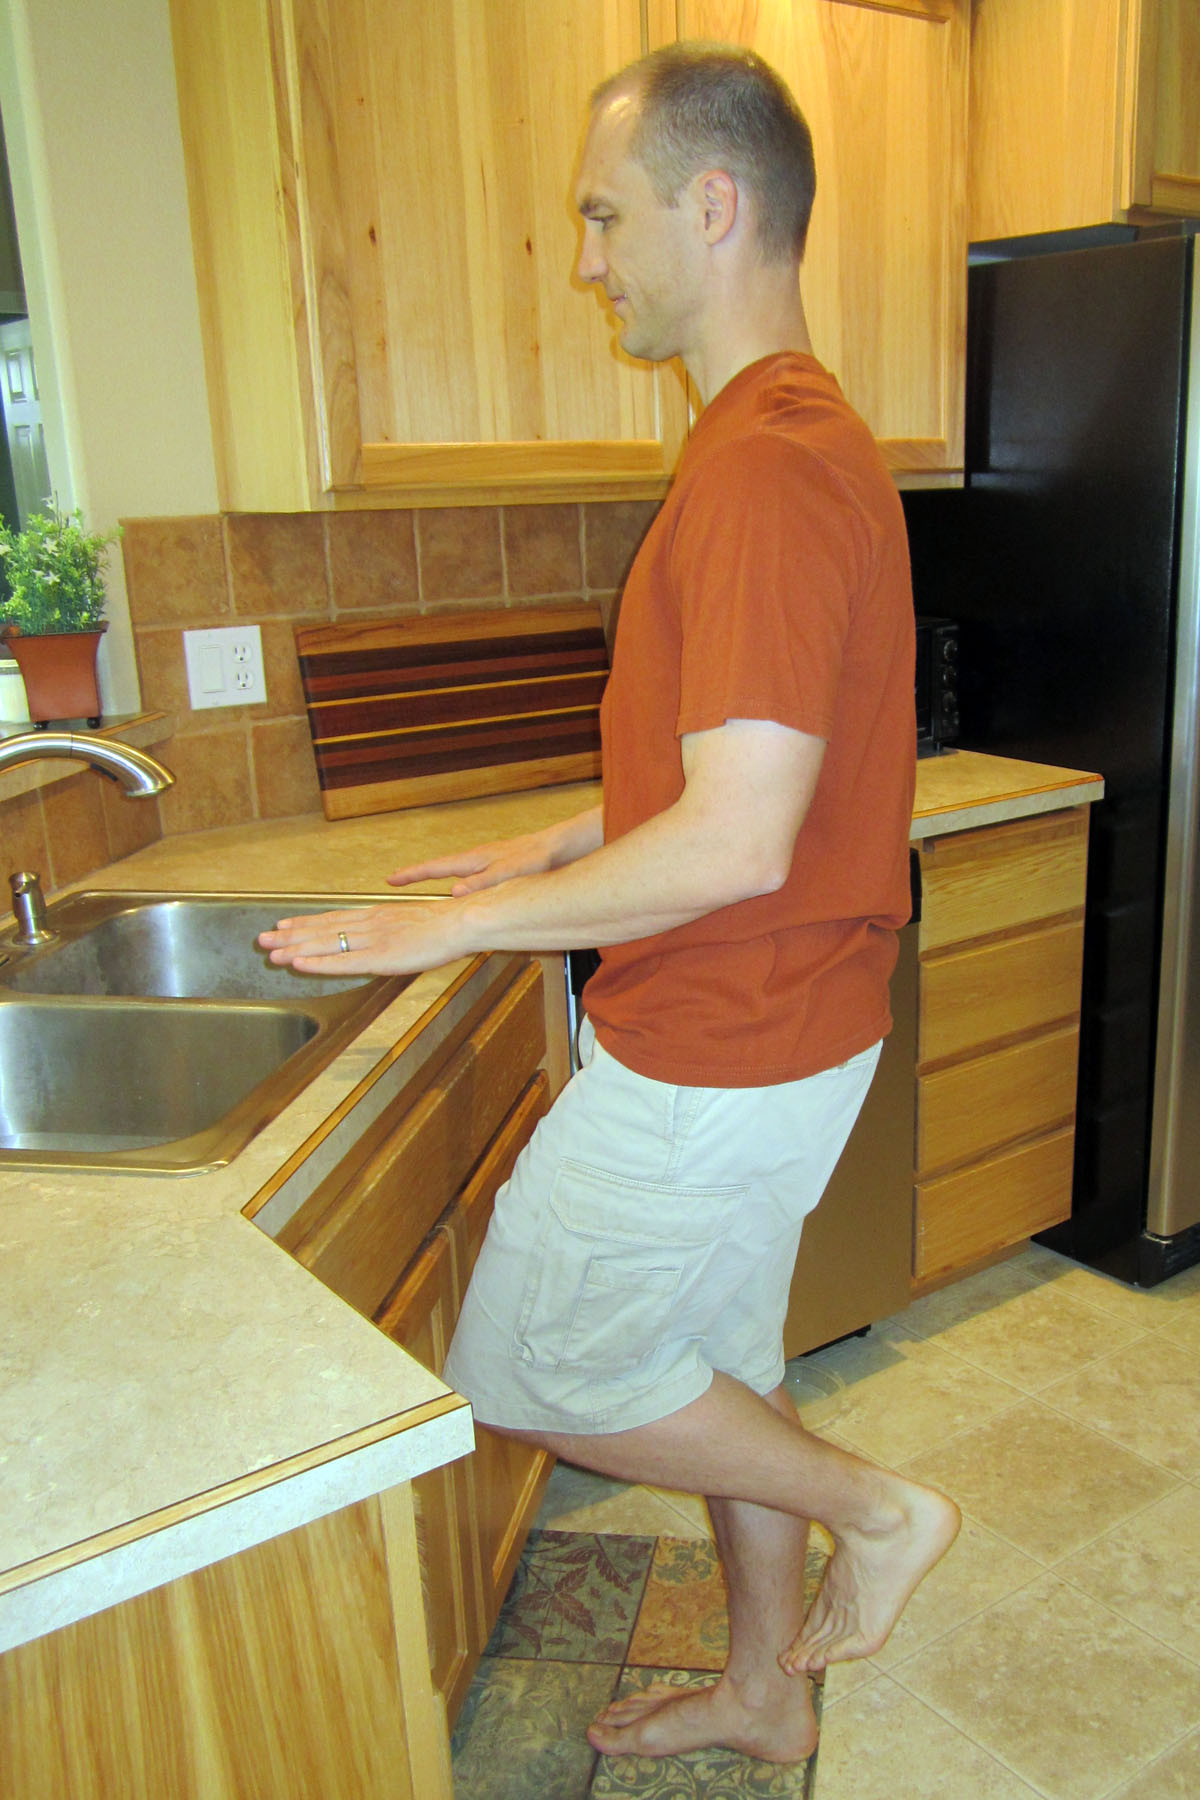
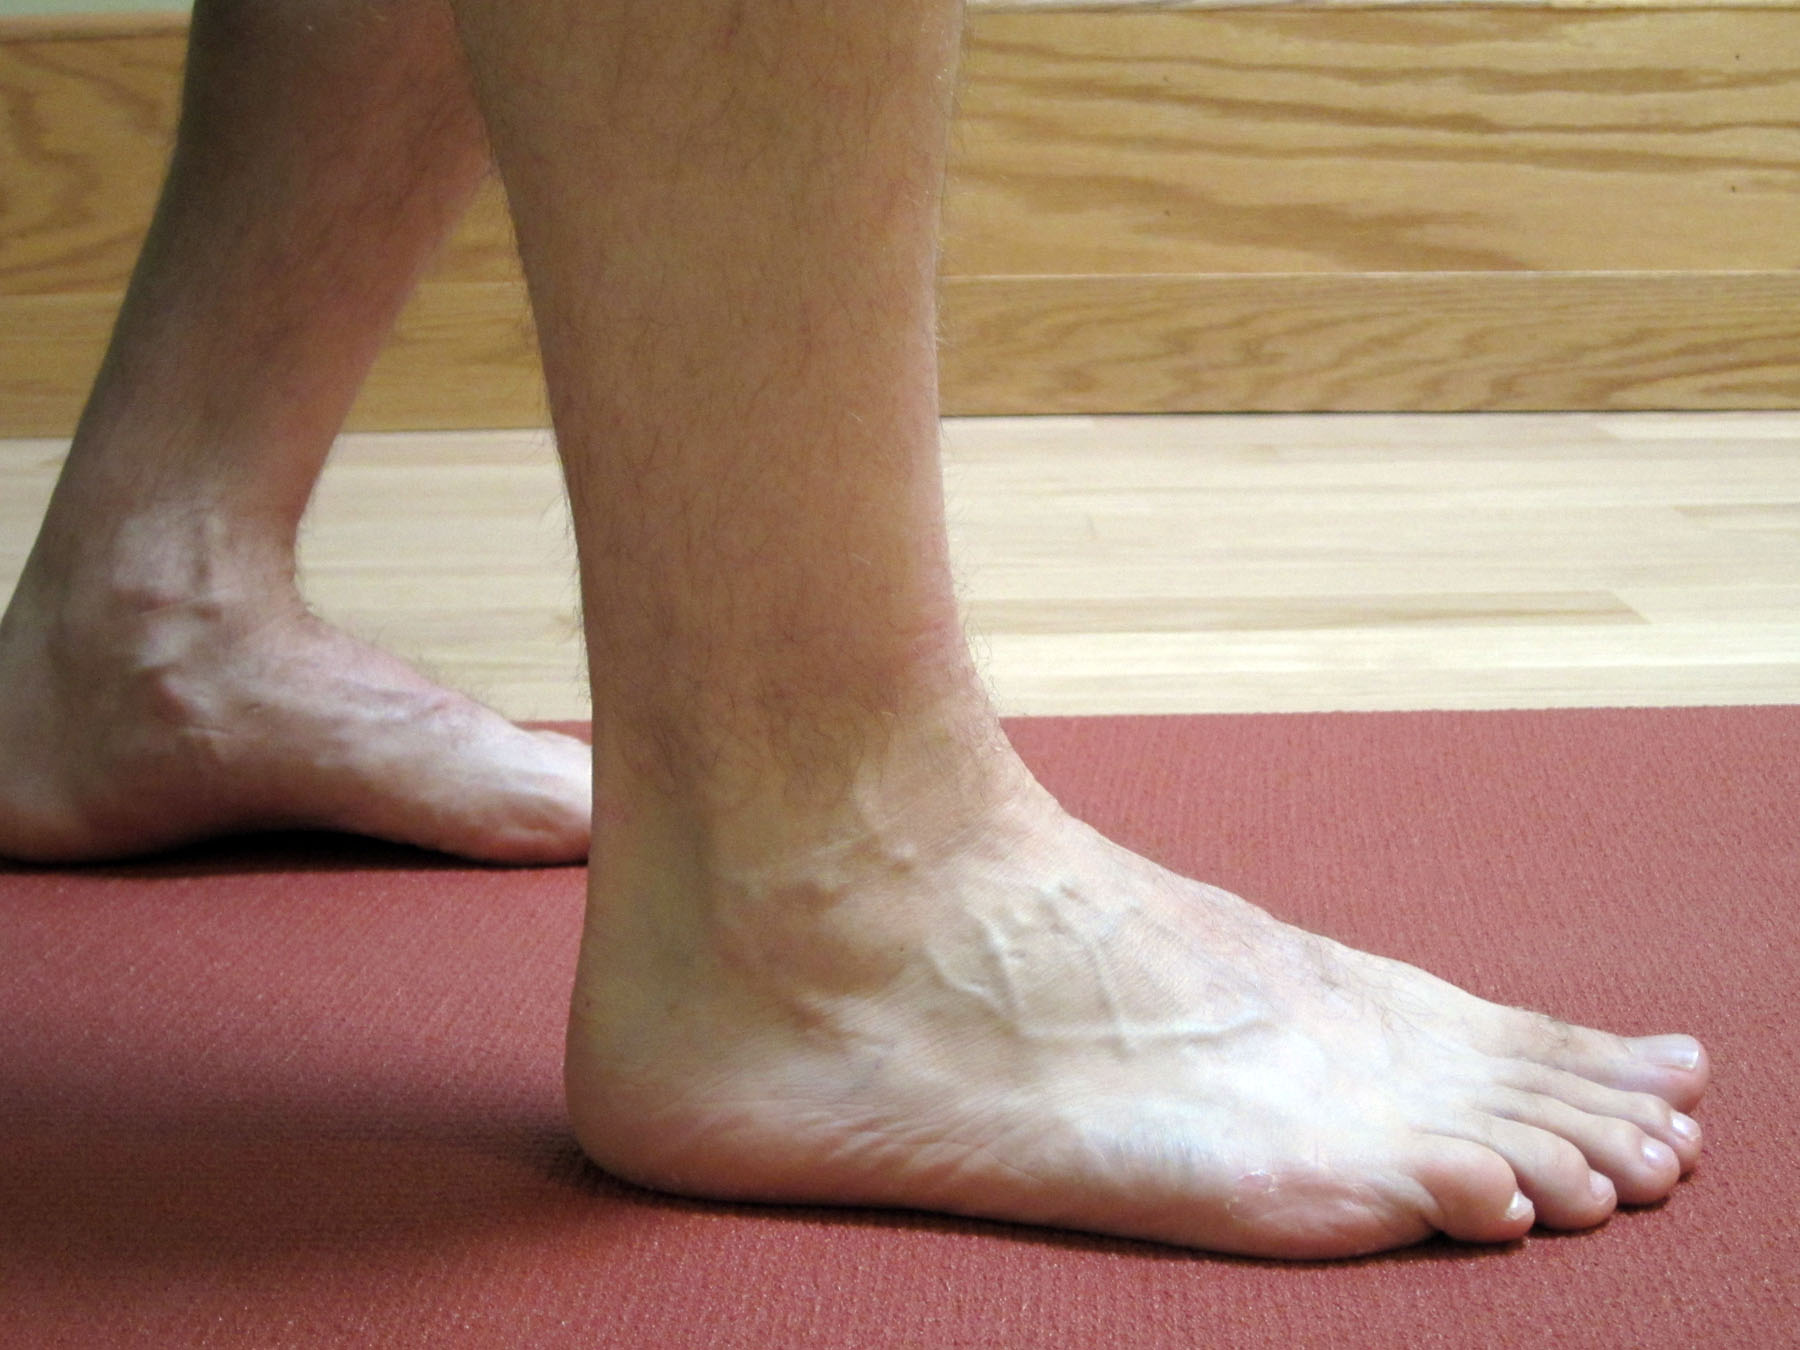
  • Flexibility Training – Flexibility training is important for everyone as part of a healthy lifestyle, but it’s critical for those with RA. A person should take every joint through a full ROM at least once a day. I highly encourage a regular two to three times a week flexibility program in addition to a daily ROM program. Appropriate options include: yoga, Pilates, Tai Chi, water aerobics, or a self-stretching routine. The program should be performed in a slow and very controlled manner by taking care to never overstretch a joint or to move too quickly.
  • Aquatic Therapy – Many find that performing a regular exercise program in an aquatic environment can satisfy most exercise needs, including flexibility and strength. Water can also be very useful in pain control and help with relaxation. Exercising in a reduced gravity environment like the pool limits the compression forces on the bones. Additional weight training or body weight exercise should still be performed to insure adequate bone density as one ages.

To specifically answer Gloria’s question on the upper extremities, I would encourage her to daily perform an upper extremity stretching routine which takes all of the upper extremity joints through at least one full ROM.  Be sure to take several rest breaks during the day to perform stretching and ROM exercises.  Strengthening exercises for the shoulders, elbows, wrists, and fingers would also be beneficial.  Be sure to work the finger extensors (opening the hand) and not just the flexors (squeezing). Finger Putty is a great product which enables you to perform a variety of hand and finger exercises.  I would also encourage an emphasis on posture and upper back stretching as demonstrated in My Top 8 Stretches to Eliminate Neck, Upper Back, and Shoulder Pain. Gloria, I hope you find this information to be helpful as you manage your RA. Please let me know if you have additional questions.

I would love to hear from more of you! What are your experiences dealing with rheumatoid arthritis?  Have you or a loved one been dealing with this condition?  What has worked or not worked for you?  Additional discussion can help others to manage a very difficult disease.  Please leave your comments below.

If you have a question that you would like featured in an upcoming blog post, please e-mail contact@thePhysicalTherapyAdvisor.com.  Be sure to join our growing community on Facebook by liking The Physical Therapy Advisor!

Disclaimer:  The Physical Therapy Advisor blog is for general informational purposes only and does not constitute the practice of medicine or other professional health care services, including the giving of medical advice.  No health care provider/patient relationship is formed.  The use of information on this blog or materials linked from this blog is at your own risk.  The content of this blog is not intended to be a substitute for professional medical advice, diagnosis, or treatment.  Do not disregard, or delay in obtaining, medical advice for any medical condition you may have.  Please seek the assistance of your health care professionals for any such conditions.

My Top 3 Household Items For Self-Mobilization

Many household items can be used to perform self-myofascial release.  Why is self-mobilization and fascial release so important? Mobilization has effects on the musculoskeletal system, the vascular system, and the fascial system. Having good mobility (free of adhesions) can positively improve performance or recovery, and it’s important in maintaining a healthy body. With common household items, you can manage muscle spasms and cramping as well as those painful areas due to training (or more commonly, poor posture and sitting).

Muscle spasms and cramps can be terribly painful.  They tend to occur at the most inopportune time and place.  In a pinch, many household items can be used to assist in eliminating muscle spasms, cramps, tightness, and pain.  When available, my first choice is almost always the foam roller.  It is versatile and can be used to mobilize tissue as well as boney articulations.  The foam roller also works great to increase spinal extension mobility.  For more information on foam rolling, please refer to Foam Rolling for Rehabilitation and 5 Ways to Improve Range-of-Motion (ROM).

My Top 3 Household Items for Self-Mobilization:

1. PVC Pipe – This works great for sore forearms (including “tennis elbow”) as well as tight hamstrings or shin splints. You can use one hand or both to press or rub the PVC pipe over sore or tender areas. The amount of pressure shouldn’t be painful. Avoid pressing on especially boney areas.

PVCPipeForTennisElbow

2. Tennis Ball* – This is perfect to pinpoint those hard to reach places on the back or in the buttock region. Hold pressure over the sore area or spasming muscle until the spasm releases. This could take a couple of minutes depending on the severity of the spasm. (*A tennis ball may be substituted with another firmer and smaller rubber ball as shown below.)

TennisBallForSpasms

3. Racquetball – This is perfect for self-foot mobilization or if you need to provide more pressure using a firmer ball. If you suffer from plantar fasciitis or poor mobility in your feet, I highly recommend performing this daily for a couple of minutes on each foot. Be sure to work the entire foot, not just the arch.

RaquetballForFootMobilization

Muscle spasms, cramps, tightness, and muscle soreness are often quite painful!  These three common household items can be used to help mobilize, minimize, and/or eliminate muscle pain.  For more helpful ideas, please refer to Muscle Cramping & Spasms – Treatment Options, in which I discuss specific treatment options for managing pain including: massage, self-mobilization tools, topical agents, and supplements.

What are your top household items for dealing with muscle cramping and spasms?  Please post your comments below as we could all use a few more tricks to eliminate pain!

If you have a question that you would like featured in an upcoming blog post, please comment below or submit your question to contact@thePhysicalTherapyAdvisor.com.  Be sure to join our growing community on Facebook by liking The Physical Therapy Advisor!

Muscle Cramping & Spasms – Treatment Options

The list of potential reasons for developing a muscle cramp or spasm is quite long and somewhat arduous.  Once the cramp or spasms begin, it’s often quite painful!  Therefore, we’re highly motivated to act quickly to eliminate the spasm.  What can you do to prevent muscle cramps and spasms? More importantly, how can you recover from experiencing one?  I will provide simple treatment options to quickly help aid in your recovery.

For discussion purposes, I will address a spasm which isn’t caused by a serious medical condition such as a fracture, muscle tear and/or injury, or other medical conditions which would require the immediate attention of a healthcare practitioner.  If you believe that the spasm is from a serious medical condition, please do not attempt to self-treat the condition–immediately seek competent medical advice.

Over training or overexertion is a common issue experienced by many of the clients who I work with.  It remains a very sensitive topic as no one wants to admit that he/she was physically unprepared for an event or activity in which he/she participated in.  Don’t worry!  The point of participating in competition and other difficult activities is to test your body and to have fun!  During a race or sporting event, you will likely overreach from your training plan.  The hope is that your body is physically prepared to handle this overreaching without injury.  If you experience muscle cramps or spasms before or during an event, modify your training routine for the next event.

Top Tips for Treating Muscle Cramping & Spasms:

  • Massage – Contact a masseuse, physical therapist, athletic trainer, or friend who is skillful in body work and massage to relieve the area in spasm. The specific massage technique to use will vary according to your preference. Massage techniques range from a light relaxing massage to a deep tissue massage or utilization of acupressure points.
  • Foam Roller – The foam roller allows you to perform self-massage and tissue mobilization. The foam roller is a wonderful tool to prevent muscle cramping and spasms. Please refer to the following posts for more information: Foam Rolling For Rehabilitation and 5 Ways to Improve Range-Of-Motion. I highly recommend a High Density Foam Roller to help aid in your recovery.
  • Other Self-Mobilization Tools – Many times, a friend or masseuse isn’t available to assist when you need the help the most. A foam roller cannot effective reach places in the upper back or arms, so other self-mobilization tools may be necessary. You can get creative and use a tennis ball or golf ball, but I like a specific tool called a Thera Cane Massager. This tool allows you to apply direct pressure to a spasming muscle. When held for a long enough period of time, the Thera Cane Massager will usually cause the muscle spasms to release and provide much needed pain relief! I am also a big fan of the Thera-Band Standard Roller Massager. I particularly like that its firmness allows for a deep amount of pressure. If you prefer something similar (but more flexible, for the boney regions of the thigh or lower leg), I recommend The Stick Self Roller Massager.
  • Topical Agents – Many topical agents can help decrease and eliminate muscle spasms. The method of action varies greatly according to the product used. You may find that one product works better than another. Some of my favorite products in my medicine cabinet include: Biofreeze Pain Relieving Gel; Arnica Rub (Arnica Montana, an herbal rub); and topical magnesium.
  • Magnesium Bath – The combination of warm water with magnesium is very soothing and relaxing. Options include: Epsoak Epson Salt or Ancient Minerals Magnesium Bath Flakes. I find that the magnesium flakes work better, but they are significantly more expensive than Epson salt.
  • Oral Magnesium – You can take Mag Glycinate in pill form or by eating foods higher in magnesium such as spinach, artichokes, and dates. Taking additional magnesium (particularly at night) can help to reduce muscle cramps and spasming. It is also very helpful in reducing overall muscle soreness and aiding in a better night’s rest. I recommend beginning with a dose of 200 mg (before bedtime) and increasing the dose as needed. I would caution you that taking too much magnesium can lead to diarrhea. Mag Glycinate in its oral form is the most highly absorbable. Although not as absorbable, Thorne Research Magnesium Citrate and magnesium oxide can also be beneficial.
  • Increase your Electrolyte Intake – You may need to increase your potassium, sodium, or calcium intake to your diet or consider supplementation. Sherpa Pink Gourmet Himalayan Salt contains the electrolytes you would expect as well as a host of other trace minerals. I have found this to be highly effective for cramps and muscle soreness. It also helps me to sleep more soundly. I highly recommend it to anyone who is suffering from chronic cramping or after participating in an athletic event. Drink a small glass of warm water, mixing in a teaspoon full of pink Himalayan sea salt, before bedtime.
  • Fix Your Posture – Poor posture is one of the most common causes of muscle cramping and spasming as well as pain. This is particularly true if you spend a good portion of your day sitting. Sign up to receive my weekly blog posts via e-mail, and I will share with you My Top 8 Stretches to Eliminate Neck, Upper Back, and Shoulder Pain. These simple exercises, with complete instructions and photos, will help you to improve poor posture and can be performed at home.
  • Move More – Not only has research proven that sitting for more than two hours at a time decreases your expected life span, but extended sitting also leads to increased muscle tension, cramping, and pain. If you sit most of the day, get up and walk. If you stand most of the day, frequently change your standing posture. To optimize health and joint function, you should take each joint in your body through a least one full range-of-motion (ROM) every day.
  • Stretch – Stretching is a wonderful way to help eliminate a muscle spasm. We instinctively stretch when we feel a spasm begin. Try gently stretching (lengthening) the muscle which is in spasm. I recommend beginning with a short 30-60 seconds stretch, then repeating as needed. If the spasm or cramp is severe, you will likely need to continue stretching several times in a row, multiple times throughout the day. Stretching should always be part of a general fitness and lifestyle program. As we age, muscle and tendons tend to lose elasticity so stretching becomes even more important. I highly recommend a daily stretching routine or participation in a group class, such as yoga, which incorporates full body stretching.
  • Acupuncture – I am personally a big fan of acupuncture. It is very useful in treating all kinds of medical conditions. It can be particularly effective in treating muscle cramps and spasms as it addresses the issues on multiple layers. Acupuncture directly stimulates the muscle by affecting the nervous system response to the muscle while producing a general sense of well-being and relaxation.
  • Speak with your Physical Therapist (PT) or Physician (MD) – If the above techniques are not helping or if the muscle cramps and spasms continue to come back regularly, speak to your medical provider to determine if other causes are contributing to the problem. The American Physical Therapy Association (APTA) offers a wonderful resource to help find a physical therapist in your area. In most states, you can seek physical therapy advice without a medical doctor’s referral (although it may be a good idea to hear your physician’s opinion as well).

What are your top tips for dealing with muscle cramping and spasms?  Please post your comments below as we could all use a few more tricks to eliminate pain!

If you have a question that you would like featured in an upcoming blog post, please comment below or submit your question to contact@thePhysicalTherapyAdvisor.com.  Be sure to join our growing community on Facebook by liking The Physical Therapy Advisor!

Muscle Cramping & Spasms – Common Causes

A muscle cramp or spasm is defined as a sudden, involuntary, and typically, severe muscle contraction.  They are normally temporary, but cramps and spasms can occur repeatedly in the same muscle group.  It is very rare for a muscle spasm or cramp to permanently damage the muscle, but the cramp or spasm can produce mild to excruciating pain.  The pain can be very short lived or linger for days after a severe episode.  What can you do to prevent muscle cramps and spasms? More importantly, how can you recover from experiencing one? I will address common causes now and provide treatment options in Muscle Cramping & Spasms – Treatment Options.

Muscle cramps and spasms affect people of all ages.  Generally the cause of a muscle spasm can be identified by reviewing the person’s age, health status, and activity level.  Common causes of spasms or cramping are addressed below.  (The causes are listed from most to least common according to the clients who I interact with the most.)

Common Causes

    • Overexertion For active individuals, overexertion is the most likely cause of cramping and spasming. During and particularly after exercise, spasms are not generally associated with dehydration or electrolyte imbalances in spite of what the sport beverage industry would have us believe. Spasms are more likely due to overexertion and pushing your muscles harder and longer than they are used to performing. This is overwhelmingly the most common cause of muscle spasms and cramps for weekend athletes. For many, it’s the most difficult concept to accept as we feel as though we have adequately trained for our sporting endeavors. We want a magic pill or remedy, but we don’t want to acknowledge that maybe we weren’t as prepared as we thought we were for our specific activity.
    • Prolonged Immobility – Muscle tissue prefers movement versus static and isometric postures. Over time, lack of movement tends to lead to spasms and pain. A prolonged poor posture, such as a slouched spine with a forward head posture or your knee completely flexed up while riding in a car all day, can cause muscle cramping. Keeping the muscle tissue in a shortened length can lead to poor blood flow, another potential cause of spasms. Poor posture can lead to vertebral and spinal issues, which can cause more pain and spasming
    • Electrolyte Imbalance – Magnesium, calcium, sodium, and potassium are all critical to body functions, particularly for the muscle and nervous tissue. Having too much or too little in relationship to each other can lead to muscle spasms and pain. Dehydration with severe electrolyte imbalances can lead to death.
    • Vertebral Misalignment – Vertebral misalignment is commonly associated with prolonged poor posture, but it could be from a traumatic event. The muscle spasms due to over use when compensating for poor posture. Pain and spasming result from: the particular position; pressure on a nerve; pressure on pain generating tissues; or from a nerve that is affected and/or impinged.
    • Muscle Tears & Injury In the case of a direct muscle injury (which didn’t involve a complete muscle or tendon tear), the associated muscle can spasm. Muscles nearby the injury may also reflexively spasm as they try to splint and hold the area stable.
    • Dehydration Dehydration can lead to an electrolyte imbalance, which can result in muscle spasms and cramping. It also can cause poor blood flow to body parts and organ systems which require blood for oxygen and nutrients. Spasms can be found in the skeletal muscle as well as in the abdominal organs. Dehydration with severe electrolyte imbalances can lead to other cardiac symptoms, including cardiac arrest (heart attack). Dehydration can occur for many reasons including illness resulting in excessive vomiting or diarrhea.
    • Poor Blood Flow – Vascular occlusion can cause spasms and cramping in the lower legs. Muscles require a certain amount of blood flow, oxygen, and nutrients to perform. In the case of peripheral vascular disease (PVD), the arteries are unable to deliver an adequate supply. This results in pain, spasms, and cramps which typically subside with rest.
    • Pain – Pain from any injury (including muscle, boney, tendon, ligament, nerve tissue, and emotional or psychological pain) can cause a muscle to spasm.
    • Nerve Damage The loss of nerves decreases the excitability of a muscle. This can lead to hyper (over) excitability of the muscle which causes cramping and muscle spasms. Nerve damage is apparent in many medical conditions: spinal cord injury; peripheral nerve injury; and spinal nerve injury from accidents or from conditions such as disc herniation or spinal stenosis.
    • Medical Conditions Many medical conditions can cause muscle spasms. Possible conditions include: fibromyalgia; Multiple Sclerosis (MS); Parkinson’s disease; Amyotrophic lateral sclerosis (ALS), also known as Lou Gehrig’s disease; and stroke.
    • Fractures Muscles tend to spasm near a boney fracture in order to splint and protect the area from further injury due to movement.
    • Illness Illnesses such as rheumatic fever, polio, rickets, and even the flu can cause muscle spasms.
    • Thyroid Issues Muscle spasms and cramping can occur if you’re experiencing thyroid issues. Hypothyroidism occurs when your thyroid doesn’t produce enough thyroid hormone. This can also be associated with excessive fatigue and weakness.
    • Medications Certain medications, including some of the cholesterol lowering medications known as Statins, may have a side effect of muscle spasms and cramping.
    • Restless Leg Syndrome (RLS) Although RLS isn’t specifically associated with muscle cramps or spams, it is sometimes described as such. It is associated with uncomfortable sensations in the legs with an irresistible urge to move one’s legs to relieve the sensations. Sensations (other than cramping) include pins and needles, feeling itchy, or a crawling feeling. The symptoms are typically worst when sitting or lying down.
    • Arachnidism Arachnidism is an injury resulting from a spider bite and bites from other insects. The venom of the bite can cause muscle spasming and cramping.

Although the list of common causes of spasms or cramping is long, it’s certainly not all inclusive.  Please refer to Muscle Cramping & Spasms – Treatment Options for specific treatment options including: massage, self-mobilization tools, topical agents, and supplements.

Why do you think you’re experiencing muscle cramps or spasms?  Please post your comments below for further feedback.

If you have a question that you would like featured in an upcoming blog post, please comment below or submit your question to contact@thePhysicalTherapyAdvisor.com.  Be sure to join our growing community on Facebook by liking The Physical Therapy Advisor!

Ankle Sprains – Rehabilitation (Part III of III)

As a physical therapist, I find that the most exciting part of a person’s rehabilitation is the full return to function, activity, or sport.  Countless variations of exercises and activities are performed while working toward restoring the full functional use of the ankle.  Concluding the three part series, the final stage in rehabilitation is centered on improving ankle and foot strength, stability, as well as addressing any balance deficits.

How rehabilitation progresses will vary greatly for each individual.  Therefore, no treatment plan will be alike.  For discussion purposes, I will address a generic treatment plan, which should be modified for your personal needs and activity level.  In this final stage of rehabilitation, you will progress to normal daily activities, including any athletic endeavors.  This is also when you work toward limiting any future re-occurrence of the sprain.

At this stage in recovering from a lateral ankle sprain, you should be walking relatively normally and mostly pain-free.  Running and more active side-to-side movements likely still cause pain.  Although not contra-indicated, these types of activities should be limited (unless you’re wearing a good lace up brace or are being regularly taped by a professional).

The initial portion of the rehabilitation is centered on improving ankle and foot strength, stability, as well as addressing any balance deficits.  This process begins with statically based exercises and activities.  Ultimately, it progresses into dynamic strength, balance, and mobility activities.  How rapidly a person progresses in this phase is wildly variable.  The key is to progress at your own pace.  If you start experiencing increasing pain, feelings of ankle instability, and sensations that it may “roll” or sprain again, then you need to taper down your activity level.  After the pain subsides, continue to focus on the activities that that didn’t cause pain or discomfort previously.

The following treatment plan includes exercises for strength and balance as well as mobility drills and full athletic simulation drills.  Each category is listed in an easiest to most challenging format.  You shouldn’t progress to the next exercise until the first one is mastered.

Strength

  • Continue with the Ankle Resistance Exercises, but progress to a stiffer Thera-Band Exercise Band (http://amzn.to/USkOeo).
  • Heel/Toe Raises – A person should be able to perform 25 heel raises in a row with only minimal fingertip assistance on a counter top. A normal amount of calf strength would be considered once you can perform 25 heel raises. 

HeelToeRaisesCollage

  • One Leg Squat – Perform a one leg squat without using your hands for balance to increase the difficulty level. The one leg squat on your tip toes is a harder variation which involves more calf muscle activation. Start with two sets of 10 repetitions, then progress to three sets of 10 repetitions.

OneLegSquat_Collage

  • Clock Exercise – Stand on your affected (injured) foot and attempt to touch your tip toe of the non-affected side as far out as you can reach. Bring your foot back to the center or starting point according to the hands on a clock. For example, 1 o’clock to 6 o’clock (clock-wise) or 12 ‘o clock to 6 o’ clock (counter clock-wise) depending on which foot is affected. Perform the routine between three to five times slowly.

ClockExercise

Balance

  • Stand on one foot – A 30 second hold with eyes open during the first time, then closed during the second time, is considered normal.
  • Stand on one foot on a pillow – A 30 second hold for two to three repetitions. As you progress, stand on the pillow and perform the Clock Exercise as described above.
  • Stand on one foot on a water noodle – This exercise challenges your balance due to the softer surface and narrow water noodle. It also challenges the side-to-side stability of the ankle, which is the weakest area, yet the most critical, with a lateral ankle sprain. A 30 second hold for two to three repetitions.

AnkleBalanceCollage

  • Stand on one foot and bounce a ball against a wall.
  • Stand on a Wobble Board, Bosu Balance Trainer, or other unstable surface.

Mobility Drills

  • Initially, start with forward and backward movements and progress from a walk, to a jog, to a sprint.
  • Jump Rope
  • Side Stepping – Progress the speed as pain allows and if you’re not experiencing the feeling of instability.
  • Karaoke or Grapevine – Walk or run sideways while alternating the placement of the foot either in front or behind the other.
  • Sprint Ladder – A number of agility drills can be performed with the sprint ladder. Search YouTube and pick your favorite video which closely mimics the footwork desired for your particular sport or activity.
  • Short side-to-side Wind Sprints – While sprinting, touch your hand to the ground at each change of direction.

Full Athletic Simulation Drills

  • Depending on your sport of choice, return to your sport specific training drills. You may still require additional support. I recommend wearing a good lace up brace or being taped by a professional for support. Additional support should only be used temporarily and with the intention of progressing from using them as your ankle can tolerate.

Depending on your time table for recovery and the severity of your injury, the information provided in this three part series on ankle sprains will likely be very helpful in your recovery.  For some, it won’t fully meet your needs for a full and speedy recovery.  Each person and injury is different.  If you continue to experience pain and swelling, and/or require an accelerated time table for recovery (or return to competition), then I recommend the services of a sports medicine physical therapist or athletic trainer.  Many modalities, such as electrical stimulation, manual techniques and taping methods can assist in recovery when properly utilized.  To find a qualified physical therapist in your area, search at American Physical Therapy Association (APTA).

If you have additional questions or comments regarding this series, please comment below or submit your question to contact@thePhysicalTherapyAdvisor.com.  Be sure to join our growing community on Facebook by liking The Physical Therapy Advisor!

Disclaimer:  The Physical Therapy Advisor blog is for general informational purposes only and does not constitute the practice of medicine or other professional health care services, including the giving of medical advice.  No health care provider/patient relationship is formed.  The use of information on this blog or materials linked from this blog is at your own risk.  The content of this blog is not intended to be a substitute for professional medical advice, diagnosis, or treatment.  Do not disregard, or delay in obtaining, medical advice for any medical condition you may have.  Please seek the assistance of your health care professionals for any such conditions.

Ankle Sprains – Intermediate Phase (Part II of III)

Ankle sprains are one of the most common and prevalent musculoskeletal injuries.  Although more likely to occur in children, ankle sprains can happen to anyone anytime.  In my last post, Ankle Sprains – Acute Phase (Part I of III), I addressed how to handle the initial acute phase of an ankle sprain.  I will continue to guide you through the treatment plan on how to rehabilitate your ankle in this three part series by addressing the progression from the acute phase into the intermediate phase.

Sprains are categorized as Grade I, II, or III.  A Grade I sprain is the most common.  It’s typically associated with only mild damage to the ligament, and instability doesn’t affect the joint.  A Grade II sprain is a partial tear to the ligament and is usually associated with some laxity (hypermobility).  If this occurs, it’s best to wear a brace for several weeks.  Ideally, scar tissue will form and compensate for the lax ligament, so the joint doesn’t become hypermobile.  Good muscle strength and proprioception of the lower foot is important to limit future sprains.  In Grade III sprains, a full tear of the ligament occurred.  One typically consults with an orthopaedic surgeon for possible repair.  After surgery, a guided physical therapy program is recommended.

For discussion purposes, I will only address a Grade I sprain.  Initially, one may wear an air splint, ACE wrap, or some other lace-up or slip-on style brace to help with stability, inflammation, and pain control of the ankle.  In most cases, a person will want to transition from wearing the brace as soon as the initial pain subsides.  (If one had a Grade II sprain, he/she would wear a splint for several weeks so that the ankle would initially stiffen.)

At this point in your recovery, you are likely three to seven days since the initial injury.  This phase of rehabilitation can last from seven days to several weeks before progressing into the final phase of rehabilitation (and ultimately, back to full function).  Progression out of the intermediate phase is always symptom dependent.  You should be able to stand with equal weight on your feet and not experience an increase in ankle pain.  The ankle is likely stiff at this time, but it is time to start walking, progress range of motion (ROM), and start gentle resistive exercises.

  • Walking – If you have been using a crutch to unweight the foot, then start the progression to weight bearing during walking. If you have been walking, then increase the amount of weight you have been putting on the ankle and foot. At this time, the focus will be to normalize your walking pattern. This means having a good heel strike, rolling onto the foot into full weight bearing on the leg, and then propelling forward with a good toe off. You will continue to use the crutch as long as needed until you can walk nearly normal without limping. Until then, utilize the crutch to unweight the leg and foot as much as necessary to perform a nearly normal walk or gait sequence.
  • Range of Motion (ROM) – Start to increase the range of motion of the ankle. Initially, work to progress the plantarflexion and dorsiflexion movement (the forward and backward movement of the ankle). As pain subsides, progress the side to side motion as well as all other motions.
  • Recommended Exercises:
    • Ankle Pumps – A very easy exercise. Just pump your ankle forward and backward into plantarflexion and dorsiflexion movement. Perform 10-15 repetitions several times a day on both feet

Ankle_Combined

    •  Ankle Alphabet – Move the foot and ankle only by pretending your big toe is a pen, and draw the alphabet using capital letters.  Perform 1-2 times a day.
    • Calf Stretching – Hold each stretch for at least 30 seconds, three times on each leg, 2-3 times a day. This stretch shouldn’t cause more than a mild increase in pain or discomfort.

Calves

  • Gentle Resistive Exercises:
    • Perform plantarflexion and dorsiflexion movement by initially using an exercise band. I recommend using a Thera-Band Exercise Band (http://amzn.to/USkOeo). As your pain improves, you can progress to standing heel and toe raises as long as you don’t experience more than a mild increase in pain levels.
    • As pain and range of motion improve, progress to inversion and eversion with the exercise band. Stop if you experience more than a mild increase in pain levels.
    • For further instruction and photos, please refer to Ankle Resistance Exercises.
  • Initial Balance and Proprioception Exercises. For a complete discussion on the specifics of balance, please refer to How Do I Improve Balance? (Part I) and How Do I Improve Balance? Part II.
    • Standing on one foot. Initially, you may need to use your hand (or a finger) on a counter top for added support. As the pain subsides and your balance improves, you may need to increase the difficulty level. As you progress, balance will become of greater importance (to be addressed in Part III).

IMG_4793_RGB_4x6

Toward the end of the intermediate phase, you should be walking fairly normally.  There will likely be some swelling.  It is typical for some amount of swelling to come and go.  It will be directly related to how long you are on your feet and your general lower extremity circulation.  I highly recommend you continue to wear compression stockings during this time.  You may also continue to experience soreness and pain–particularly after a long day or a lot of upright activity.  Continue to utilize a regular icing protocol as needed for pain and swelling.  Also, continue to supplement with Capra Flex by Mt. Capra (http://amzn.to/1pF936I).

It’s time to progress into the final stage of rehabilitation once you have returned to near normal walking, your pain levels are relatively low, and you are able to complete the basic exercises listed above.  The final stage of rehabilitation includes a full return to daily activities and eventually, all sport or athletic activities.  I will address the specifics of the final stage of rehabilitation in Part III.

Join our growing community on Facebook by liking The Physical Therapy Advisor!  If you have a question that you would like featured in an upcoming blog post, please e-mail contact@thephysicaltherapyadvisor.com.

Disclaimer:  The Physical Therapy Advisor blog is for general informational purposes only and does not constitute the practice of medicine or other professional health care services, including the giving of medical advice.  No health care provider/patient relationship is formed.  The use of information on this blog or materials linked from this blog is at your own risk.  The content of this blog is not intended to be a substitute for professional medical advice, diagnosis, or treatment.  Do not disregard, or delay in obtaining, medical advice for any medical condition you may have.  Please seek the assistance of your health care professionals for any such conditions.

Ankle Sprains – Acute Phase (Part I of III)

Ankle sprains are a common occurrence and can happen to anyone at any age.  The Journal of Sports Medicine (January 2014) conducted a meta-analysis on the topic of ankle sprains.  The findings concluded that women were at higher risk of ankle sprains and that children were more likely to sprain an ankle than an adolescent or an adult.  Indoor and court sports were the highest risk activity.  However, an ankle sprain can occur just as easy from stepping off a curb or accidentally on a pet’s toy.  So what is the best course of action to take upon spraining your ankle?  Starting with the acute phase, I will walk you through the treatment plan on how to rehabilitate your ankle in this three part series.

AnkleSprain_1

Many different types of ankle sprains are possible, but the most common sprain is known as the lateral ankle sprain.  Initially during a lateral ankle sprain, the foot rolls inward (inverts) farther than it should which causes a “sprain” of the lateral ligaments of the ankle.  It may also affect the lateral muscles or tendons of the ankle which produce eversion of the foot.  The muscles most typically affected are known as the peroneals.  In more severe cases, the fibula bone or the fifth metatarsal bone near the pinky toe could also be injured either with a fracture or the tendon could rupture from the bone.

For discussion purposes, I will only address the basic lateral ankle sprain.  At the time of injury, a person may often feel or hear a popping sound.  This is followed by a fairly rapid onset of swelling in the ankle, typically along the lateral (outside) part of the ankle (near the bump known as the lateral malleolus).  This is also usually associated with a significant amount of pain.

Depending on the severity of the pain, the location of the swelling, and any potential bruising, your course of treatment may vary.  If you are unsure as to the severity of the sprain, are in severe pain, or you’re not sure how to handle the injury, I recommend that you seek competent advice from a medical doctor, physical therapist, or athletic trainer.

Assuming you don’t have a more serious injury, the initial course of treatment following the sprain includes RICE, which stands for Rest, Ice, Compression, and Elevation.

  • Rest – In this case, rest would indicate not using the ankle. I would initially recommend using a crutch or crutches to either fully unweight the ankle (or at least take some pressure off) when walking.
  • Ice – Apply ice to the ankle, and the sooner, the better. The rule for icing is to apply ice no more than twenty minutes per hour. Do not place the ice directly against the skin, especially if you are using a gel pack style. Individuals with poor circulation or impaired sensation should take particular care when icing. A bag of frozen peas can be ideal.
  • Compression – Compression helps prevent and decrease swelling. Swelling can cause increased pain and slow the healing response, so limit it as much as possible. You can utilize a common ACE wrap or you can purchase a pair of mild over-the-counter compression socks. If you have a friend who is medically trained, many different taping techniques can also assist in decreasing swelling. Many physical therapists or athletic trainers can apply Kinesiology Tape or MummyTape (http://amzn.to/UA75bT) for you or you can find application techniques online.
  • Elevation – Elevate means to keep the ankle above the level of the heart. This allows for gravity to assist in keeping the inflammation and swelling down. Typically, I would combine the ice with compression and elevation.

Gentle Movement

During the acute phase, move the ankle as much as you can tolerate.  I would not be aggressive with the movement.  I would not move the ankle if it caused more than a mild to moderate increase in pain.  This may irritate the injury and cause more swelling and inflammation.  Movement is good and helpful unless it’s causing extreme pain.  Focus on the up and down movement of the ankle (known as plantarflexion and dorsiflexion), NOT on the side to side motion (known as inversion and eversion).

Possible Supplementation

During the acute phase, I recommend starting at least a thirty day course of Capra Flex by Mt. Capra (http://amzn.to/1pF936I).  Capra Flex is an organic glucosamine and chondroitin supplement which also includes an herbal and spice formulation designed to naturally decrease inflammation and support healing.  I recommend it to anyone recovering from an injury or attempting to prevent injury when performing at a very high level. I personally use it, and in my practice, it has helped clients recover faster and prevent injury. It can interfere with some blood thinning medication, so if you are on this type of medication, please check with your physician.

The initial acute phase of an ankle sprain can last one to seven days on average.  Before progressing into the next phase of rehabilitation, you should be able to stand with equal weight on your feet and not have a significant increase in pain.  Once you can, it is time to progress into the intermediate phase (to be covered in Part II).

Join our growing community on Facebook by liking The Physical Therapy Advisor!  If you have a question that you would like featured in an upcoming blog post, please e-mail contact@thephysicaltherapyadvisor.com.

Disclaimer:  The Physical Therapy Advisor blog is for general informational purposes only and does not constitute the practice of medicine or other professional health care services, including the giving of medical advice.  No health care provider/patient relationship is formed.  The use of information on this blog or materials linked from this blog is at your own risk.  The content of this blog is not intended to be a substitute for professional medical advice, diagnosis, or treatment.  Do not disregard, or delay in obtaining, medical advice for any medical condition you may have.  Please seek the assistance of your health care professionals for any such conditions.

Foam Rolling for Rehabilitation

FoamRoll_Collage

The foam roller is a wonderful tool which allows me as a practitioner or you as an independent user to manipulate the body’s soft tissues which has a potential positive effect on the fascial system, the musculotendinous system, and the circulatory system.  Research on foam rolling for rehabilitation and its use in clinical rehabilitation is at present minimal (although increasing all of the time).  Clinically, I have used the foam roller in my practice extensively, and I highly recommend using one.  I use the foam roller during treatment and extensively as a home exercise tool.

Possible reasons to utilize the foam roller include:

  • A different way to perform myofascial release.
  • It can be used as a mobilization tool for soft tissues as well as boney articulations.
  • It is an excellent tool for home exercise programs.
  • It can be easily adapted for use on multiple areas of the body.
  • An effective tool which one can easily travel with.
  • If a client is adverse to close quarters or physical touch, touching the foam roller provides a safety barrier in his/her mind, but allows the physical therapist to provide the needed mobilization to aide in recovery.

How should I use the foam roller?

  • I typically recommend one to three minutes of body weight rolling (if it is tolerated) per extremity, and the same for the thoracic, low back, and buttock area.
  • A good rule of thumb is to roll out an area that is tender and sore, or recently worked, until it no longer feels tight and sore.
  • Again approximately one to three minutes per area although this may vary based on your size. Increased time will be needed the more developed your muscles are.
  • Use the foam roll on tight or restricted areas prior to performance without risk of deleterious effects unlike static stretching.
  • Use the foam roll after exercise or competition to speed up recovery times and decrease the risk of muscle soreness or restriction.
  • The foam roller can also be used as an aide to increase the intensity of a stretch during static stretching activities.

Foam rollers come in many different lengths and sizes.  Each size has a slightly different purpose and use.  For most individuals, the three foot long by six inch diameter size will be the most versatile.  You can purchase a quality foam roller for a good price online on Amazon.

For more information on the use of a foam roller, please refer to Does Foam Rolling Help or Hurt Performance?  What has been your experience with using the foam roller?  Is it worth the effort?  Please share your comments or questions!

*Individuals taking blood thinning medications or with blood clotting disorders should consult his/her physician prior to using a foam roller for mobilization.

Join our growing community on Facebook by liking The Physical Therapy Advisor!  If you have a question that you would like featured in an upcoming blog post, please e-mail contact@thephysicaltherapyadvisor.com.

My Top 7 Tips to Prevent Low Back Pain While Traveling

This time of year, many of us plan to hit the road (or the sky) to visit family and/or friends or to get away for some rest and relaxation!  Now imagine crawling around on the floor because you can’t stand up as your best laid plans are derailed by a bad episode of low back pain (LBP).  Why the pain while vacationing?  Sitting is a major contributing factor to low back pain.  Combine sitting followed by bending and twisting as you load and unload heavy bags—you’re setting yourself up for a miserable time!

Low back pain (LBP) is estimated to affect nearly 80% of the U.S. population at one time or another, and it is one of the top reasons for physician visits.  Fortunately, most LBP is mechanical–meaning it is from a physical or structural cause not related to conditions such as cancer or infections.  The problem with this type of LBP is that it usually comes back.  People who have had an episode of mechanical LBP are 90% more likely to experience it again.  It’s best to minimize your risk factors for experiencing LBP by being pro-active.

My Top 7 Tips to Prevent Low Back Pain While Traveling include:

  • If you smoke, stop. Smoking is one of the top risk factors in LBP. Even cutting back can decrease your risk.
  • Limit the amount of sitting that you spend at one time. Get out of a sitting position every hour, and ideally, walk. If you aren’t able to walk, then try to shift your position at least once every twenty minutes. Frequent position changes can help to avoid LBP.
  • Sit with good posture. Whenever possible, make sure your knees stay below your hip level and that you are able to maintain your natural lumbar curve. A great tool to help you with this is a lumbar roll.
  • Standing Back Extensions: After sitting, stand up, and perform standing back extensions. I encourage performing at least 10 repetitions each time you stand.

IMG_3843_RGB_4x6

  • Stretch Your Hip Flexors: After performing standing back extensions, it’s time to stretch your hip flexors. The hip flexors tend to tighten up during prolonged sitting. When they spasm, it can cause LBP because they attach directly to the spine. Stand with a good upright posture, with your feet straight ahead, and bend your front knee until you feel the opposite hip flexor stretch. Hold for 30 seconds, and then repeat two to three times on each side.

IMG_3934_RGB_4x6

  • Press-ups: Lie on your stomach and perform 10 to 20 press-ups before you leave from home, when convenient and safe during your travels, and when you arrive at your destination. Go slow and easy, but work your way up to full motion. I encourage performing this multiple times a day as time allows.

IMG_3832_RGB_6x4

  • Stretch Your Hamstrings: Find a doorway and stretch your hamstrings before you leave from home, when convenient and safe during your travels, and when you arrive at your destination. I recommend at least one minute per side and preferably two repetitions per side.

IMG_3844_RGB_6x4

My final tip to manage low back pain is to work with a physical therapist to learn methods to strengthen the lumbar extensor muscles and core musculature.  If available, seek a physical therapist who utilizes the MedX system as it has solid research on LBP and targeted strengthening.  Research clearly indicates that the right targeted exercises are the most effective way to manage LBP.  If you are prone to LBP and want to dig deeper on self-treatment options, my rehabilitation guide can help you.

AVAILABLE NOW ON AMAZON!

In my book, Treating Low Back Pain during Exercise and Athletics, you will learn how to address specific causes of LBP as well as the best practices on how to prevent and self-treat when you experience an episode of LBP.  In this step-by-step LBP rehabilitation guide (complete with photos and detailed exercise descriptions), you will discover how to implement prevention and rehabilitation strategies to eliminate pain and get back to training and exercise sooner.

Learn how to prevent, self-treat, and manage LBP so you can get back to your daily life and exercise goals more quickly without additional unnecessary and costly medical bills!

BUY NOW

Treat Your Own Back (Orthopedic Physical Therapy Products, 2011)

McKenzie is a pioneer in the field of physical therapy.  He offers very easy and practical advice on how to treat and manage low back pain.  I recommend this book to anyone who has experienced low back pain or knows someone suffering from low back pain.