8 Easy Strategies to Limit the Risk of Falling

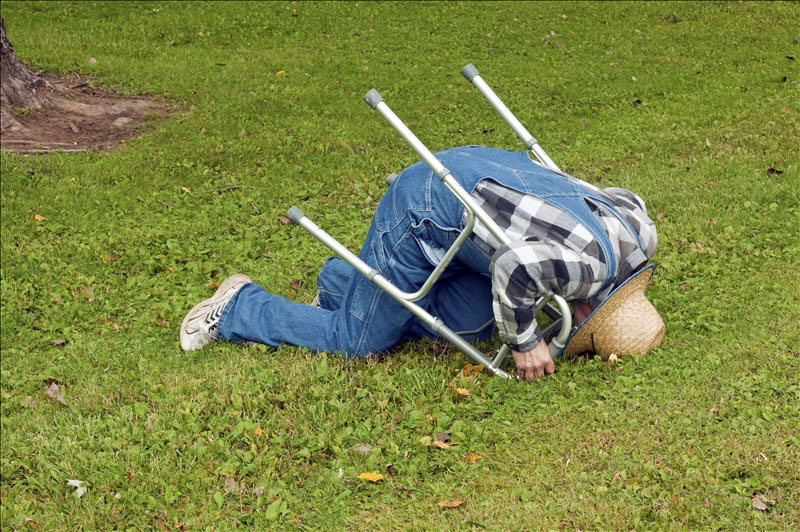
Falling is one of the most debilitating problems an elder adult can face.  Presently nearly 90% of hip fractures in the elderly population are due to falling.  Sadly, nearly 1 in every 5 elder adults who fracture a hip will die within one year due to complications from the injury.  Implementing strategies to avoid falling and injury is one of the most important things you can do for yourself and your loved ones.  As part of aging successfully and gracefully, strive to maintain your independence and functional mobility as long as possible.

Falling and the fear of falling cause a downward spiral of mobility and independence among the elderly.  This affects a person’s quality of life and significantly increases end of life health care costs.  A lack of mobility is a major contributor to poor health status.  More health care dollars are spent as the person continues to become sicker with chronic diseases such as diabetes, heart disease, congestive heart failure (CHF), chronic obstructive pulmonary disease (COPD), and cancer.  These conditions should be (in part) managed through exercise as medicine along with a healthy diet.

elderly man with a walker takes a tumble in the park

8 Easy Strategies to Limit the Risk of Falling:

  1. Keep walkways clear and free from clutter.  Many falls are avoidable simply by cleaning up the areas we frequently walk through.
  2. Remove throw rugs or at the very least, tack them down so they are less of a trip hazard.
  3. Add adequate lighting that is easy and convenient to turn on/off from your destination location (such as your bed or recliner).  Put the light source on a remote control or clap on/off switches so that you don’t have to walk in the dark from the light switch to your destination.
  4. Drink more water.  Many falls are due to dizziness caused by dehydration.  The older you are, the easier it is to become dehydrated.  Drinking more water not only prevents dehydration, but it also aids in preventing urinary tract infections (UTI).  A UTI can cause weakness, dizziness, and confusion in the elder adult; thus, increasing the risk of falling.
  5. Use assistive devices correctly.  Many people don’t use their canes or walkers appropriately.  This can make the device a trip hazard and also increases the risk of falling.  If you are unsure how to correctly use an assistive device, please ask a physical therapist for instruction.
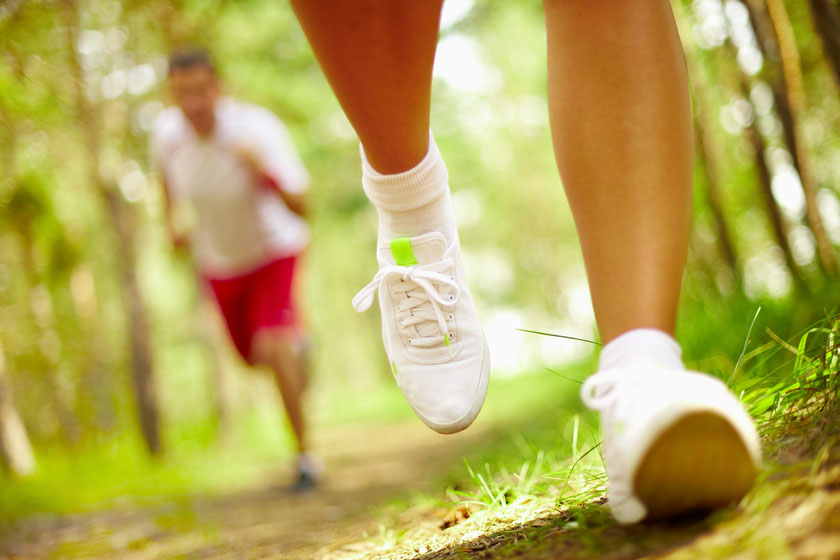
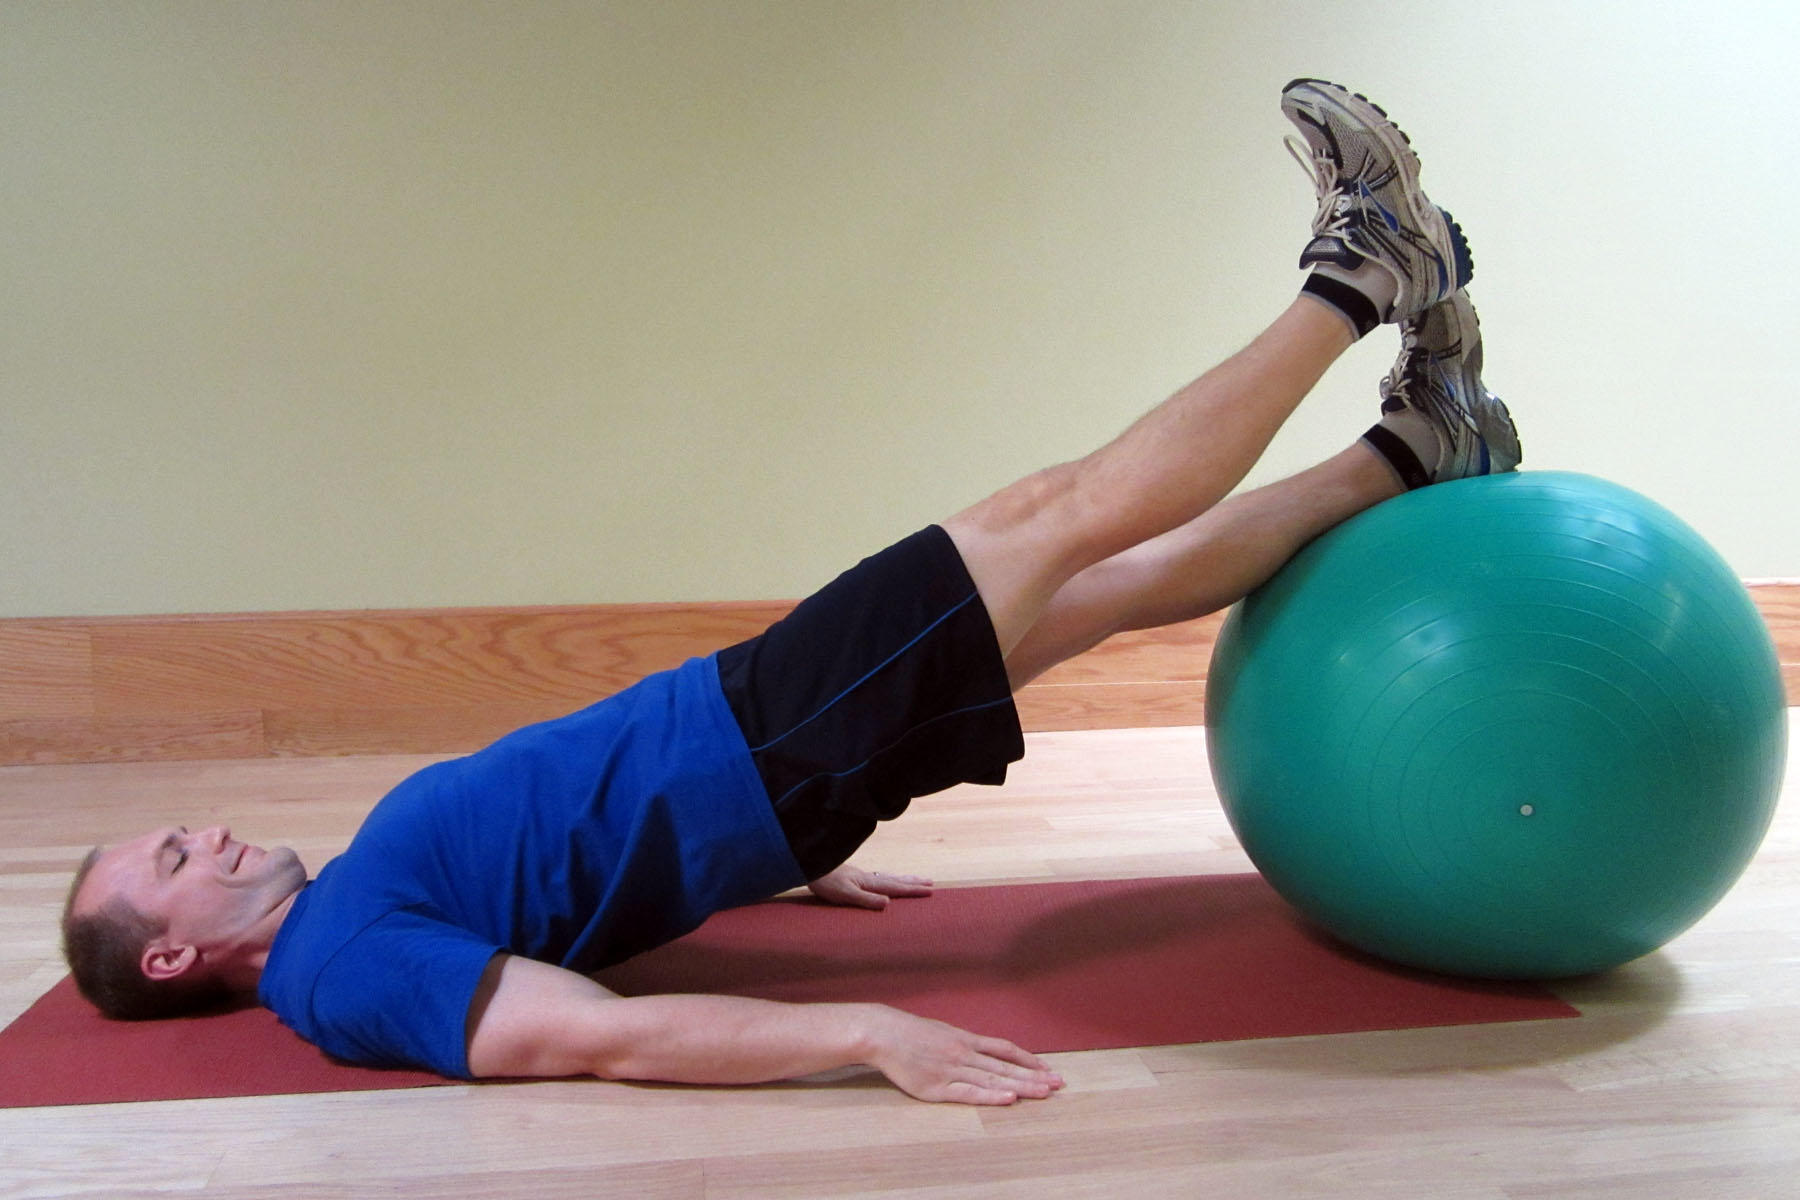
  6. Stay active.  Many older adults become less active over time.  This occurs for a variety of reasons, but muscle weakness and debility can develop very quickly.  A daily walking program or participating in a Tai Chi class can be excellent methods in maintaining balance and mobility while decreasing the risk of falling.  I also highly encourage weight training in older adults as muscle atrophy is a major cause of debility and frailty.  You are never too old to strength train.  The benefits of strength training are noticeable regardless of age.
  7. Work on your balance.  Like muscle, balance can be a use it or lose it proposition.  Balance is affected by many of the body’s systems.  A quick daily balance routine can greatly reduce your risk of falling.  Please refer to the following resources to get started: How Do I Improve Balance? (Part I), How Do I Improve Balance? (Part II), and Improving Balance by Using a Water Noodle.
  8. Seek help from a physical therapist.  Many physical therapists specialize in geriatric care and balance disorders.  Treatment options are available in a clinic setting or in the home.  Physical therapists can provide care directly in a client’s home.  Most health insurance will cover the service if ordered by a medical physician.  Physical therapy can provide a great benefit in addressing risk factors for falling.  This may include a home evaluation, a physical assessment, and treatment recommendations.  In most cases, a treatment plan should include a balance and strengthening component.  Thankfully, you can benefit from physical therapy no matter your age.  My oldest client was 102 years old.  She progressed from being bed bound to being transferred (while using a lift) to walking over 100 feet with assistance!

Most falls are preventable if you are proactive. Implementing these 8 easy strategies will significantly reduce your risk of falling. A fall can significantly and permanently alter your ability to care for yourself and function independently. Broken Hips: Preventing A Fall Can Save Your Life is an excellent NPR article, including an audio clip, that really drives home the importance of this issue.  Make changes today for a better tomorrow!

Have you or a loved one been injured from a fall?  Which strategy can you implement to reduce your risk of falling?  Please leave your comments below.

If you have a question that you would like featured in an upcoming blog post, please comment below or submit your question to contact@thePhysicalTherapyAdvisor.com. Be sure to join our growing community on Facebook by liking The Physical Therapy Advisor!

Q & A: Should Children Run Long Distances?

Q.  My son is 14 years old.  He wants to run a marathon this summer.  He has participated in many races ranging from 5k to 5 miles in the past.  Is long distance running safe for children?  -Mark

A.  Thanks, Mark, for this great question! The topic of children running extreme distances from marathons to ultra-marathons is still debatable (as is strength training in younger children).  In general, the science and research supporting adolescent runners is inconclusive and continues to evolve.  Children’s physical, mental, and emotional development varies widely and isn’t necessarily correlated to chronological age.  When choosing which type of activity and exercise is appropriate for a child, his/her physical, mental, and emotional development need to be considered.

I believe that children are capable of running longer distances even at an early age although most will not want to.  The real question is: Should they?  Running and activity should be encouraged in whatever form the child prefers.  There has been very little research on the effects of long distance mileage on younger children.  Physiological considerations include:

  • Growth Plates. The epiphyseal plate (growth plate), which is a cartilaginous plate at each end of a long bone, in children typically closes between 18-25 years old. It is most active when the child is younger. Excessive stress (either in the form of overload such as weight lifting very heavy loads with poor technique or repetitive loading such as running long distances) could cause damage to these growth plates, which affects the child’s ability to properly grow.
  • Muscle Strength. A child’s muscle development is not the same as that of an adult. This means that the repetitive strain of long distance running (particularly on hard surfaces) could again increase the risk of repetitive motion injuries. A child’s musculature may not be mature enough to handle the repetitive load.
  • Energy Metabolism. Children typically have a very high metabolism. They require more carbohydrates than adults as well as additional fat consumption to insure adequate cholesterol to promote normal brain development. A child’s ability to store carbohydrates is less than that of an adult due to a smaller body mass size. Issues with fueling during longer runs could have more consequences for younger runners.

A child’s ability to tolerate longer distances will widely vary based on his/her physical, mental, and emotional development.  If a younger child desires to run a long distance race, then he/she will require supervision.  A healthy eating plan that is high in fat and protein is critical.  A proper fueling plan for carbohydrate intake will insure that the child acquires additional nutrients for the activity and for normal growth and development.

Typically, younger kids and teens will not be as proficient of runners compared to most adults because children’s lungs and VO2 max don’t peak until the 20s.  However, they can run surprisingly fast!  A younger child’s body is more adept at handling shorter distance intervals or bursts of running than longer distances.

Running

Consider the following when determining if long distance running is appropriate for your child:

  • Assess your child’s physical, mental, and emotional development.  Could he/she handle long distance running in these three crucial areas?
  • What kind of surface will the majority of the running take place on? I highly advise grass, trail or dirt path versus concrete and sidewalks. Definitely avoid long runs on hard surfaces. Keep to softer surfaces, such as dirt or grass, when possible. This decreases the strain on a child’s growth plates and body in general.
  • What is the anticipated training volume? How many actual miles of running? I would advise a lower mileage program.
  • A proper fueling and rehydrating plan must be addressed. This needs to be closely monitored by a parent (and not only by the child involved).
  • Consider tackling a shorter distance such as the half marathon. Increase the mileage as the child ages and matures.

A new runner (of any age) should spend more time initially working on an adequate running base and proper running form.  Encourage your child to develop good habits and proper technique now, so that running can be a lifelong pursuit.

I’m a supporter of children who participate in cross country programs at school.  It provides an opportunity to run 3-5 mile distances regularly on softer surfaces while developing a wonderful base (and comradery as well).  I also highly encourage children to participate in a school track program.  Run different distances, such as the 800 or 1200 meter distance, in order to develop proper running form and technique.  It also helps to develop the child’s ability to run faster, not just longer.

Encourage your child to be active and participate in various activities.  If he/she desires to engage in long distance running, progress slowly and closely monitor for any symptoms of pain or injury.  If you suspect a developing problem, consult your pediatric physician about your concerns.  I would also caution you that many pediatric physicians may not be too keen on the idea of long distance running in pre-teen children.  Seek a physician who is open to the idea and can work with you and your child to insure optimal health.

Pre-teens and teens are best suited for shorter distance running, but with proper training they could safely run longer distances (ranging from the 10k to the half marathon).  Most children’s physical, mental, and emotional development is not suitable for running distances such as the marathon and especially, ultra-marathons.  I typically don’t recommend those distances until at least mid to late teens.  If attempted, special care should be taken to avoid over taxing their young bodies.

Thanks, Mark, for the question.  I wish you and your son all the best in his future running endeavors!

Do you have a child or know of one who has participated in long distance racing?  Please share your thoughts below. 

If you have a question that you would like featured in an upcoming blog post, please comment below or submit your question to contact@thePhysicalTherapyAdvisor.com. Be sure to join our growing community on Facebook by liking The Physical Therapy Advisor!

Disclaimer:  The Physical Therapy Advisor blog is for general informational purposes only and does not constitute the practice of medicine or other professional health care services, including the giving of medical advice.  No health care provider/patient relationship is formed.  The use of information on this blog or materials linked from this blog is at your own risk.  The content of this blog is not intended to be a substitute for professional medical advice, diagnosis, or treatment.  Do not disregard, or delay in obtaining, medical advice for any medical condition you may have.  Please seek the assistance of your health care professionals for any such conditions.

14 Tips and Strategies to Self-Treat Muscle Pain

Muscle pain is common and often occurs after exercise or activity.  Although the pain is uncomfortable, most types of muscle pain are benign and quickly pass.  Muscle aches and pains can affect your ability to compete or train at a high level.  It also can affect your sleep and mood.  Discover the possible causes of muscle pain as well as prevention and treatment strategies.

Possible Causes of Muscle Pain include:

  • Delayed Onset Muscle Soreness (DOMS). This soreness typically occurs 24-48 hours after an exercise session due to micro trauma within the muscle tissue. It tends to be worse after eccentric biased exercise where the muscle is lengthened.
  • Muscle Strain. If you strain your muscle either by over lengthening or over exerting the muscle capacity, muscle tearing may occur. Depending on the size and location of the tear, it may range from minor to severe (potentially needing surgical intervention).
  • Myofascial Issues. Layers of the myofascia (the dense, tough tissue which surrounds and covers all of your muscles and bones) may become bunched or knotted up and result in pain. This is typically due to poor posture, repetitive motion injuries or over exertion.
  • Neurological Issues. Many neurological disorders, including pinched nerves, can cause pain. Other medical conditions, such as muscular dystrophy, cause muscle dystonia.
  • Illness. Muscle pain can occur as a symptom in colds, flu, Rocky Mountain Spotted Fever, and other viral or bacterial infections.
  • Disease. Many diseases, such as Polio, Lupus, and Lyme’s Disease, cause muscle pain.
  • Medications. Certain medications, such as statin drugs for cholesterol, have been strongly associated with muscle pain.
  • Fibromyalgia. This condition causes muscle pain, joint pain, and extreme fatigue.
  • Rhabdomyolysis. A serious condition, due to either direct or indirect muscle trauma, which causes pain. It can be life threating due to the potential for kidney failure. Common causes include extreme exercise, statin medication, severe injury or illicit drug use.
  • Compartment Syndrome. A serious condition in which excessive swelling and pressure build up in a confined space. It leads to extreme muscle pain and eventually, numbness and tissue death.

This list highlights some of the many potential causes of muscle pain.  Many are benign while others are true medical emergencies.  The most common reasons include: delayed onset muscle soreness (DOMS); muscle strains; myofascial related issues due to posture and/or repetitive motion injuries; and fibromyalgia.

In order to properly treat muscle pain, first identify the cause of your muscle pain.  Can you correlate the symptoms with a certain activity or exercise?  Are you suffering from a cold or flu like symptoms?  If you are unable to correlate a reason for the pain, then you may consider consulting with your medical physician to rule out other possible causes for muscle pain.

Young man experiencing neck pain against a white background

The following tips and strategies to treat muscle soreness specifically address mechanical causes related to DOMS, minor muscle strains, and myofascial issues.  Many of these strategies are also appropriate in helping to manage fibromyalgia symptoms.

14 Tips and Strategies to Self-Treat Muscle Pain: 

  1. Fix Your Posture. Poor posture is one of the most common causes of muscle spasming and pain. This is particularly true if you spend a good portion of your day sitting. Sign up to receive my weekly blog posts via e-mail, and I will share with you My Top 8 Stretches to Eliminate Neck, Upper Back, and Shoulder Pain. These simple exercises, with complete instructions and photos, will help you to improve poor posture and can be performed at home.
  2. Massage. Contact a masseuse, physical therapist, athletic trainer or friend who is skillful in body work and massage to relieve the area in spasm. The specific massage technique to use will vary according to your preference. Massage techniques range from a light relaxing massage to a deep tissue massage or utilization of acupressure points.
  3. Foam Roller. The foam roller allows you to perform self-massage and tissue mobilization. The foam roller is a wonderful tool to prevent muscle cramping and spasms. Please refer to the following posts for more information: Foam Rolling For Rehabilitation and 5 Ways to Improve Range-Of-Motion. I highly recommend a High Density Foam Roller to help aid in your recovery.
  4. Other Self-Mobilization Tools. Many times, a friend or masseuse isn’t available to assist when you need the help the most. A foam roller cannot effective reach places in the upper back or arms, so other self-mobilization tools may be necessary. You can get creative and use a tennis ball or golf ball, but I like a specific tool called a Thera Cane Massager. This tool allows you to apply direct pressure to a spasming muscle. When held for a long enough period of time, the Thera Cane Massager will usually cause the muscle spasms to release and provide much needed pain relief! I am also a big fan of the Thera-Band Standard Roller Massager. I particularly like that its firmness allows for a deep amount of pressure. If you prefer something similar, but more flexible for the boney regions of the thigh or lower leg, I recommend The Stick Self Roller Massager.
  5. Topical Agents. Many topical agents can help to decrease and eliminate muscle spasms. The method of action varies greatly according to the product used. You may find that one product works better than another. Some of my favorite products in my medicine cabinet include: Biofreeze Pain Relieving Gel; Arnica Rub (Arnica Montana, an herbal rub); and topical magnesium.
  6. Magnesium Bath. The combination of warm water with magnesium is very soothing and relaxing. Magnesium is known to help decrease muscle pain and soreness. Options include: Epsoak Epson Salt or Ancient Minerals Magnesium Bath Flakes. I find that the magnesium flakes work better, but they are significantly more expensive than Epson salt.
  7. Oral Magnesium. You can take Mag Glycinate in pill form or by eating foods higher in magnesium such as spinach, artichokes, and dates. Taking additional magnesium (particularly at night) can help to reduce muscle cramps and spasming. It is also very helpful in reducing overall muscle soreness and aiding in a better night’s rest. Most people are deficient in the amount of magnesium they consume on a regular basis. I recommend beginning with a dose of 200 mg (before bedtime) and increasing the dose as needed. I would caution you that taking too much magnesium can lead to diarrhea. Mag Glycinate in its oral form is the most highly absorbable. Although not as absorbable, Thorne Research Magnesium Citrate and magnesium oxide can also be beneficial.
  8. Stay Hydrated. The human body is primarily made of water, which is critical for all body functions. Your muscles are approximately 80% water. Dehydrated tissues are prone to injury and pain as they struggle to gain needed nutrients to heal and repair. Dehydrated tissues are less flexible and tend to accumulate waste products. Stay hydrated by drinking water. Try to avoid beverages that contain artificial sweeteners or chemicals with names you can’t spell or pronounce.
  9. Eat Healthy. A healthy diet is critical to avoid injury, illness, and pain. Your body tissue needs nutrients to be able to perform at a high level. Avoid processed food as much as possible. Limit sugary food and add more protein and healthy fat in your diet. Maintaining a diet with adequate healthy fats is essential in providing the nutrients to support all hormone function in the body as well as support the brain and nervous system. Adequate protein intake is necessary to support muscle health and development. Give your body the needed nutrients to combat illness and function at a high level.
  10. Move More! Not only has research proven that sitting for more than two hours at a time decreases your expected life span, but extended sitting also leads to increased muscle tension, cramping, and pain. If you sit most of the day, get up and walk. If you stand most of the day, frequently change your standing posture. To optimize health and joint function, you should take each joint in your body through a least one full range of motion (ROM) every day. If you are experiencing pain, I recommend performing more frequent ROM (every 1-2 hours).
  11. Stretch. Stretching is a wonderful way to help eliminate a muscle spasm. We instinctively stretch when we feel a spasm begin. Try gently stretching (lengthening) the muscle affected by the spasm. I recommend beginning with a short 30-60 seconds stretch, then repeating as needed. If the spasm or cramp is severe, you will likely need to continue stretching several times in a row, multiple times throughout the day. Stretching should always be part of a general fitness and lifestyle program. As we age, muscle and tendons tend to lose elasticity so stretching becomes even more important. I highly recommend a daily stretching routine or participation in a group class, such as yoga, which incorporates full body stretching.
  12. Acupuncture. I am personally a big fan of acupuncture. It is very useful in treating all kinds of medical conditions. It can be particularly effective in treating muscle cramps, spasms, and pain as it addresses the issues on multiple layers. Acupuncture directly stimulates the muscle by affecting the nervous system response to the muscle while producing a general sense of well-being and relaxation.
  13. Sleep and Rest More. Most people are not sleeping long enough or often enough to optimize health. Take a nap or go to bed earlier. Your body requires time to repair and heal as you sleep. Your body must rest in order to grow and develop. Training every day is not the best way to improve. It can lead to injury and burn out. Take a rest day and have fun. Participate in a Tai Chi or yoga class, take a leisurely bike ride or take a walk in the park.
  14. Speak with your Physical Therapist (PT) or Physician (MD). If your muscle pain cannot be correlated to a specific mechanical cause, please speak to your medical provider to determine if other causes are contributing to the problem. The American Physical Therapy Association (APTA) offers a wonderful resource to help find a physical therapist in your area. In most states, you can seek physical therapy advice without a medical doctor’s referral (although it may be a good idea to hear your physician’s opinion as well).

Most muscle pain and soreness can be self-managed and self-treated if you are proactive.  These tips and strategies are highly effective in managing muscle pain.  A healthy lifestyle is a lifelong pursuit.  If you are injured or not enjoying an activity, you will not stay engaged or motivated in the long term.  Seeking advice specifically from a running coach, physical therapist or physician can be beneficial.

How do you manage your aches and pains?  Which tip or strategy will you incorporate into your treatment?  Please leave your comments below.

If you have a question that you would like featured in an upcoming blog post, please comment below or submit your question to contact@thePhysicalTherapyAdvisor.com. Be sure to join our growing community on Facebook by liking The Physical Therapy Advisor!

Disclaimer:  The Physical Therapy Advisor blog is for general informational purposes only and does not constitute the practice of medicine or other professional health care services, including the giving of medical advice.  No health care provider/patient relationship is formed.  The use of information on this blog or materials linked from this blog is at your own risk.  The content of this blog is not intended to be a substitute for professional medical advice, diagnosis, or treatment.  Do not disregard, or delay in obtaining, medical advice for any medical condition you may have.  Please seek the assistance of your health care professionals for any such conditions.

How to Quickly become Heat Acclimated for Your Race

Spring racing season can be particularly difficult as you prepare for the weather.  Unless you live near the equator or the southern hemisphere (where seasons are opposite), then you likely spend most of the winter preparing for a spring race in relatively cold weather.  How can you quickly and safely become heat acclimated to prepare for a race, soccer or other outdoor sports when most of your training was performed in cold weather?

As you approach mid to late spring, the weather becomes more unpredictable in many parts of the world.  The conditions could be cold, windy, and rainy or in near summer heat while you’re running or playing your sport of choice.  The change from heat to cooler weather is usually an easier transition for most runners and athletes.  However, the transition from colder weather to heat can affect performance.  The exact ideal temperature (approximately 45-55 degrees Fahrenheit) is debatable and also based on humidity.  Most running experts suggest performance impairments of between 1.6% and 3% in marathon times for every 10 degrees above 55 degrees Fahrenheit.

Running and exercising in warmer weather tends to be more taxing on your body and requires more energy to remain cool.  When you’re not acclimatized to running in heat, it takes more effort to keep your running pace.  This increases your risk of muscle cramping, bonking (hitting the wall), and/or being unable to maintain your goal pace (which leads to a longer finishing time).

Group of people running.

6 Tips to Quickly become Heat Acclimated for Your Race:

  1. Perform High Intensity Interval Training (HIIT).  You will need to adequately train your body to handle the extra intensity needed in order to maintain your pace.  The best method when training for a more intense pace is through High Intensity Training (HIT) or High Intensity Interval Training (HIIT).  Perform short bursts (ranging from 30-60 seconds at a time) of activity followed by a 1-2 minute recovery.  The 30-60 seconds should be at a high intensity, meaning that your rate of perceived exertion (RPE) is high.  You should be breathing heavy.  If you are overweight or have arthritis, this may be performed while using a stationary bicycle or in a pool.  You can also walk uphill at a quick pace, then stop and rest.  This is performed in intervals ranging from 30 to 60 seconds as well.
  2. The Sauna.  My preference is to utilize the sauna post running.  This allows me to put forth max effort in performing my scheduled run followed by a 10-20 minute sauna session.  (Initially, work up to a 30-40 minute session if tolerated.)  You can use either a dry heat sauna or a steam room, but choose this based on the anticipated humidity during your race or sport activity.  Utilizing the sauna provides best results if initiated three to four weeks prior to the event.  However, positive effects can occur in as little as one to two weeks before the race.  I recommend tapering down and discontinuing sauna use two or three days prior to the event.  If you’re hard core, try performing light exercise when in the sauna or steam room.  A few rounds of push-ups or squats can be beneficial.  If you own a sauna, you may even consider gently riding a stationary bike.  (If you have a heart condition, please first clear any use of a sauna with your physician.)
  3. Hot Yoga.  Currently, this form of yoga is a “hot” fitness trend.  Preforming hot yoga is an excellent cross training method which allows you to acclimatize to the heat.  I recommend one to two sessions per week as part of your cross training routine.
  4. Increase your Fuel Intake.  You will likely be putting forth a harder effort in the heat to maintain your pace.  I recommend increasing your fuel intake by 100-200 Calories per hour during the race.  This will provide your body with enough energy to push harder than expected.  Experiment with the increased fuel during your training runs or prior to the event.  This will eliminate any potential gastrointestinal (GI) issues from the change in your fueling strategy.
  5. Salt.  It is rarely necessary to supplement with salt tablets during the race.  Muscle cramping can be an issue, but it’s usually due from over exertion and not from a lack of salt.  Heat increases your exertional levels.  If you start to cramp, you can quickly place something salty (such as some pickle juice or a mixture of sea salt and honey) in your mouth.  (You don’t even need to ingest the food or beverage.)  It will trigger a neurological response which can alleviate the cramp.
  6. Colostrum.  Colostrum is the first milk produced by female mammals after giving birth. It contains a host of immunoglobulins, anti-microbial peptides, and other growth factors. It is especially good at strengthening the intestinal lining which prevents and heals conditions associated with a leaky gut. Colostrum can also help a person more effectively exercise in hotter conditions. Over all, it can boost the immune system, assist with intestinal issues, and help the body to recover faster. I recommend CapraColostrum by Mt. Capra, which is a goat based supplement. If you have a goat allergy, I also alternatively recommend a cow (bovine) based supplement known as IgG 2000 CWP. This supplement is an immunoglobulin concentrate made from bovine colostrum.

In general, exercising in warmer weather tends to be more taxing on your body.  It requires more energy to remain cool.  Incorporate these 6 tips on how to quickly and safely become heat acclimatized as you prepare for a race or other outdoor sport.  You will likely experience a successful outcome by maintaining your goal pace while avoiding dehydration and muscle cramping.

What is your preferred weather condition for running or outdoor sports?  Do you have any tips to share that have helped you to acclimatize to warmer than expected conditions?  Please leave your comments below.

Looking for that exercise or book I mentioned in a post?  Forgot the name of a product or supplement that you’re interested in?  It’s all listed in the Resource Guide.  Check it out today!

If you have a question that you would like featured in an upcoming blog post, please comment below or submit your question to contact@thePhysicalTherapyAdvisor.com.  Be sure to join our growing community on Facebook by liking The Physical Therapy Advisor!

How to Avoid an ACL Injury

Spring soccer season has begun!  ACL injury can be devastating.  Unfortunately, it’s a common injury that occurs in soccer as well as other sports.  The ACL (Anterior Cruciate Ligament) is an important ligament of the knee that is responsible for knee stability.  ACL injury often occurs in combination with other injury to the knee, including injury to the medial collateral ligament (MCL) and the meniscus.  Depending on the severity, surgery is typically indicated to correct an injury to the ACL and meniscus.  Discover the risk factors for ACL injury, and learn how to implement strategies in order to avoid injury while staying active in sports.

Risk Factors for ACL Injury:

  • More common in females.
  • Hamstring weakness.
  • Poor lower leg strength.
  • Poor core strength and stability.
  • Knee laxity.
  • Genetic anatomical variations including: certain bone shapes in the tibia, femur, and the knee joint, as well as a wider q-angle in women (due to the shape of the pelvis, the angle of the femur to the tibia is larger).
  • Prior ACL injury.
  • Extrinsic factors such as weather conditions and different surfaces (typically those surfaces that have a high level of friction and little give such as turf or playing indoors).
  • Higher body mass.

When surgery is needed to repair the ligament, an ACL injury is a season ending process with a long recovery.  It can take 9-18 months to adequately heal and recover from injury prior to returning to pre-injury levels.  Therefore, it’s critical to take steps to limit your risk of injury.

6 Tips for Avoiding ACL Injury:

1.  Increase your core strength and stability.  Please refer to Core Exercises for ACL Injury Prevention for detailed descriptions and photos of my recommended core stability exercises.

BallBridgewithLegRaiseExercise

2.  Increase your lower leg strength and focus on your hamstrings.  Hamstring strength is critical in avoiding ACL injury.  In general, lower leg strength is a critical component in avoiding injury.  Perform exercises such as the squat (for general lower leg strength) as well as lunges and the straight leg dead lift to increase hamstring strength.  For more ideas on how to improve your leg and hip strength, please refer to Q & A: How to Increase Hip Strength and Improve Mobility.

3.  Add plyometric exercise to your routine.  Plyometrics is an excellent technique to improve strength and explosive power to your lower legs.  When performing the movements, be sure to focus on the alignment of your legs and knees.  Let the knees absorb the force, then rebound out of the movement.  Don’t allow your legs to buckle inward.  Keep the patella (knee cap) in line with your second toe to insure proper form.

4.  Focus on sport specific mobility drills.  Sports, such as soccer, football, and basketball, have higher rates of ACL injury.  Be sure to work on sport specific mobility drills.  Focus particularly on proper landing after jumping, decelerating movements, and quick cutting movements.  When performing these drills, don’t allow your legs to buckle inward.  Keep the patella (knee cap) in line with your second toe to insure proper form.

5.  Improve your balance.  Balance is an important part of mobility.  It is usually overlooked and taken for granted until mobility is significantly affected.  In How to Improve Balance Using a Water Noodle, I demonstrate a clock drill which I highly recommend you perform in order to maintain and improve your balance.  Also, please refer to Q & A: How Do I Improve Balance (Part II) for specific suggestions on how to improve balance in each of the five body systems.

6.  Participate in an ACL conditioning program.  The Santa Monica ACL Prevention Project developed an ACL Injury Prevention Program specifically for female soccer players.  This 15-minute training program incorporates balance, agility, and performance drills into the warm up phase of training and practice.  This particular ACL prevention training plan has 6 phases including: warm up; stretching; strengthening; plyometrics and/or agility drills; and cool down.  The conditioning program is usually performed two to three times per week.

Incorporate these 6 tips and strategies as part of your normal training and cross training routine to avoid ACL injury.  They can be incorporated into your off season as well as part of an in season training program.  If you suspect an ACL injury, please consult with your physician, physical therapist (PT), or athletic trainer (ATC).

Do you participate in an ACL prevention program?  Which specific tip can you incorporate into your routine?  Please leave your comments below.

If you have a question that you would like featured in an upcoming blog post, please comment below or submit your question to contact@thePhysicalTherapyAdvisor.com. Be sure to join our growing community on Facebook by liking The Physical Therapy Advisor!

Q & A: How to Increase Hip Strength and Improve Mobility

Q.  Hi. I have been noticing that even with my current strength training I’m pretty weak in my hip area.  I’d like to work on strengthening this area, so I don’t have problems when I’m older.  Can you recommend a few exercises that I can add to my routine?  Thanks, I love your posts and utilize the information as often as I can.  -Amy

A.  Thanks, Amy, for this fantastic question! It’s wonderful that you are aware of this particular weakness and you’re being proactive now versus experiencing potential issues later. Maintaining adequate hip and pelvic strength is important for many reasons. The hip muscles control or influence most of the lower leg mechanics, including the hip, knee, and foot.  They also play a role in lumbar stability and mobility.  Both hip strength and mobility is vital to insure proper lower extremity movement.

Weakness and/or poor mobility in the hips can lead to potential problems including:

  • Hip pain
  • Knee pain
  • Lumbar pain
  • Abnormal gait patterns
  • Increased fall risk
  • Early development of osteoarthritis in the hips and knees
  • Iliotibial band syndrome
  • Hip bursitis
  • Shin splints
  • Plantar fasciitis

Many other conditions and pain can also be attributed to poor hip strength and mobility.  This is by no means an all-inclusive list.  I have written specific blog posts regarding many of these conditions.  In each case, one of my recommended tips is to improve both hip strength and mobility.  Many of the hip muscles are located deep in the pelvis and buttock area.  They are not necessary large, but they are critical.  These hip muscles can also be responsible for pain, particularly when spasming.  Piriformis Syndrome occurs when the piriformis muscle (a deep hip rotator muscle) spasms.  The spasm can cause buttock pain.  Due to its proximity to the sciatic nerve, it can also cause radiating pain down into the leg known as sciatica.

How to Increase Hip Strength and Improve Mobility:

  • Squat. The squat activates nearly all of the muscles in the lower leg. It is particularly effective at activating the muscles in the legs referred to as the posterior chain, which includes the hamstrings, the glutes (or buttock muscles), and the hip adductors (or the groin muscles). It also activates muscles in the hips, the calves, the stabilizing muscles in the ankles, the quadriceps, as well as the core (the abdominals and lumbar extensor muscles). These muscles are critical for all functional mobility related movements, including walking; getting up from a chair or a toilet; or picking up someone or something. For more information on squatting, please refer to 7 Reasons Why the Squat is Fundamental to Life.
  • Target the hip muscles. Many of the muscles of the hip require specific exercises to insure that the correct muscle is activated. Please refer to Hip Strengthening Exercises for detailed descriptions and photos of my recommended exercises.

MonsterWalkWithExerciseBand

  • Improve your mobility. Tightness and restrictions in the hip and pelvic musculature are often associated with pain in the legs and low back. Please refer to Hip Stretches and Mobilizations for detailed descriptions and photos of specific stretches for the hip and pelvis and how to self-mobilize by using a foam roller and lacrosse ball. Tightness and restrictions increase your risk of injury due to improper mobility. For example, tightness in the hip internal rotator muscles causes the hip and lower leg to roll in, which is associated with Patellar Femoral Pain Syndrome (also known as runner’s knee). For more information on this condition, please refer to How to Self-Treat Patellar Femoral Pain Syndrome.
  • Self-mobilize. Using a foam roller is an excellent method to decrease pain and improve mobility throughout the hip and pelvis. For more information on how to use a foam roller, please refer to Foam Rolling for Rehabilitation.
  • Walk more frequently. Walking is a critical component to healthy aging. Walking on various surfaces and terrain is an excellent way to improve your health, fitness, and hip strength. To discover other benefits walking, please refer to Why You Should Walk, Not Run.

Maintaining adequate hip and pelvis mobility and strength is an important strategy in avoiding many lower extremity orthopaedic conditions.  Being aware of a particular area of weakness and being proactive now could save you from experiencing pain in the future. Thanks, Amy, for your question!

Which strategy will you use to increase your hip strength and improve mobility?  It could be as simple as using the foam roller or walking.  Most importantly, just get started!  Please leave your comments below.

Looking for that exercise or book I mentioned in a post?  Forgot the name of a product or supplement that you’re interested in?  It’s all listed in the Resource Guide.  Check it out today!

If you have a question that you would like featured in an upcoming blog post, please comment below or submit your question to contact@thePhysicalTherapyAdvisor.com. Be sure to join our growing community on Facebook by liking The Physical Therapy Advisor!

How to Safely Overreach to Advance Your Training

Overreaching is a term used to describe an acute training phase during which you temporarily increase the training volume, load, and/or intensity as part a specific training strategy to gain a specific training outcome.  When properly programmed, overreaching can be an effective and important part of a training cycle.  Unlike Overtraining Syndrome (OTS), overreaching is an actual training strategy to build strength and/or performance.  Although it typically results in additional fatigue and soreness, you can easily recover with a few days of rest and a specific recovery plan.  After resting, the desired outcome is an obvious improvement or supercompensation in that specific sport or activity.

Overreaching is an important component of high-quality training.  When utilizing overreaching, please be aware of the potential to develop Overtraining Syndrome (OTS).  Please refer to 12 Tips to Prevent Overtraining Syndrome for the warning signs.  Overreaching is an advanced training concept and shouldn’t be utilized by novice individuals regardless of the sport or activity.

Why risk Overtraining Syndrome to incorporate overreaching into your training?

  • Overreaching helps your body to perform the extra steps needed to produce more results in a shorter period of time.
  • Overreaching helps you “shock” the body in order to improve. During a short period of time (days to weeks), you push yourself to a state of being nearly overtrained prior to backing off. This is more than the typical overload you are attempting with regular training.
  • Supercompensation occurs as you push yourself to the limit. Then you pull back from the brink of being overtrained as you transition into a rest and recovery phase, which is outlined in 12 Tips to Prevent Overtraining Syndrome and 10 Tips to Self-Treat Overtraining Syndrome.
  • Quality intermediate to advanced training plans incorporate a stair step increase in performance with 3-4 intermittent bouts of overreaching throughout a typical periodized training year. Make sure that your training plan is right for you.

IMG_1106_Small

6 tips on how to safely overreach to advance your training:

  1. A planned and programmed overreaching session should last no longer than 1-2 weeks.
  2. Increase your training, intensity, and/or volume no more than 40%. For example, if you typically run 50 miles a week, then plan on a week or two of 70 miles before your scheduled rest and recovery days. You may also choose to combine two harder variables in one training session. Combine a long run with challenging hills, a tempo session with speed work, or take a long run after performing a high intensity interval training session (HIIT).
  3. Watch for the following warning signs of overtraining syndrome: feeling fatigued sooner during the workout; excessive fatigue or soreness; changes in appetite (larger or smaller); and a longer post workout recovery time. If you’re experiencing these symptoms, then you are into overreaching and on the verge of overtraining. Depending on how much longer in the phase you need to progress, you may need to discontinue your overreaching training plan and initiate your recovery protocol.
  4. During the overreaching cycle, be sure to properly recover between each bout of exercise. Implement specific recovery strategies including: extra sleep; adequate nutrition and hydration; proper supplementation; and foam rolling.
  5. Plan a 5-7 day recovery protocol. Several methods to help you to recover are outlined in outlined in 12 Tips to Prevent Overtraining Syndrome and 10 Tips to Self-Treat Overtraining Syndrome. Find more recovery tips in Muscle Cramping & Spasms – Treatment Options.
  6. Once you complete your recovery time, continue with your training plan. Take note of where you are and how you feel in your training. If you are feeling well and are demonstrating improvement, be sure to adjust your training plan by appropriately tapering up the volume and/or intensity to match your added gain. For example, if you were squatting 200 lbs. as a part of your work sets, you may increase the weight by 5-10% for a total of 210 or 220 lbs. This would also be the case for any other exercise or running distance and/or pace.

Overreaching can be an excellent method to speed up and quickly advance in your training.  Overreaching increases your risk of developing Overtraining Syndrome (OTS).  It should be performed carefully and thoughtfully as part of a complete training plan.  Overreaching should always be followed with an equally thought out rest and recovery protocol.  During your overreaching cycle, document your training and recovery strategies so that you can refine your process.  It will make your next attempt at overreaching even more effective and safe in the future.

Discover how you can continue to train hard and avoid the associated poor performance, illness, and injury that can result in lost training days and opportunity!

AVAILABLE NOW ON AMAZON!

In my book, Preventing and Treating Overtraining Syndrome, I show you how to recognize the risk factors and symptoms of OTS.  You’ll learn how to utilize prevention strategies to help you develop a personal training strategy that will allow you to push past your limits and prior plateau points in order to reach a state of what is known as overreaching (your body’s ability to “supercompensate”).  This will speed up your results, so that you can train harder and more effectively than ever before!  In addition, learn how to use the foam roller (complete with photos and detailed exercise descriptions) as part of a health optimization program, recovery program, rest day or treatment modality.

BUY NOW

10 Tips to Self-Treat Overtraining Syndrome

Overtraining Syndrome (OTS) can affect any athlete in any sport or at any level. I have treated high school athletes to weekend warriors for OTS. Recently I have noticed more cases of OTS among CrossFit enthusiasts and runners of all distances. People are training harder and longer than ever before with wonderful results. At times, even the best of intentions can lead to not so desirable consequences. OTS usually starts with muscle soreness and a feeling of fatigue. Then it quickly progresses into a case of overtraining syndrome or injury. Overtraining can occur when the intensity and/or volume of exercise becomes too much for the body to properly recover from. For my tips and strategies to prevent OTS, please refer to 12 Tips to Prevent Overtraining Syndrome. In this follow up post, I will specifically address how to self-treat OTS.

Overtraining Syndrome will significantly impede your performance and frequently leads to a serious injury.  In OTS, your body isn’t able to adequately handle or adapt to the high volume and intensity of exercise that you are performing. If you develop OTS, you will need to take specific steps to speed up your recovery in order to prevent injury.  Depending on the duration of symptoms and the severity of the case, OTS is a serious condition which can take a long time to recover from.  OTS not only affects the muscular system, but also the circulatory system, the nervous system, and the hormone regulation system.  Recognizing the warning signs early and being proactive in prevention will help you to avoid OTS.  If you’re already suffering, use the following tips and strategies in your recovery.

ActiveRest

10 Tips to Self-Treat Overtraining Syndrome:

  1. Rest. One of the first and primary treatments for OTS is to rest. More rest is required the longer the overtraining has occurred. Therefore, early detection is critical. If the overtraining has only occurred for a short period of time (such as three to four weeks), then a brief three to five days of rest may be sufficient while implementing the following treatment strategies. After the rest days, slowly taper back into training at a lower training volume until recovery is complete. Typically, the intensity of training can be maintained as long as the volume is decreased. I also advise that you start an alternate day recovery cycle. Train for one day, and then take a day off. This will typically last for a few more weeks before resuming your normal training cycle. As you resume full training, it is important that the warning signs of overtraining are identified and corrected. In more severe cases, the training program may have to be interrupted for weeks or months for a full recovery.
  2. Cross train. Opt for an alternate form of exercise to help prevent exercise withdrawal syndrome. If you are heavily participating in CrossFit or running, choose leisurely cycling and yoga as part of your cross training routine. The key is to keep both training volume and intensity low while preserving a baseline of fitness. Most of the medical studies on overtraining are geared toward single sport athletes. For triathletes and other multi-sport athletes, the recovery process may be different depending on the circumstances. If you can identify that the overtraining has occurred in only one discipline, then resting from that discipline (as well as significantly decreasing training in the other sports) may result in a full recovery. Don’t try to substitute more workouts in one sport in order to compensate for rest in another. This will only worsen the symptoms of OTS, which affects both the parasympathetic (PSN) and sympathetic nervous system (SNS). Resting from overtraining on the bicycle by swimming more will help to rest fatigued quadriceps. However, stress is stress to the cardiovascular, nervous, and hormone systems. Cross training is an important component in your recovery. Incorporate it in your typical training cycles as a method to limit your risk of injury. Cross training can make training more enjoyable as it keeps your body stimulated and ready for improvement. As you recover from OTS, the volume and intensity must be significantly reduced to allow for adequate rest and recovery.
  3. Spot train your weak areas. In addition to cross training, use this recovery time to spot train your weak areas. Work on your mobility and balance as a prevention technique for areas that are prone to injury. If you have a history of low back pain or a prior knee injury, utilize this time to single out all those weak areas in an effort to prevent injury in the future. As you rest from your primary training routine while incorporating cross training, perform spot training as well. The Resource Guide includes a specific exercise section with rehabilitation exercises ranging from low back pain to knee pain. These .pdf files include photos and detailed descriptions to help you get started on spot training your weak areas. This is also an excellent time to work on the specific technical skills that your sport requires. It may include learning how to mentally manage your sport better.
  4. Actively manage your aches and pains. Consider seeing a masseuse for regular body work. Another option is to use the foam roller after exercise to speed up recovery times and decrease the risk of muscle soreness or restriction. To learn how to use a foam roller for self-treatment, please refer to Foam Rolling for Rehabilitation.
  5. Acupuncture. Incorporating acupuncture into your recovery process can be very beneficial. Acupuncture can help to address a multitude of conditions which affect the nervous, muscular, and hormonal systems. All three systems should be addressed during the recovery process. Along with many of my clients, I have experienced wonderful results with acupuncture. I highly recommend an acupuncturist who specializes in sports medicine and has experience treating athletes. During acupuncture sessions, you can take time to specifically work on intentional relaxation and meditation which has the added benefit of addressing the nervous and hormonal systems.
  6. Seek help early. If you are experiencing chronic aches or pain or are struggling with an aspect of your training, seek help immediately. A healthy lifestyle is a lifelong pursuit. If you are injured or not enjoying an activity, you will not stay engaged or motivated in the long term. Seeking advice specifically from an experienced coach, physical therapist, or physician can be beneficial.
  7. Decrease the stimulants. It is important to take steps to help both the nervous and hormonal system re-regulate and rejuvenate. Often with OTS, the adrenals become overtaxed and the level of cortisol (a stress hormone) is too high. Intake of stimulants, such as caffeine, tends to worsen the condition. Remember, caffeine can be found in many pre-work out supplements, running gels, soda, coffee, and tea as well as some over the counter (OTC) medications. During your recovery phase, limiting chemicals that promote stimulation to the nervous and hormonal systems (particularly in regard to cortisol and adrenal function) will speed up your recovery. Once you have recovered and are tapering back into full training, I caution you in limiting stimulants as a prevention strategy for future episodes of OTS.
  8. Eat healthy. A healthy diet is critical to avoid injury. Your body tissue needs nutrients to be able to perform at a high level. Avoid processed food as much as possible. Limit sugary food and add more protein and healthy fat in your diet. Maintaining a diet with adequate healthy fats is essential in providing the nutrients to support all hormone function in the body as well as support the brain and nervous system. In the case of OTS, I encourage that you consume a higher fat diet to help your body’s hormonal system re-regulate. Also, adequate protein intake is necessary to support muscle health and development. For more information on protein intake, please refer to How Much Protein Do I Really Need?
  9. Hydrate more frequently. The human body is primarily made of water, which is critical for all body functions. In the case of OTS, I highly encourage you to hydrate more frequently during recovery. Adequate water intake is critical to avoid dehydration which can negatively affect your training. Dehydrated tissues are prone to injury as they struggle to gain needed nutrients to heal and repair. Dehydrated tissues are less flexible and tend to accumulate waste products. Stay hydrated by drinking water. Try to avoid beverages that contain artificial sweeteners or chemicals with names you can’t spell or pronounce. Coconut water is a popular drink that offers vital nutrients. Also, consider a juicing cleanse with a heavy focus on the kidneys and liver to help detoxify the body.
  10. Supplement. My most recommended supplement to help recover from injury is CapraFlex by Mt. Capra. Essentially, it combines an organic glucosamine and chondroitin supplement with other natural herbs which are designed to reduce inflammation. CapraFlex can be taken long term or intermittently. In the case of OTS, I also recommend a colostrum supplement called CapraColostrum by Mt. Capra. Colostrum is the first milk produced by female mammals after giving birth. It contains a host of immunoglobulins, anti-microbial peptides, and other growth factors. It is especially good at strengthening the intestinal lining which prevents and heals conditions associated with a leaky gut. Colostrum can also help a person more effectively exercise in hotter conditions. Over all, it can boost the immune system, assist with intestinal issues, and help the body to recover faster. Like CapraFlex, Tissue Rejuvenator by Hammer Nutrition contains glucosamine and chondroitin as well as a host of herbs, spices, and enzymes to help support tissues and limit inflammation. I recommend taking either CapraFlex OR Tissue Rejuvenator. You can take CapraColostrum independently or in conjunction with either CapraFlex or Tissue Rejuvenator. I recommend taking these supplements as a recovery strategy. I recommend initially trying a 30 day protocol. If the supplements are aiding your recovery, you may choose to continue taking them for an additional 30 days. I implement this protocol as part of a prevention strategy during times of heavy volume or high intensity training. (Please consult with your pharmacist and/or physician prior to starting any new supplementation protocol. Herbs could interact with some medications particularly if you are taking blood thinners.)

Overtraining Syndrome can be dangerous and severely limit your ability to train.  It also significantly increases your risk of injury.  A recovery protocol should include a multifaceted approach that incorporates strategies to positively affect the muscular, nervous, and hormonal systems.

Nothing can derail your best laid training plans and goals like an injury or suffering from OTS!  If you develop OTS, you will need to take specific steps to speed up your recovery in order to prevent injury and return to a normal training schedule.

AVAILABLE NOW ON AMAZON!

In my book, Preventing and Treating Overtraining Syndrome, I show you how to recognize the risk factors and symptoms of OTS.  You’ll learn how to utilize prevention strategies to help you develop a personal training strategy that will allow you to push past your limits and prior plateau points in order to reach a state of what is known as overreaching (your body’s ability to “supercompensate”).  This will speed up your results, so that you can train harder and more effectively than ever before!  In addition, learn how to use the foam roller (complete with photos and detailed exercise descriptions) as part of a health optimization program, recovery program, rest day or treatment modality.

Discover how you can continue to train hard and avoid the associated poor performance, illness, and injury that can result in lost training days and opportunity!

BUY NOW