3 Easy Exercises to eliminate Wrist and Elbow Pain

Hand, wrist, and elbow pain is all too common (particularly, with computer, tablet, and phone use). Pain in any one of these locations affects all of us from time to time. The two most likely reasons for developing hand, wrist, and elbow pain are from overuse and poor posture.

Poor wrist, shoulder or thoracic mobility is also commonly related to hand, wrist and/or elbow pain. If the wrist cannot flex or extend properly, it not only causes wrist pain, but excessive stretching of the forearm muscles and strain on the elbow (possibly leading to pain). Poor shoulder or thoracic spine mobility can also cause excessive strain on the elbow, wrist and/or hand.

In this video post, I describe three easy exercises to help you quickly eliminate pain in your hand, wrist, and elbow. I demonstrate two simple stretches with an easy variation to improve their efficacy and teach you how to easily improve your hand and wrist strength using a simple rubber band.

CLICK HERE TO WATCH NOW

Posture plays a critical role in the positioning of your extremities with movement and even when sitting (including office and/or computer work). Improper posture combined with poor ergonomics is a top reason to develop not only elbow pain, but also neck, upper back, shoulder, and wrist pain. Regardless if the activity is weightlifting or typing, your posture matters!

For additional ways to easily improve your posture and reduce pain in the arm/hand as well as the neck and shoulder, be sure to subscribe to my e-mail list to gain immediate access to My Top 8 Stretches to Eliminate Neck, Upper Back, and Shoulder Pain for step-by-step exercise instructions and photos.

Hand, wrist, and/or elbow pain can be debilitating and limit your ability to exercise, work on the computer or even use your phone. Be proactive in your care and management. If the pain persists, seek additional help. Don’t let the pain linger. The longer it’s left untreated, the more potential for harm and damage which potentially could lead to a longer recovery. The American Physical Therapy Association (APTA) is an excellent resource for learning more about physical therapy as well as locating a physical therapist in your area.

Do you have any other favorite exercises or stretches to reduce hand, wrist or elbow pain? Please leave your comments below.

If you have a question that you would like featured in an upcoming blog post, please comment below or submit your question to contact@thePhysicalTherapyAdvisor.com. In case you haven’t already, be sure to subscribe to my e-mail list and YouTube channel as well as join our community on Facebook by liking The Physical Therapy Advisor!

5 Strategies to Improve Your Physical Resiliency

Why do some people age well while others do not?  The answer may in part lay in a person’s resiliency.  Resiliency is defined as an object’s ability to return to an original form or position after being bent, compressed or stretched.  When this definition is applied to a person, it gives us a clue as to why some people recover quickly after illness or injury.  This more scientific definition helps us understand why resiliency is nothing more than your own margin for error in life.  The greater margin for error you have, then the less likely something catastrophic will occur.  Continue Reading to discover 5 Strategies to Improve Your Physical Resiliency.

Osteoarthritis vs. Rheumatoid Arthritis

What’s the Difference?

By Dr. Matthew Crooks

Arthritis is a condition involving tenderness and swelling in your joints, and it’s often coupled with inflammation as well. With over 100 different types of arthritis, the two most common forms are Osteoarthritis (OA) and Rheumatoid Arthritis (RA). Both of these involve inflammation in the joints; however, learn how these conditions differ.

Breaking Down the Differences

The main differentiator between Osteoarthritis and Rheumatoid Arthritis is that RA is an autoimmune disorder while OA is a degenerative disease. Another major difference between the two is that RA is a type of polyarticular arthritis meaning that it affects multiple joints as well as different sides of the body. Osteoarthritis affects only a few joints and just one side of the body.

Autoimmune

An autoimmune disease is one that causes your body to think there is an issue in a particular area. As a result, it attacks and damages healthy tissue. In the case of RA, it causes your body to attack the tissue surrounding the affected joints. Your immune system will produce antibodies that will attach themselves to the joints. Your body will then attack these joints which then cause inflammation, swelling, and pain in the area.

Degenerative

Being a degenerative disease, OA is one that affects you as you begin to age as well as prolonged wear and tear on your joints. Over time, the protective cartilage that pads and protects the ends of your bones begins to wear down. As this cartilage begins to wear down, the bones within the joint will start to rub together, resulting in pain and stiffness.

Osteoarthritis Symptoms:

Pain and stiffness within the joints are the most common symptoms of Osteoarthritis. These two symptoms typically appear in the morning or after a period of rest.

Some other symptoms that you will notice with OA: 

  • A limited range of motion or stiffness that tends to go away after activity.
  • Clicking or cracking sounds when bending a joint.
  • Mild swelling in the joint area.
  • Tenderness to touch.
  • Pain in the joint that gets worse with activity and at the end of the day.

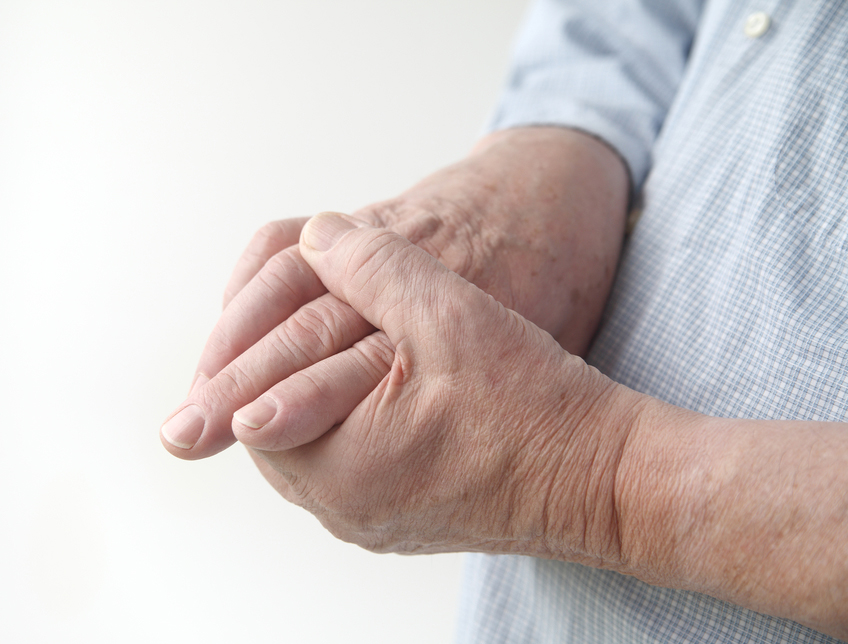
The most common areas that are affected are hands, fingers, knees, hips, and spine. Over time these symptoms will increase and build up rather than show up suddenly and out of nowhere. However, if the stressors that are causing the wearing and breaking down of the joint cartilage are continued, you may notice a sudden increase in the symptoms.

Rheumatoid Arthritis Symptoms:

Like Osteoarthritis and other forms of arthritis, pain and stiffness will be associated with Rheumatoid Arthritis. Besides this, RA will bring with it: swelling; tenderness; and more than one joint that is affected or the same joint on either side of the body is affected. Fatigue and loss of appetite can also be symptoms of RA.

Other areas of the body can also be affected when dealing with RA besides your joints. The prolonged inflammation that comes with the disease can cause the following:

  • Dryness, pain, and redness in your eyes.
  • Dry mouth.
  • Gum irritation.
  • Small lumps under your skin called rheumatoid nodules.
  • Shortness of breath.
  • Anemia.

Osteoarthritis Prognosis

The prognosis for those with Osteoarthritis will vary from person to person and case to case. There are some cases where patients will not be adversely affected much at all by OA while others are severely affected. The fact that it’s a degenerative disease carries the assumption that the condition will continue to get worse over time.

While this is the case with some patients, other times the disease tends to stabilize at a certain point. While some patients will eventually need to undergo some sort of joint replacement surgery, it’s rare for the condition to progress enough for this to be the recommended course of action.

Osteoarthritis is not a condition that can be reversed. However, it is a condition that can be treated. When experiencing symptoms of OA, limiting the activity in those joints and the amount of stress you put on them will help. The most effective strategies you can take are to maintain a healthy weight and exercise regularly.

Rheumatoid Arthritis Prognosis

In the past, Rheumatoid Arthritis carried a more negative prognosis than it does today. Typically, patients can now live a productive and healthy life while continuing to go to work, school and partake in social and physical activities.

Like most conditions though, the prognosis will vary from case to case. In some patients, the symptoms will go through periods of dormancy while others will experience chronic symptoms. In some severe cases, life expectancy can decrease but this is not as common.

Common prognoses associated with RA include: persistent joint inflammation; a decline in mobility/range of motion in the affected area; and pain and stiffness that does not improve with treatment.

Like OA, it can affect other areas of the body as well, outside of the joints. Some patients will experience psoriasis; heart disease; eye inflammation; osteoporosis; anemia; respiratory complications; and depression. Patients with RA will need constant medical care and should be in contact with their primary care physician as well as a rheumatologist regularly.

Treatment

While both of these conditions are chronic and neither can be cured, both are treatable. Treatment can make living with the disease more comfortable (and in some cases, normal).

Reducing inflammation is an important part of treatment. A doctor may suggest anti-inflammatory drugs which will also alleviate the pain and stiffness in the joint. Other forms of treatment are physical therapy or injections depending on your specific area of pain.

Increasing the mobility and range of motion in the affected area will help slow down the progression of the disease. It’s important to be in contact with your doctor if you are experiencing any of these symptoms. There are always options to improve your quality of life.

For more information on RA and OA, please refer to Q and A: Exercises Beneficial to Managing Rheumatoid Arthritis and 4 Key Strategies for Preventing and Treating Osteoarthritis.

About Dr. Matthew Crooks

Dr. Matthew Crooks is a double board certified, fellowship trained interventional pain specialist. He has had the distinction of training with leading experts in pain medicine at two of the nation’s top hospitals, with extensive training in acute and chronic pain management, completing residency in Anesthesiology at Johns Hopkins Hospital. While at Johns Hopkins, he had the honor of being selected Chief Resident of the Department of Anesthesiology and Critical Care Medicine for the 2008-2009 year.


Is Resiliency the Key to Aging?

Resiliency is defined as an object’s ability to return to an original form or position after being bent, compressed or stretched. When this definition is applied to a person, it gives us a clue as to why some people recover quickly after illness or injury. It can even help describe why some people age well while others do not. This more scientific definition helps us understand why resiliency is nothing more than your own margin for error in life. The greater margin for error you have, then the less likely something catastrophic will occur.

However, for this definition to be useful, we must have an understanding as to what makes a person resilient. Are there tried and true methods in making a person more resilient? Discussing resiliency in an object is quite easy. You just have to understand the characteristics of the object in question. Understanding what make a person resilient is a very complicated discussion because of the multifaceted nature of being human.

Resiliency in humans is not just a physical characteristic. It’s comprised of emotional (psychological), mental (cognitive), social (relationships), and spiritual characteristics.

Each characteristic of human resiliency impacts the others. Understanding the interplay of the five different aspects helps in understanding a person’s true resiliency. The patterns of resiliency in others can offer valuable clues on how we can all become more resilient and age well. Continue Reading to discover how to improve your resiliency.

4 Key Strategies for Preventing and Treating Osteoarthritis (OA)

Osteoarthritis (OA) is the most common form of arthritis that affects an estimated 12.1% of the U.S. population (nearly 21 million Americans age 25 and older).  OA is one of 171 different types of arthritis.  The chance of developing osteoarthritis increases with age.  Most people over age 60 experience OA to some degree.

Arthritis is a commonly used term that can have multiple meanings depending on the person.  In general, arthritis means inflammation of the joints.  OA is commonly associated with wear and tear on the joint surfaces from injury or overuse.  It is associated with a breakdown of cartilage in joints and can occur in almost any joint in the body.  OA seems to have a genetic or heredity component.

OA is most commonly found in joints that were previously damaged through injury or wear and tear (particularly, the load bearing joints of the body which include the spine, hips, knees, ankles, and toes).  Finger joints are also commonly affected by OA.

Preventing an injury is always best in order to avoid OA.  Unfortunately, accidents occur.  The following actionable key strategies will help you to prevent and treat OA.

4 Key Strategies for Preventing and Treating Osteoarthritis (OA):

Range of Motion (ROM)

A mobile joint is a healthy joint.  A joint must go through its full ROM on a daily basis to remain healthy.  Most joints do not contain a direct blood supply delivering important nutrients.  Without full ROM, synovial fluid (a nutrient rich and internally lubricating fluid) cannot properly circulate and coat the joint surface.  Over time, this can lead to stiffness and dysfunction along with joint deterioration (such as arthritis).

Appropriate stretching and ROM can be used as a treatment and preventative measure.  Although there are many different stretching methods, not all of them are created equal and are not appropriate in every circumstance.  Research indicates that stretching improperly or at the wrong time can inhibit performance and can lead to worsening pain symptoms in the case of OA.

Five different methods of stretching or improving ROM include:

  • Static Stretching
  • Dynamic Stretching
  • Myofascial Release with Foam Rolling
  • Proprioceptive Neuromuscular Facilitation (PNF)
  • Neuromobilization or Neural Gliding

Please refer to 5 Ways to Improve Range-Of-Motion (ROM) for detailed descriptions for each method.

Stretching is critical to maintaining flexibility.  Flexibility is a critical component to healthy and optimally functioning body and joint surfaces.  While often being overlooked, flexibility and stretching are critical to optimizing health, preventing injury, and maximizing performance.

Stretching should never be done to the point of causing pain.  It is possible to cause injury by over aggressively stretching.  The best results are usually through consistency and a mild to moderate stretching sensation.  Yoga, Pilates, and Tai Chi can also be great forms of exercise to maintain ROM.

Strength

Appropriate strength is the key to insuring proper joint function and stability.  An appropriate strengthening program should be a staple to a healthy aging lifestyle and for osteoarthritis prevention and treatment.  Appropriate amounts of strength insure the body’s joints have appropriate stability for activities of daily living and any desired recreational activities without pain or further wear and tear.

If you have OA, seek a professional (such as a physical therapist) who is familiar with managing OA in order to establish an exercise program that includes strength training.

Excessive shearing forces, rotational forces, and exercises should be avoided.  Joints with severe involvement should be exercised with caution and an emphasis should be placed on ROM and stability versus actual loading of the joint.  All exercises should be performed in a slow and controlled environment within the available ROM.  Maintaining muscle mass through strength training is critical.  Strength training should be performed only one to two times per week to minimize any risk of over stressing the joint.

Healthy Diet

Osteoarthritis as well as many other forms of arthritis can have an inflammatory component.  Other types of arthritis, such as Rheumatoid Arthritis (RA), have an autoimmune component.  Appropriate nutritional management is critical for treatment as well as general prevention.  Consume foods that promote a low inflammatory diet.  This includes a diet high in Omega-3 fatty acids and other natural herbs (like garlic and turmeric) which can naturally lower inflammation.

Healthy Weight

OA is often associated with wear and tear of the joint surfaces (including overuse syndrome).  The most susceptible joints affected are load bearing joints such as the knee and spine.  Weight management is a critical component.

For example:  Every pound of excess weight exerts about 4 pounds of extra pressure on the knees.  A person who is 10 pounds overweight has 40 pounds of extra pressure on his/her knees.  If a person is 100 pounds overweight, that is the equivalent of 400 pounds of extra pressure on his/her knees.

It is important to manage your weight effectively.  Excessive body weight can cause additional wear and tear, particularly on the lower extremities joints, and can worsen any damage caused by OA.

While osteoarthritis (OA) is a common aliment for most of us as we age, it doesn’t have to be symptomatic.  The research on OA is very clear.  If you have OA, it doesn’t mean that you will have pain or develop any form of debility associated with OA.  In order to increase the likelihood that OA doesn’t affect your ability to age well, it’s best to stay as active as possible.  Implement these 4 key strategies in order to prevent and treat OA.

What are your experiences dealing with osteoarthritis?  What has worked or not worked for you?  Please leave your comments below.

If you have a question that you would like featured in an upcoming blog post please e-mail contact@thePhysicalTherapyAdvisor.com.  Be sure to join our growing community on Facebook by liking The Physical Therapy Advisor!

Does Kinesiological Tape Really Work?

I was first introduced to Kinesiological (Kinesio) style taping during a continuing education class in 2005.  Since then, this style of taping has exploded in the mainstream with athletes and celebrities alike wearing it.  Research on this modality was initially scant.  Today there are over 540 published studies with even more antidotal testimony!  Although the research is ongoing and published regularly, I get asked all the time about what can you use Kinesiological tape for and how exactly it works.  I will review three theories on how Kinesiological tape actually works and the different reasons for using it.

Kinesiological Taping For Achilles Tendinitis

How does Kinesiological Tape Work?

  • Sensory Theory (also known as the Gate Control Theory) – The basic premise of this theory is that the Kinesiological tape, when applied to the skin, activates sensory receptors present on the skin. These receptors relay information to/from the brain.  Since the sensory receptors are faster than other types of receptors (such as pain) the brain reacts to the sensory information first.  This can lead to altered movement patterns and awareness to the area.  It can also allow for decreased sensations of pain.  This theory is similar as to why we think topical analgesics (such as Biofreeze) work as well as why transcutaneous electrical nerve stimulation (TENS units) can reduce pain.
  • Circulatory Theory – The basic premise of this theory is that the when the Kinesiological tape is applied with little tension it forms convolutions in the skin. These convolutions create channels and reduce pressure within the tissues, lymph system, and circulatory system which aids in blood and lymphatic flow.
  • Muscle Activation Theory – The premise of this theory is that when the Kinesiological tape is applied at different levels of tension on the skin over the muscles and tissues, the Kinesiological tape can either mechanically or neurological increase or decrease muscle activation via a nervous system response.

Presently the truth behind Kinesiological taping is that we really don’t know exactly how or why it works.  Based on my clinical experience, I believe that the Kinesiological tape interacts with the body’s tissues in different ways depending on how and where the Kinesiological tape is applied.  Depending on how the Kinesiological tape is utilized, any one or combination of the three theories is likely correct.

Research states that Kinesiological style taping is at least as effective as other minimal interventions for musculoskeletal pain which may include topical analgesics like Arnica montana (Arnica Rub) or Biofreeze.

Research has also shown that taping can reduce pain acutely within first week of injury and possibly even in cases of pain which has been present for as long as three to four weeks (or longer).

Research concludes that there are some improvements in muscle and joint range of motion (ROM) and a reduction of pain.  However, because the improvement isn’t significant or long standing it shouldn’t be used as a standalone intervention.  Kinesiological taping is best used in combination with other interventions (such as manual therapy based techniques and exercise) which have been proven to affect outcomes over the long-term.

When Kinesiological tape is used in conjunction with other treatments, it may help speed up the recovery as the Kinesiological tape can allow for other techniques to be utilized more effectively due to the loss of pain, swelling or easing of movements.

Although there have been hundreds of research studies performed, the effectiveness of Kinesiological tape is still questioned primarily due to issues with research design.  Many of the taping applications are based on theory and not science.  Since there isn’t a consistent application pattern, the research studies aren’t comparing the same techniques over large enough patient populations to show a true effect.  In addition, researchers still need to quantify how much tension is actually being used and the actual Kinesiological taping technique being used versus other types of techniques or interventions.

Unfortunately, without better quality research it’s unclear if the results shown in many of the studies are due to an actual effect or through placebo.  For now, none of the studies show significant benefits regarding long-term pain alleviation or improved strength or range of motion (ROM).  So for now, the main conclusion is that Kinesiological taping should be used only as a short-term treatment in combination with other treatments.  I personally use Kinesiological tape, and I often find that my clients experience success with specific tape applications for different conditions.

What do you use Kinesiological Tape for?

  • Reduce pain
  • Reduce swelling and edema
  • Support muscles and joints
  • Reduce muscle tension
  • Increase strength
  • Improve performance
  • Enhance or correct movement patterns through stimulation of sensory receptors
  • Provide compression
  • Enhance healing by slightly lifting skin away from sore or injured tissues to improve blood flow and lymphatic drainage
  • Support injured joints and muscles without impeding range of motion (ROM)

There are dozens of companies’ now manufacturing Kinesiological style tape.  There are many high quality tapes being manufactured with all kinds of colors, designs, and variations in adhesive quality and elasticity.  Personally, my favorite brands are based on price point and actual use.  This includes ease of application and how long the Kinesiological tape actual stays on.  The brands I use most include:  Kinesio Tape, RockTape, Thera-Band Kinesiology tape, Spider tape, and KT TAPE.  Although there are many more brands available, I have not personally used them.

There are many different applications Kinesiological taping can be used for.  Like any treatment modality, it can work wonders for one person and do nothing for another, but should we really be surprised?  Many of our most popular pharmaceuticals are no different.  Kinesiological taping has the benefit of rarely having significant side effects.  There are rarely side effects to utilizing this style of tape as the products utilized tend to be very hypoallergenic.  Occasional skin irritation has been the only noted side effect I have known of in my clinical experience.  In order to avoid skin related issues (including application and removal tips), please refer to Skin Care with Taping.

I have found success with utilizing Kinesiological taping as an adjunct treatment strategy and as part of a complete treatment approach.  If you are interested in specific applications for different conditions, please see the following in which I demonstrate different taping techniques.

Step-by-step guides:

Kinesiological Taping for Osgood-Schlatter Disease

Kinesiological Taping for Patellar Femoral Pain Syndrome

Kinesiological Taping for Shin Splints

Video:

How to Apply Kinesiological Tape When Treating Achilles Tendinitis

Books with step-by-step guides specific for ankle sprains and low back pain:

The Physical Therapy Advisor’s Guide to Treating Ankle Sprains and Strains

The Physical Therapy Advisor’s Guide to Treating Low Back Pain During Activity and Exercise

Have you tried using Kinesiological taping before?  If so, what was your experience like, and did it help you?  Please leave your comments below.

If you have a question that you would like featured in an upcoming blog post, please comment below or submit your question to contact@thePhysicalTherapyAdvisor.com.  Be sure to join our growing community on Facebook by liking The Physical Therapy Advisor!

How to alleviate Elbow Pain

Elbow pain is a common issue that can affect a wide range of people.  Two of the most common types of elbow pain include:  tennis elbow (lateral epicondylitis) which affects the extensor muscles and tendons of the wrist and golfer’s elbow (medial epicondylitis) which affects the flexor muscles and tendons of the wrist.

Possible reasons for developing elbow pain include:

  • Poor grip strength.
  • Muscle imbalances between wrist flexion and extension strength.
  • Improper weight lifting technique.
  • Overuse/overload/overtraining.
  • Mobility related issues in the wrist, shoulder or thoracic spine.
  • Excessive mobility or hypermobility may also be an issue.  It tends to be more common in females than in males, and it’s usually associated with the shoulders or elbows.
  • Repetitive motion injury.
  • Poor posture.
  • Tackling an activity you don’t often do (such as digging holes for a new fence or trimming hedges).

Poor wrist, shoulder or thoracic mobility is also commonly related to elbow pain associated with exercise.  If the wrist cannot flex or extend properly, it not only causes wrist pain, but excessive stretching of the forearm muscles and strain on the elbow (possibly leading to pain).  Elbow pain can be very debilitating.  It can limit your ability to exercise as well as limit your ability to perform daily tasks.

Poor shoulder or thoracic spine mobility can also cause excessive strain on the elbow.  Consider exercises like the overhead lift or pull ups or even the squat.  If the shoulder cannot fully flex or the thoracic cannot fully extend (allowing proper shoulder flexion), then the elbows will absorb more of the load.  The lack of shoulder or thoracic mobility also affects proper alignment of the upper extremity during the movement.  Over time and with multiple repetitions, this overloading can cause pain and injury to the elbow.

Whenever one part of the body doesn’t have adequate mobility, another part will do more to allow for the movement to take place.  When an exercise is performed at a high speed, high relative weight or high repetitions, a lack of mobility can make you more susceptible to pain and injury.

Posture plays a critical role in the positioning of your extremities with movement and even when sitting (including office and/or computer work).  Improper posture combined with poor ergonomics is a top reason to develop not only elbow pain, but also neck, upper back, shoulder, and wrist pain.  Regardless if the activity is weightlifting or typing, your posture matters!  Please refer to How to Improve Posture and Eliminate Pain.

Excessive mobility can have a similar effect.  For example, if you’re performing an overhead lift, but your shoulders flex past 180 degrees, then the bar is too far behind your head.  This causes excessive force to be placed on the shoulders and elbows.  Again, this can lead to injury and pain particularly when performed at a high speed, high relative weight or high repetitions.

How to alleviate Elbow Pain:

RICE

As with many injuries, the initial treatment is RICE (Rest, Ice, Compression, and Elevation).

  • Rest.  Limit any activities that cause pain.
  • Ice.  Use ice as needed for pain and edema control.  The rule for icing is to apply ice no more than twenty minutes per hour.  Do not place the ice directly against the skin, especially if you are using a gel pack style.  A bag of frozen peas can be ideal.  Individuals with poor circulation or impaired sensation should take particular care when icing.
  • Compression.  Consider wearing an elbow compression sleeve.
  • Elevation.  Although it’s not too useful for this specific condition, it would be an excellent time to apply ice.

Self-Mobilization

Cupping is a form of muscle tissue and fascia self-mobilization.  There are many different methods and techniques you can use.  In this video, I demonstrate how to use cupping to treat elbow pain affecting the wrist extensor muscles and tendons.

Cupping can be used to treat elbow pain, elbow tendinitis, and tennis elbow.  These CupEDGE Massage Tools are easy to use and helpful for self-treating tight and restricted areas (on other parts of the body, too).  Another option would be to use a Mini Plunger.  This technique should not cause bruising or discoloration.

Work on your Grip Strength

Developing proper grip strength is important in order to avoid elbow pain.  Easy exercises to train grip strength include:  dead lift; pull ups, and farmers carries.  You can even work on hanging from a pull up bar for time as a way to judge your fitness while gaining strength and endurance in your grip.

A common mistake when training grip strength is to under estimate the importance of improving finger and wrist extensor strength.  It’s critical to keep the appropriate balance between wrist flexors and wrist and finger extensors strength to lessen the risk of wrist and elbow overuse injuries such as tennis elbow or golfer’s elbow.

Your grip strength will improve more rapidly as your wrist and hand muscles find their optimal length tension relationship (which allows for maximum strength production).  I often recommend using a thick rubber band as a way to improve finger extension strength (as demonstrated below).  Work on extending each finger equally when performing two sets of 10-15 repetitions multiple times per week.

Elbow pain can be debilitating by limiting your ability to exercise and perform daily tasks.  Be proactive in your care and management.  If the pain persists, seek additional help.  Don’t let the pain linger.  The longer it’s left untreated, the more potential for harm and damage which potentially could lead to a longer recovery.  The American Physical Therapy Association (APTA) is an excellent resource for learning more about physical therapy as well as locating a physical therapist in your area.

Have you tried cupping as a form of self-mobilization in order to alleviate elbow pain?  What was your experience like?  Please leave your comments below.

If you have a question that you would like featured in an upcoming blog post, please comment below or submit your question to contact@thePhysicalTherapyAdvisor.com.  Be sure to join our growing community on Facebook by liking The Physical Therapy Advisor!

How to Self-Treat an Ankle Sprain (Part III)

As a physical therapist, I find that the most exciting part of a person’s rehabilitation is the full return to function, activity, or sport.  Countless variations of exercises and activities are performed while working toward restoring the full functional use of the ankle.  Concluding the three part series, the final stage in rehabilitation is centered on improving ankle and foot strength, stability, as well as addressing any balance deficits.

How rehabilitation progresses will vary greatly for each individual.  Therefore, no treatment plan will be alike.  For discussion purposes, I will address a generic treatment plan, which should be modified for your personal needs and activity level.  In this final stage of rehabilitation, you will progress to normal daily activities, including any athletic endeavors.  This is also when you work toward limiting any future reoccurrences of the sprain.

At this stage in recovering from a lateral ankle sprain, you should be walking relatively normally and mostly pain-free.  Running and more active side-to-side movements likely still cause pain.  Although not contra-indicated, these types of activities should be limited (unless you’re wearing a good lace up brace or are being regularly taped by a professional).

The initial portion of the rehabilitation is centered on improving ankle and foot strength, stability, as well as addressing any balance deficits.  This process begins with statically based exercises and activities.  Ultimately, it progresses into dynamic strength, balance, and mobility activities.  How rapidly a person progresses in this phase is wildly variable.  The key is to progress at your own pace.  If you start experiencing increasing pain, feelings of ankle instability, and sensations that it may “roll” or sprain again, then you need to taper down your activity level.  After the pain subsides, continue to focus on the activities that that didn’t cause pain or discomfort previously.

The following treatment plan includes exercises for strength and balance as well as mobility drills and full athletic simulation drills.  Each category is listed in an easiest to most challenging format.  You shouldn’t progress to the next exercise until the first one is mastered.

Strength

  • Heel/Toe Raises – A person should be able to perform 25 heel raises in a row with only minimal fingertip assistance on a counter top.  A normal amount of calf strength would be considered once you can perform 25 heel raises. 

HeelToeRaisesCollage

  • One Leg Squat – Perform a one leg squat without using your hands for balance to increase the difficulty level.  The one leg squat on your tip toes is a harder variation which involves more calf muscle activation.  Start with two sets of 10 repetitions, then progress to three sets of 10 repetitions.

OneLegSquat_Collage

  • Clock Exercise – Stand on your affected (injured) foot and attempt to touch your tip toe of the non-affected side as far out as you can reach.  Bring your foot back to the center or starting point according to the hands on a clock.  For example, 1 o’clock to 6 o’clock (clock-wise) or 12 ‘o clock to 6 o’ clock (counter clock-wise) depending on which foot is affected.  Perform the routine between three to five times slowly.

ClockExercise

Balance

  • Stand on one foot – A 30 second hold with eyes open during the first time, then closed during the second time, is considered normal.
  • Stand on one foot on a pillow – A 30 second hold for two to three repetitions.  As you progress, stand on the pillow and perform the Clock Exercise as described above.
  • Stand on one foot and bounce a ball against a wall.
  • Stand on a Wobble Board, Bosu Balance Trainer or other unstable surface.

Mobility Drills

  • Initially, start with forward and backward movements and progress from a walk, to a jog, to a sprint.
  • Jump Rope
  • Side Stepping – Progress the speed as pain allows and if you’re not experiencing the feeling of instability.
  • Karaoke or Grapevine – Walk or run sideways while alternating the placement of the foot either in front or behind the other.
  • Sprint Ladder – A number of agility drills can be performed with the sprint ladder.  Search YouTube and pick your favorite video which closely mimics the footwork desired for your particular sport or activity.
  • Short side-to-side Wind Sprints – While sprinting, touch your hand to the ground at each change of direction.

Full Athletic Simulation Drills

  • Depending on your sport of choice, return to your sport specific training drills.  You may still require additional support.  I recommend wearing a good lace up brace or being taped by a professional for support.  Additional support should only be used temporarily and with the intention of progressing from using them as your ankle can tolerate.

If you continue to experience pain and swelling, and/or require an accelerated time table for recovery (or return to competition), then I recommend the services of a sports medicine physical therapist or athletic trainer.  Many modalities, such as electrical stimulation, manual techniques and taping methods can assist in recovery when properly utilized.  To find a qualified physical therapist in your area, search at American Physical Therapy Association (APTA).

Depending on your time table for recovery and the severity of your injury, the information provided in this three part series on ankle sprains will likely be very helpful in your recovery.  Each person and injury is different.  If you’re interested in a more complete and comprehensive look at self-rehabilitating an ankle sprain, be sure to check out Treating Ankle Sprains and Strains.

Knowing how to effectively self-treat and manage ankle sprains and strains is important in order to resume your training and normal activities without the risk of additional damage, injury or re-injury.  When you can confidently self-treat, you can limit pain levels, return to activity faster, and prevent reoccurrences.

AVAILABLE NOW ON AMAZON!

In my book, Treating Ankle Sprains and Strains, you will learn how to safely and confidently self-rehabilitate a common ankle sprain.  It will guide you through the ins and outs of self-treating your ankle so you can avoid costly rehabilitation bills.  Beginning with the acute phase of rehabilitation, I will walk you through the treatment plan on how to rehabilitate your ankle through the intermediate (sub-acute) phase of rehabilitation and return to full activity and sport.

Learn how to safely self-treat and properly rehabilitate your ankle so you can get back to your daily life and exercise goals more quickly without additional costly medical bills!

BUY NOW

How to Self-Treat an Ankle Sprain (Part II)

Ankle sprains are one of the most common and prevalent musculoskeletal injuries.  Although more likely to occur in children, ankle sprains can happen to anyone anytime.  In my last post, How to Self-Treat an Ankle Sprain (Part I), I addressed how to handle the initial acute phase of an ankle sprain.  I will continue to guide you through the treatment plan on how to rehabilitate your ankle in this three part series by addressing the progression from the acute phase into the intermediate phase.

Sprains are categorized as Grade I, II, or III.  A Grade I sprain is the most common.  It’s typically associated with only mild damage to the ligament, and instability doesn’t affect the joint.  A Grade II sprain is a partial tear to the ligament and is usually associated with some laxity (hypermobility).  If this occurs, it’s best to wear a brace for several weeks.  Ideally, scar tissue will form and compensate for the lax ligament, so the joint doesn’t become hypermobile.  Good muscle strength and proprioception of the lower foot is important to limit future sprains.  In Grade III sprains, a full tear of the ligament occurred.  One typically consults with an orthopaedic surgeon for possible repair.  After surgery, a guided physical therapy program is recommended.

For discussion purposes, I will only address a Grade I sprain.  Initially, one may wear an air splint, ACE wrap, or some other lace-up or slip-on style brace to help with stability, inflammation, and pain control of the ankle.  In most cases, a person will want to transition from wearing the brace as soon as the initial pain subsides.  (If one had a Grade II sprain, he/she would wear a splint for several weeks so that the ankle would initially stiffen.)

At this point in your recovery, you are likely three to seven days since the initial injury.  This phase of rehabilitation can last from seven days to several weeks before progressing into the final phase of rehabilitation (and ultimately, back to full function).  Progression out of the intermediate phase is always symptom dependent.  You should be able to stand with equal weight on your feet and not experience an increase in ankle pain.  The ankle is likely stiff at this time, but it is time to start walking, progress range of motion (ROM), and start gentle resistive exercises.

Walking

If you have been using a crutch to unweight the foot, then start the progression to weight bearing during walking.  If you have been walking, then increase the amount of weight you have been putting on the ankle and foot.  At this time, the focus will be to normalize your walking pattern.  This means having a good heel strike, rolling onto the foot into full weight bearing on the leg, and then propelling forward with a good toe off.  You will continue to use the crutch as long as needed until you can walk nearly normal without limping.  Until then, utilize the crutch to unweight the leg and foot as much as necessary to perform a nearly normal walk or gait sequence.

Range of Motion (ROM)

Start to increase the range of motion of the ankle.  Initially, work to progress the plantarflexion and dorsiflexion movement (the forward and backward movement of the ankle).  As pain subsides, progress the side to side motion as well as all other motions.

Recommended Exercises:

Ankle Pumps – A very easy exercise.  Just pump your ankle forward and backward into plantarflexion and dorsiflexion movement.  Perform 10-15 repetitions several times a day on both feet.

Ankle_Combined

Ankle Alphabet – Move the foot and ankle only by pretending your big toe is a pen, and draw the alphabet using capital letters.  Perform 1-2 times a day.

Calf Stretching – Hold each stretch for at least 30 seconds, three times on each leg, 2-3 times a day.  This stretch shouldn’t cause more than a mild increase in pain or discomfort.

Calves

Gentle Resistive Exercises

Perform plantarflexion and dorsiflexion movement by initially using an exercise band.  I recommend using a Thera-Band Exercise Band.  As your pain improves, you can progress to standing heel and toe raises as long as you don’t experience more than a mild increase in pain levels.

As pain and range of motion improve, progress to inversion and eversion with the exercise band.  Stop if you experience more than a mild increase in pain levels.

Initial Balance and Proprioception Exercise

Stand on one foot. Initially, you may need to use your hand (or a finger) on a counter top for added support.  As the pain subsides and your balance improves, you may need to increase the difficulty level.  As you progress, balance will become of greater importance.

Toward the end of the intermediate phase, you should be walking fairly normally.  There will likely be some swelling.  It’s typical for some amount of swelling to come and go.  It will be directly related to how long you are on your feet and your general lower extremity circulation.  I highly recommend you continue to wear compression stockings during this time.  You may also continue to experience soreness and pain–particularly after a long day or a lot of upright activity.  Continue to utilize a regular icing protocol as needed for pain and swelling.  Also, continue to supplement with CapraFlex.

It’s time to progress into the final stage of rehabilitation once you have returned to near normal walking, your pain levels are relatively low, and you are able to complete the basic exercises listed above.  The final stage of rehabilitation includes a full return to daily activities and eventually, all sport or athletic activities.  I will address the specifics of the final stage of rehabilitation in Part III.

Knowing how to effectively self-treat and manage ankle sprains and strains is important in order to resume your training and normal activities without the risk of additional damage, injury or re-injury.  When you can confidently self-treat, you can limit pain levels, return to activity faster, and prevent reoccurrences.

AVAILABLE NOW ON AMAZON!

In my book, Treating Ankle Sprains and Strains, you will learn how to safely and confidently self-rehabilitate a common ankle sprain.  It will guide you through the ins and outs of self-treating your ankle so you can avoid costly rehabilitation bills.  Beginning with the acute phase of rehabilitation, I will walk you through the treatment plan on how to rehabilitate your ankle through the intermediate (sub-acute) phase of rehabilitation and return to full activity and sport.

Learn how to safely self-treat and properly rehabilitate your ankle so you can get back to your daily life and exercise goals more quickly without additional costly medical bills!

BUY NOW

Q & A: Do I have Carpal Tunnel Syndrome?

Q.  My hand grip has been feeling weak, and I have noticed some tingling in my first two fingers.  Do I have Carpal Tunnel Syndrome?  I use my hands all day long, and I can’t miss work for surgery.  Is there anything I can do?  -Jared

A.  Thanks, Jared, for the great question!  Carpal Tunnel Syndrome (CTS) is a very common cause of hand pain and weakness.  It’s also often associated with numbness and tingling particularly in the thumb and first (index) and second (middle) finger.  It’s often accompanied with associated motor control issues within these fingers.  The symptoms tend to start gradually and typically worsen over time.  The pain can get to a point that is unbearable.  One can lose functional use of their hands because of the pain, numbness, and associated lack of motor control.

Symptoms of Carpal Tunnel Syndrome:

  • Pain in the wrist, palm of your hand, and/or fingers.
  • Numbness and tingling in the thumb and first (index) and second (middle) finger.  The median nerve is affected.  The fourth (ring) finger and pinky finger are not directly affected because it’s a different nerve (ulnar).  Along with numbness and tingling, many people will describe an electric shock type feeling in these same fingers.  Initially, the numbness and tingling is intermittent, but it can progress into a constant sensation.
  • People describe the lack of hand control and the tendency to drop objects.

Symptoms tend to worsen when gripping or performing hard manual labor, including repetitive motions with the hands that involve flexion (closing) of the hand.  Symptoms are often worse at night and may even wake you up.

Causes and Risk Factors for Carpal Tunnel Syndrome:

  • Pressure over the median nerve near the palm of the hand in the “Carpal Tunnel” which is a type of passageway from your forearm to your wrist.
  • Repetitive motion.  CTS is typically viewed as a repetitive motion or overuse injury.  Repetitive gripping and heavy use of the hands can lead to irritation of the median nerve.  This means that professions involving heavy use or repetitive use of hands (particularly, if there is vibration) are at higher risk of developing CTS.  This can range from manual laborers to pianists or typists.
  • Scar tissue build up and/or fascial restrictions in or around the carpal tunnel from repetitive use or trauma such as repeated compression.  Chronic vibration of the hands and arms is a risk factor.  Examples include heavy use of power tools (such as a jack hammer) or motocross racing.
  • A wrist fracture can narrow the tunnel space from swelling and inflammation or cause deformation of the bones in the wrist.
  • Swelling and inflammation from other pathologies such as Rheumatoid arthritis or cysts.
  • Any injury or pathology that causes deformation of the bones in the wrist that places additional pressure on the median nerve.  This would include obesity as fat deposits can reduce the space within the carpal tunnel.
  • Females are more likely than men to develop CTS.  This is likely due to anatomical variations where the carpal tunnel is typically smaller in women versus men.  This allows the area to be more easily compromised or affected from other causes.
  • Fluid retention may increase the pressure within your carpal tunnel and be irritating the median nerve.  This is common during pregnancy and menopause.  CTS associated with pregnancy will typically resolve on its own after pregnancy.
  • Muscle imbalances between wrist flexion and extension strength.
  • Mobility related issues in the wrist, shoulder, thoracic, and cervical spine.

CTS can be straightforward with a very typical mechanism of injury or can be very difficult to treat because of multiple factors leading to the syndrome.  Often it’s a multitude of risk factors that cause the symptoms in addition to anatomical variations from person to person.  Other compounding factors include:  diabetes; thyroid disease; kidney failure; other forms of inflammatory arthritis; poor posture; and cervical and thoracic derangements.

Poor wrist, shoulder, cervical, and/or thoracic mobility is often associated with CTS and other spine and/or upper extremity pain syndromes.  I find that even in the clearest cut of cases it’s always best to screen for other potential causative factors by starting with the cervical spine and working down the chain into the hand.  Whenever one part of the body doesn’t have adequate mobility, another part will do more to allow for the movement to take place.

My Top Recommendations to Alleviate Pain associated with Carpal Tunnel Syndrome:

Identify the offending movement.

If you’re experiencing CTS pain, try to identify which specific movement aggravates the symptoms.  Once you identify the movement, find ways to either avoid the motion or to change how you perform the activity as to not cause the symptoms.  This may mean adjusting your posture or body position or using an adaptive device to help your body compensate for the activity.  Eliminate as many of the noted risk factors from your daily activities as you can.

Work on your grip strength through extension movements.

Don’t just work on wrist flexion or gripping exercises.  Also work on finger and wrist extension in order to improve your grip strength.  Often in the case of CTS, there is a muscle imbalance between your ability to flex your fingers and wrist versus extending your fingers or wrist.  Work on extension biased exercises.  Your grip strength will improve more rapidly as your wrist and hand muscles find their optimal length tension relationship (which allows for maximum strength production).

For wrist extension, use an exercise band (as demonstrated below) to perform two to three sets of 20 repetitions.  Extend the wrist up, and then slowly back down toward the floor.  Be sure to move very slowly during the eccentric/muscle lengthening position (when your hand returns to the floor).

To improve finger extension strength, I often recommend using a thick rubber band as a way to improve finger extension strength (as demonstrated below).  Work on extending each finger equally when performing two sets of 10-15 repetitions multiple times per week.

If you want to be more precise and have the ability to exercise one finger at a time, try a device such as the CanDo® Digi-Extend® Hand Exerciser.  This is an excellent tool to improve finger extension strength.  It allows you to work the fingers in multiple ways including individually for rehabilitation purposes and as an important hack to improve overall grip strength (as described above).  It also allows for customization of resistance so you can track progress.

Stretch.

I suggest stretching the fingers and wrist multiple times a day.  Your fingers and wrist should have mobility in all directions.  Particularly focus on wrist extension (as demonstrated below).  Perform two to three sets of a 30 second stretch three to five times per day as long as you do not reproduce your CTS symptoms.

Work on your mobility.

Restrictions in mobility typically don’t just occur in the fingers and wrist, but also up the arm and into the thoracic and cervical spine.  I like to use items, such a PVC pipe, that you might already have at home.  This works great for forearm mobilization.  You could also use a golf ball.  You can use one hand to press or rub the PVC pipe over sore or tender areas.  The amount of pressure shouldn’t be painful.  Avoid pressing on especially boney areas.

Poor mobility elsewhere in the kinetic chain can and will affect hand and wrist symptoms.  Work on upper body mobility by focusing on shoulder and thoracic mobility.  You can automatically download my FREE resource for shoulder and thoracic mobility, My Top 8 Stretches to Eliminate Neck, Upper Back, and Shoulder Pain, when you subscribe to my e-mail list.

Be proactive.

Once you start to feel pain, be aggressive with your management and self-treatment.  Implement these recommended exercises, stretches, and mobilizations quickly so you can stop the pain from progressing.  It’s always easier to intervene early.  Take your rehabilitation seriously and perform the exercises diligently while you work to eliminate risk factors that may be affecting the condition.

Contact your Physical Therapist (PT).

If the pain persists, seek additional help.  Don’t let the pain linger.  The longer it’s left untreated, the more potential for harm and damage (which potentially could lead to a longer recovery).  The American Physical Therapy Association (APTA) is an excellent resource for learning more about physical therapy as well as locating a physical therapist in your area.

Thanks for the question, Jared!  Carpal Tunnel Syndrome (CTS) can be debilitating by limiting your ability to exercise, work, and perform daily tasks.  Be proactive in your care and management.  Most importantly, don’t let the pain and symptoms linger.  The longer you have the symptoms, the harder they can be to eliminate and recuperate from.

Have you ever dealt with Carpal Tunnel Syndrome (CTS) pain?  Which treatments have you found to be the most effective?  Additional discussion can help others to manage their pain.  Please leave your comments below. 

If you have a question that you would like featured in an upcoming blog post, please comment below or submit your question to contact@thePhysicalTherapyAdvisor.com.  Be sure to join our growing community on Facebook by liking The Physical Therapy Advisor!